Hadoop 2.6.0 - detailed notes on setup and deploying a Cloudera (cdh5.4.2) cluster on a bare metal
by Vasily "YetAnotherQuant" Nekrasov, 14.06.2015
Hadoop is a framework for big data. No wonder, it is itself big. Elephant, as its logo implies.
That's why you need to do a big job to setup it. Fortunately,
the solution from cloudera can make it easier.
However, there is still a lot of to-do. We will discuss the setup process in detail.
Preparing hardware
For learning purposes you can first try to deploy Hadoop on a Virtual Machine.
However, since I not only wanted to learn it but do have some appropriate tasks for it
(analysis of a million of gas load curves, nested stochastic analysis) I decided to deploy it on a real hardware cluster.
Additionally, even if you try it on VM, you need a pretty good server on which your VM runs. It was reported that
4Gb and even 2Gb of RAM per (virtual) server is sufficient, however, my experiences showed that 8Gb is a minimum.
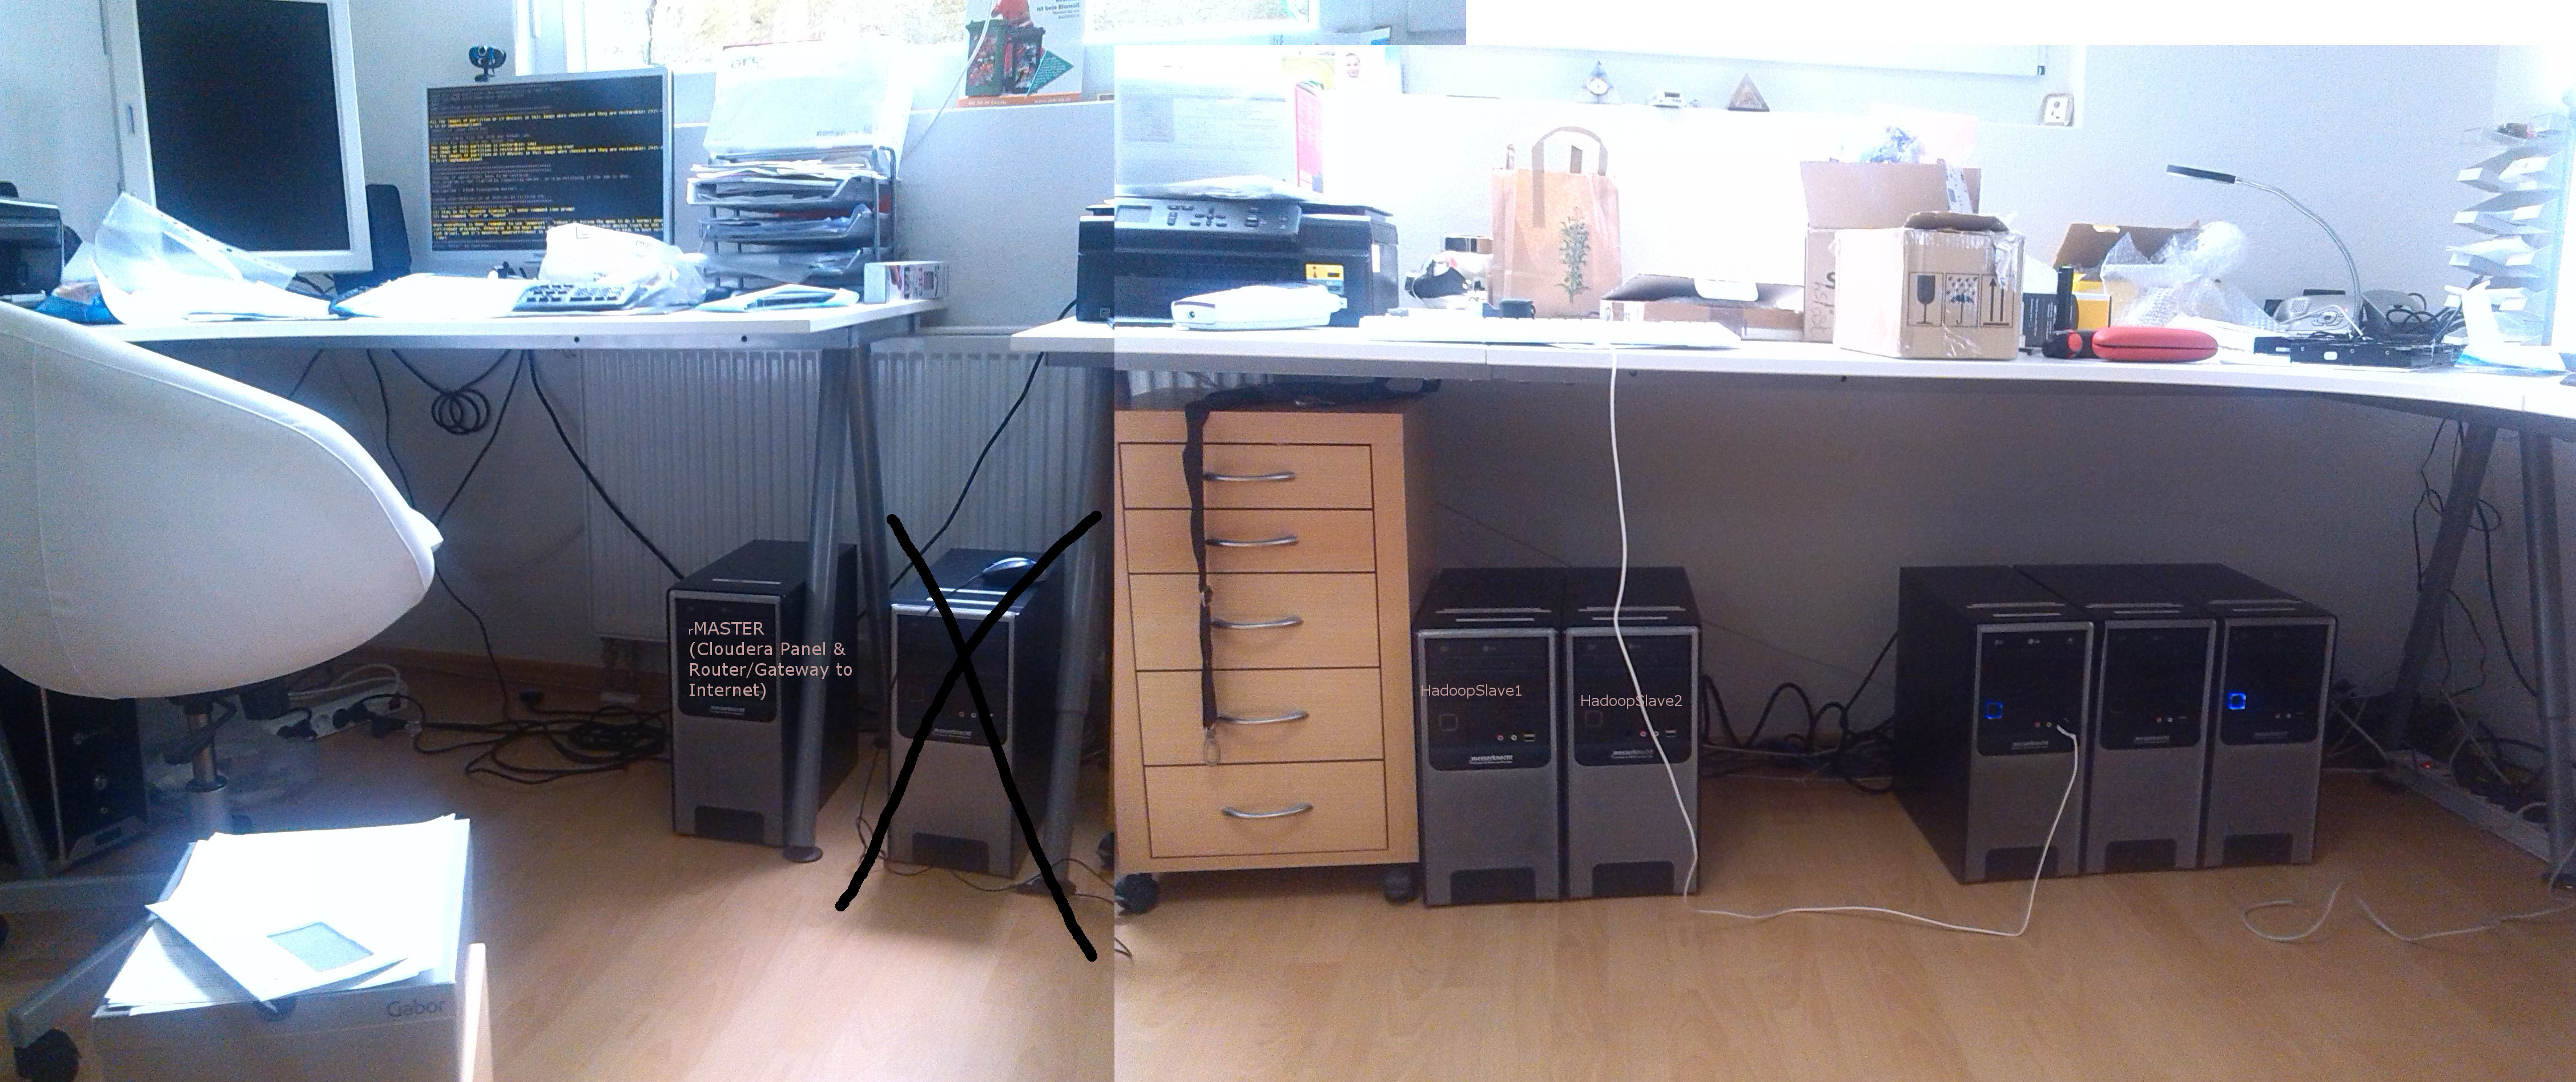
Since I also wanted to keep costs low, I decided to buy rather several old but still usable computers on Ebay than one big-ass server.
So I bought seven computers per 29 Euro, i.e. just 203 Euro.
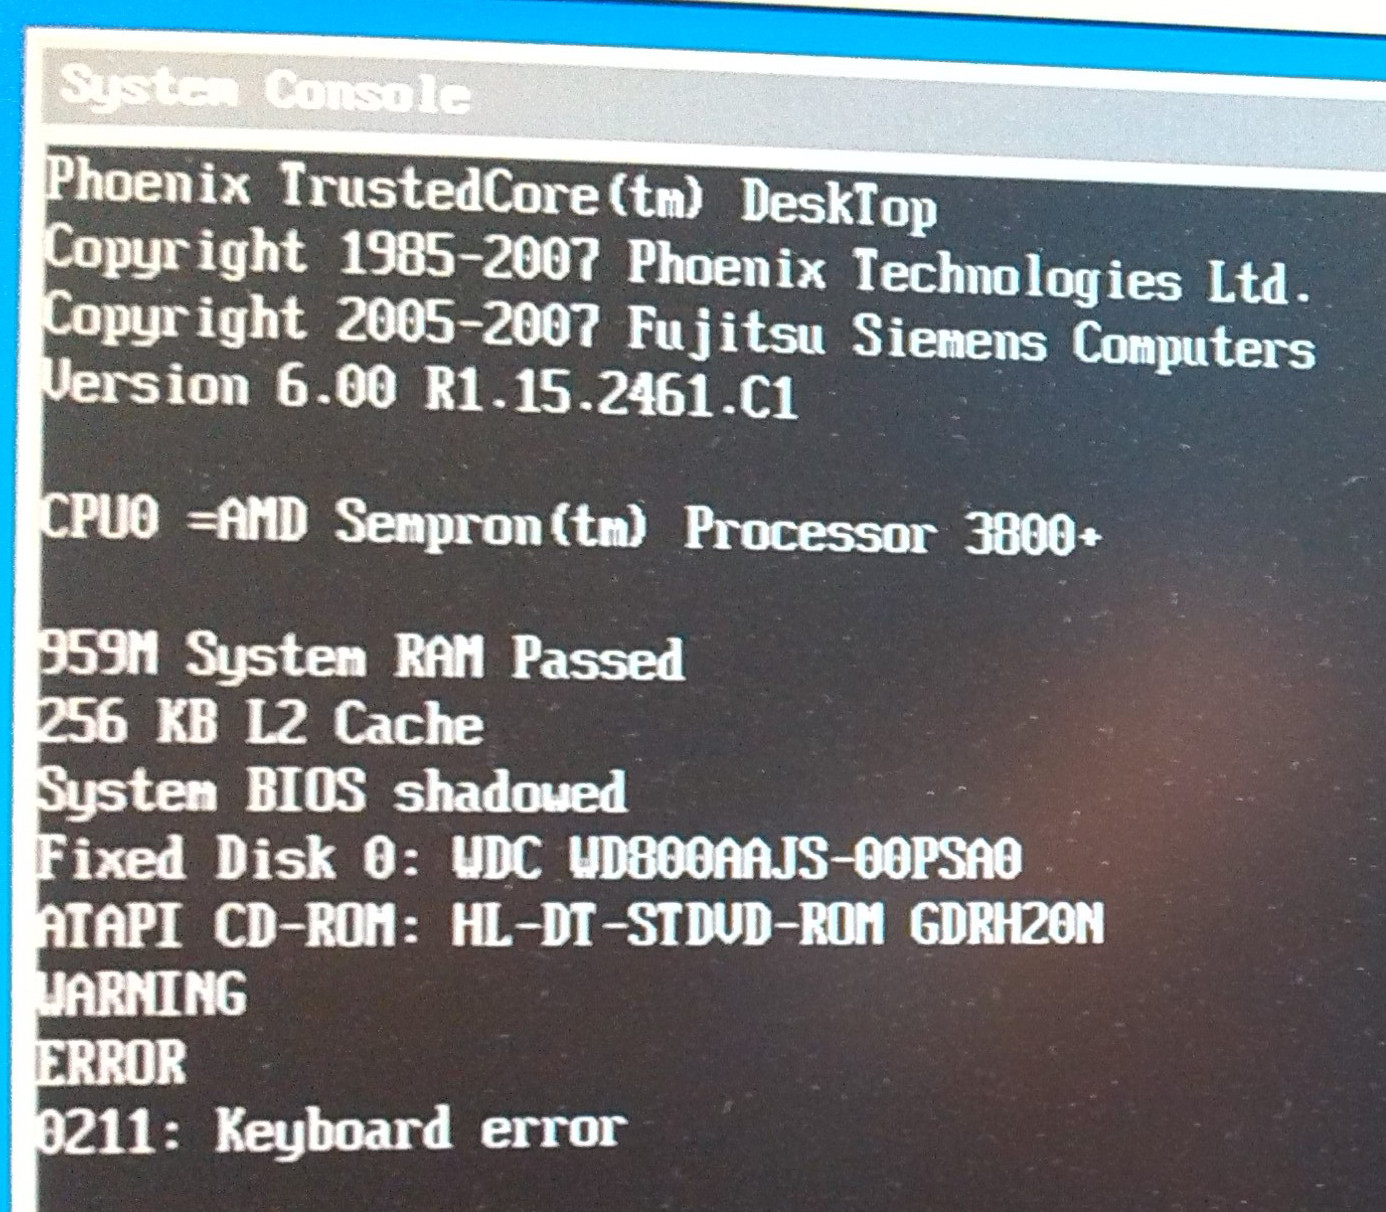
Unfortunately, they were too weak (one-core AMD Sempron Processor 3800+, 1GB Ram, 80Gb HDD) to run Hadoop
(s. System Console).
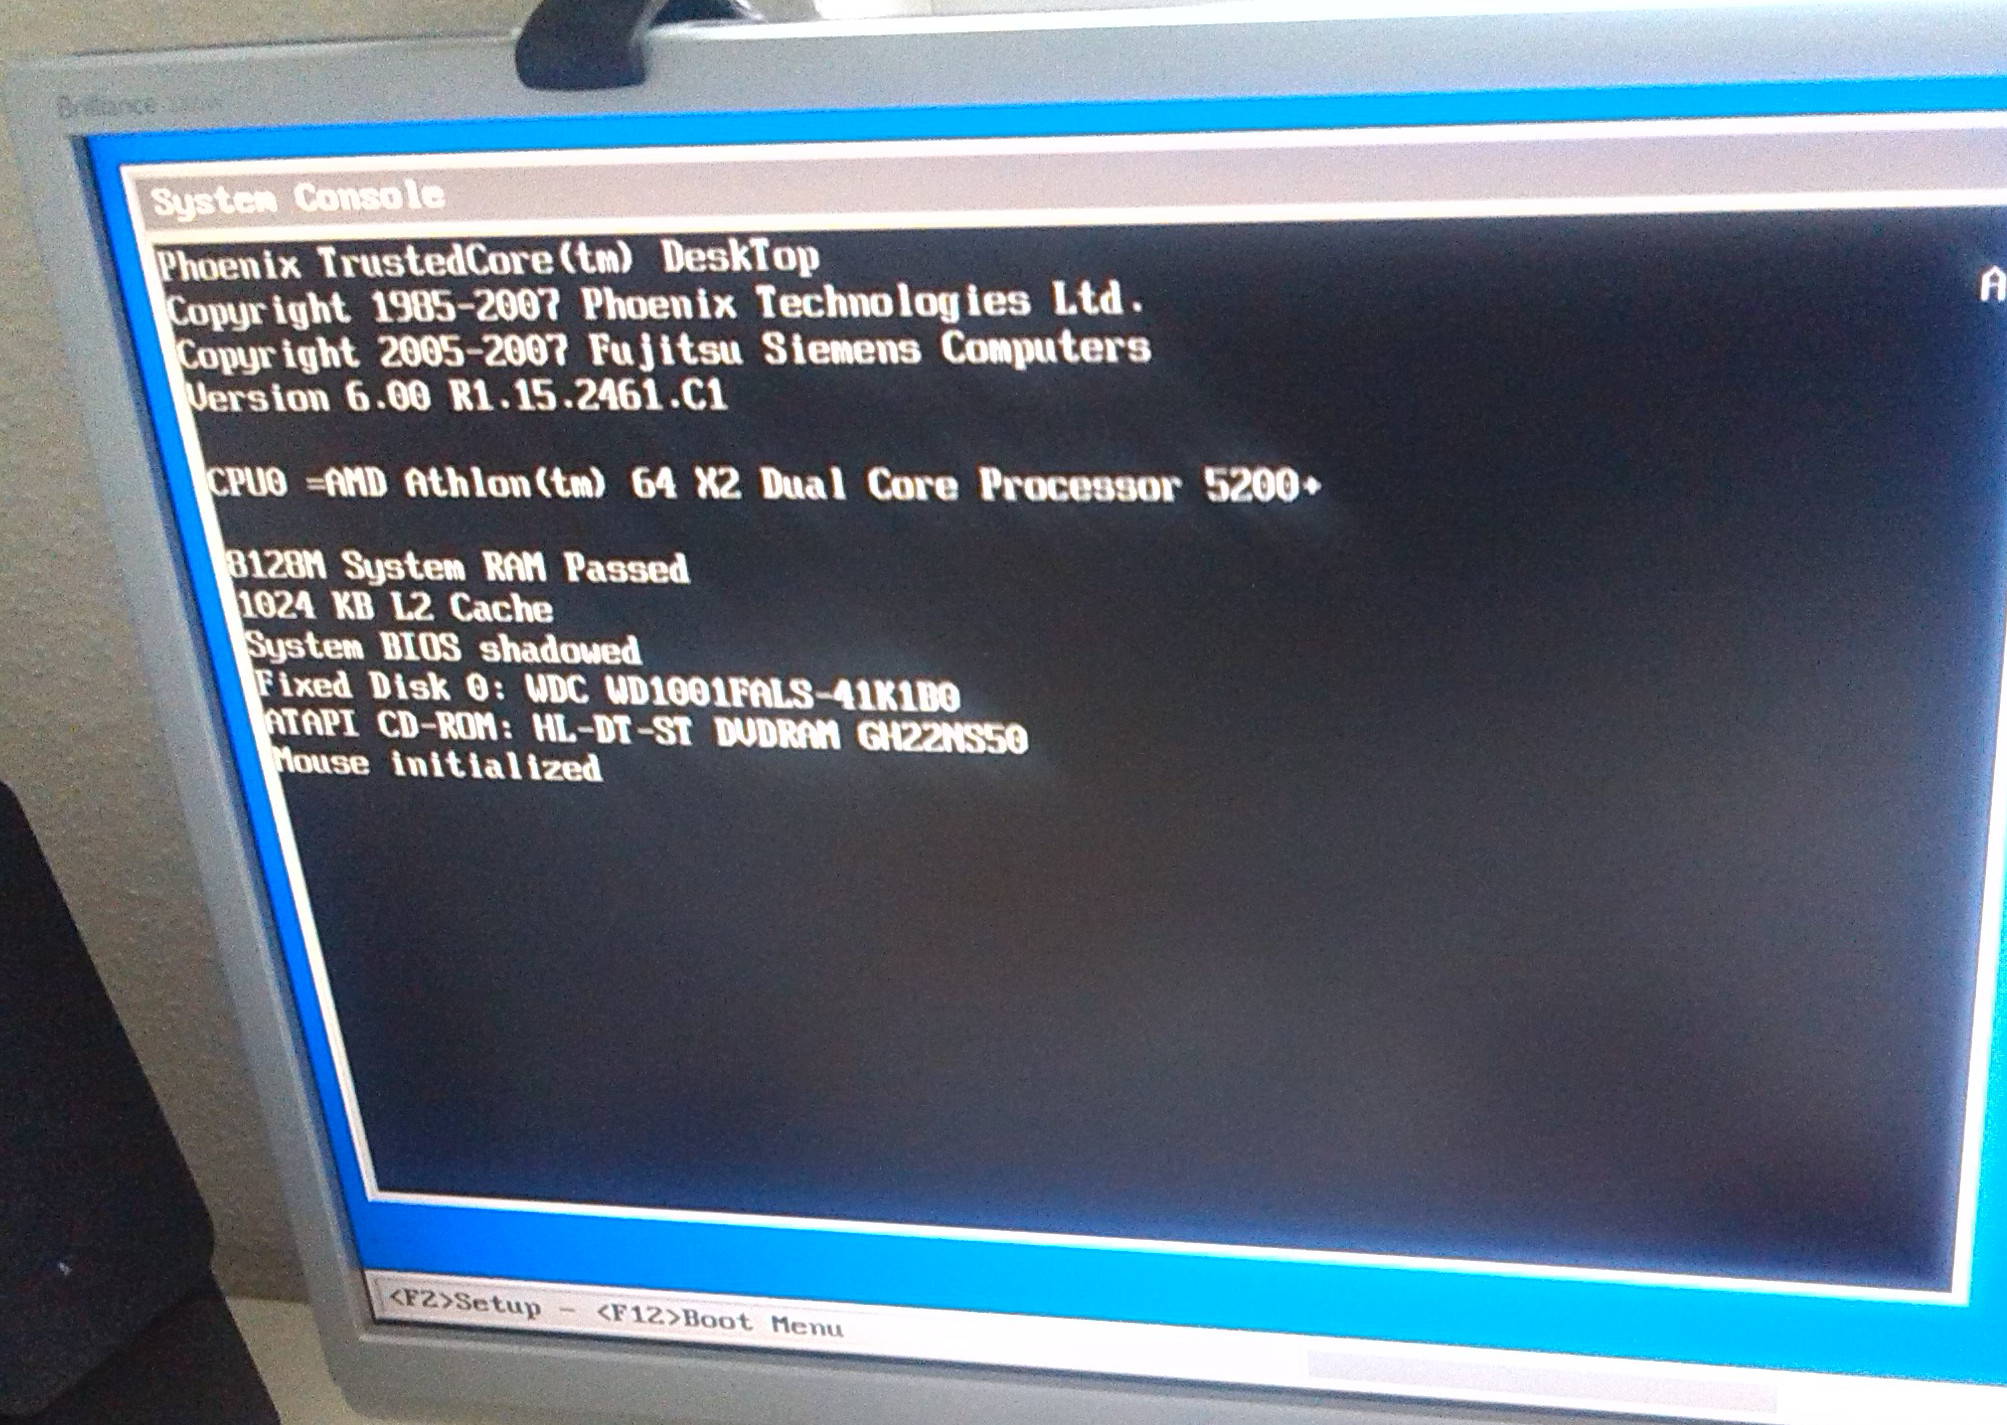
But the mainboard Fujitsu-Siemens 2461.C1
is quite good. So I upgraded the CPU to Athlon X2 5200+ (+15 Euro * 6) and RAM to 8Gb (+55 Euro * 6 ) (s. System Console after upgrade).
Unfortunately the main board does not support quadcore Phenom CPUs, otherwise I would buy them since they are only a bit more expensive than Athlon dualcore.
Finally, 80Gb HDDs looks somewhat ridiculous in context of the BIG data, so replace them with 1Tb HDDs (+40 Euro * 6).
I upgrade six, not seven computers because the 7th one is used for cluster control and as a gateway to Internet but Hadoop as such is not installed on it.
However, I additionally installed a GeForce 730 2Gb graphic card in it (+40 Euro).
Finally, I bought a router and some cables (ca. +30 Euro). So we have our
hardware for less than 1000 Euro.
A big-ass server would definitely cost more :). Of course there was pretty much work to
install new CPUs, RAM and HDDs but for me it was just fun (nostalgy; as I was a teenager I earned my pocket money with it).
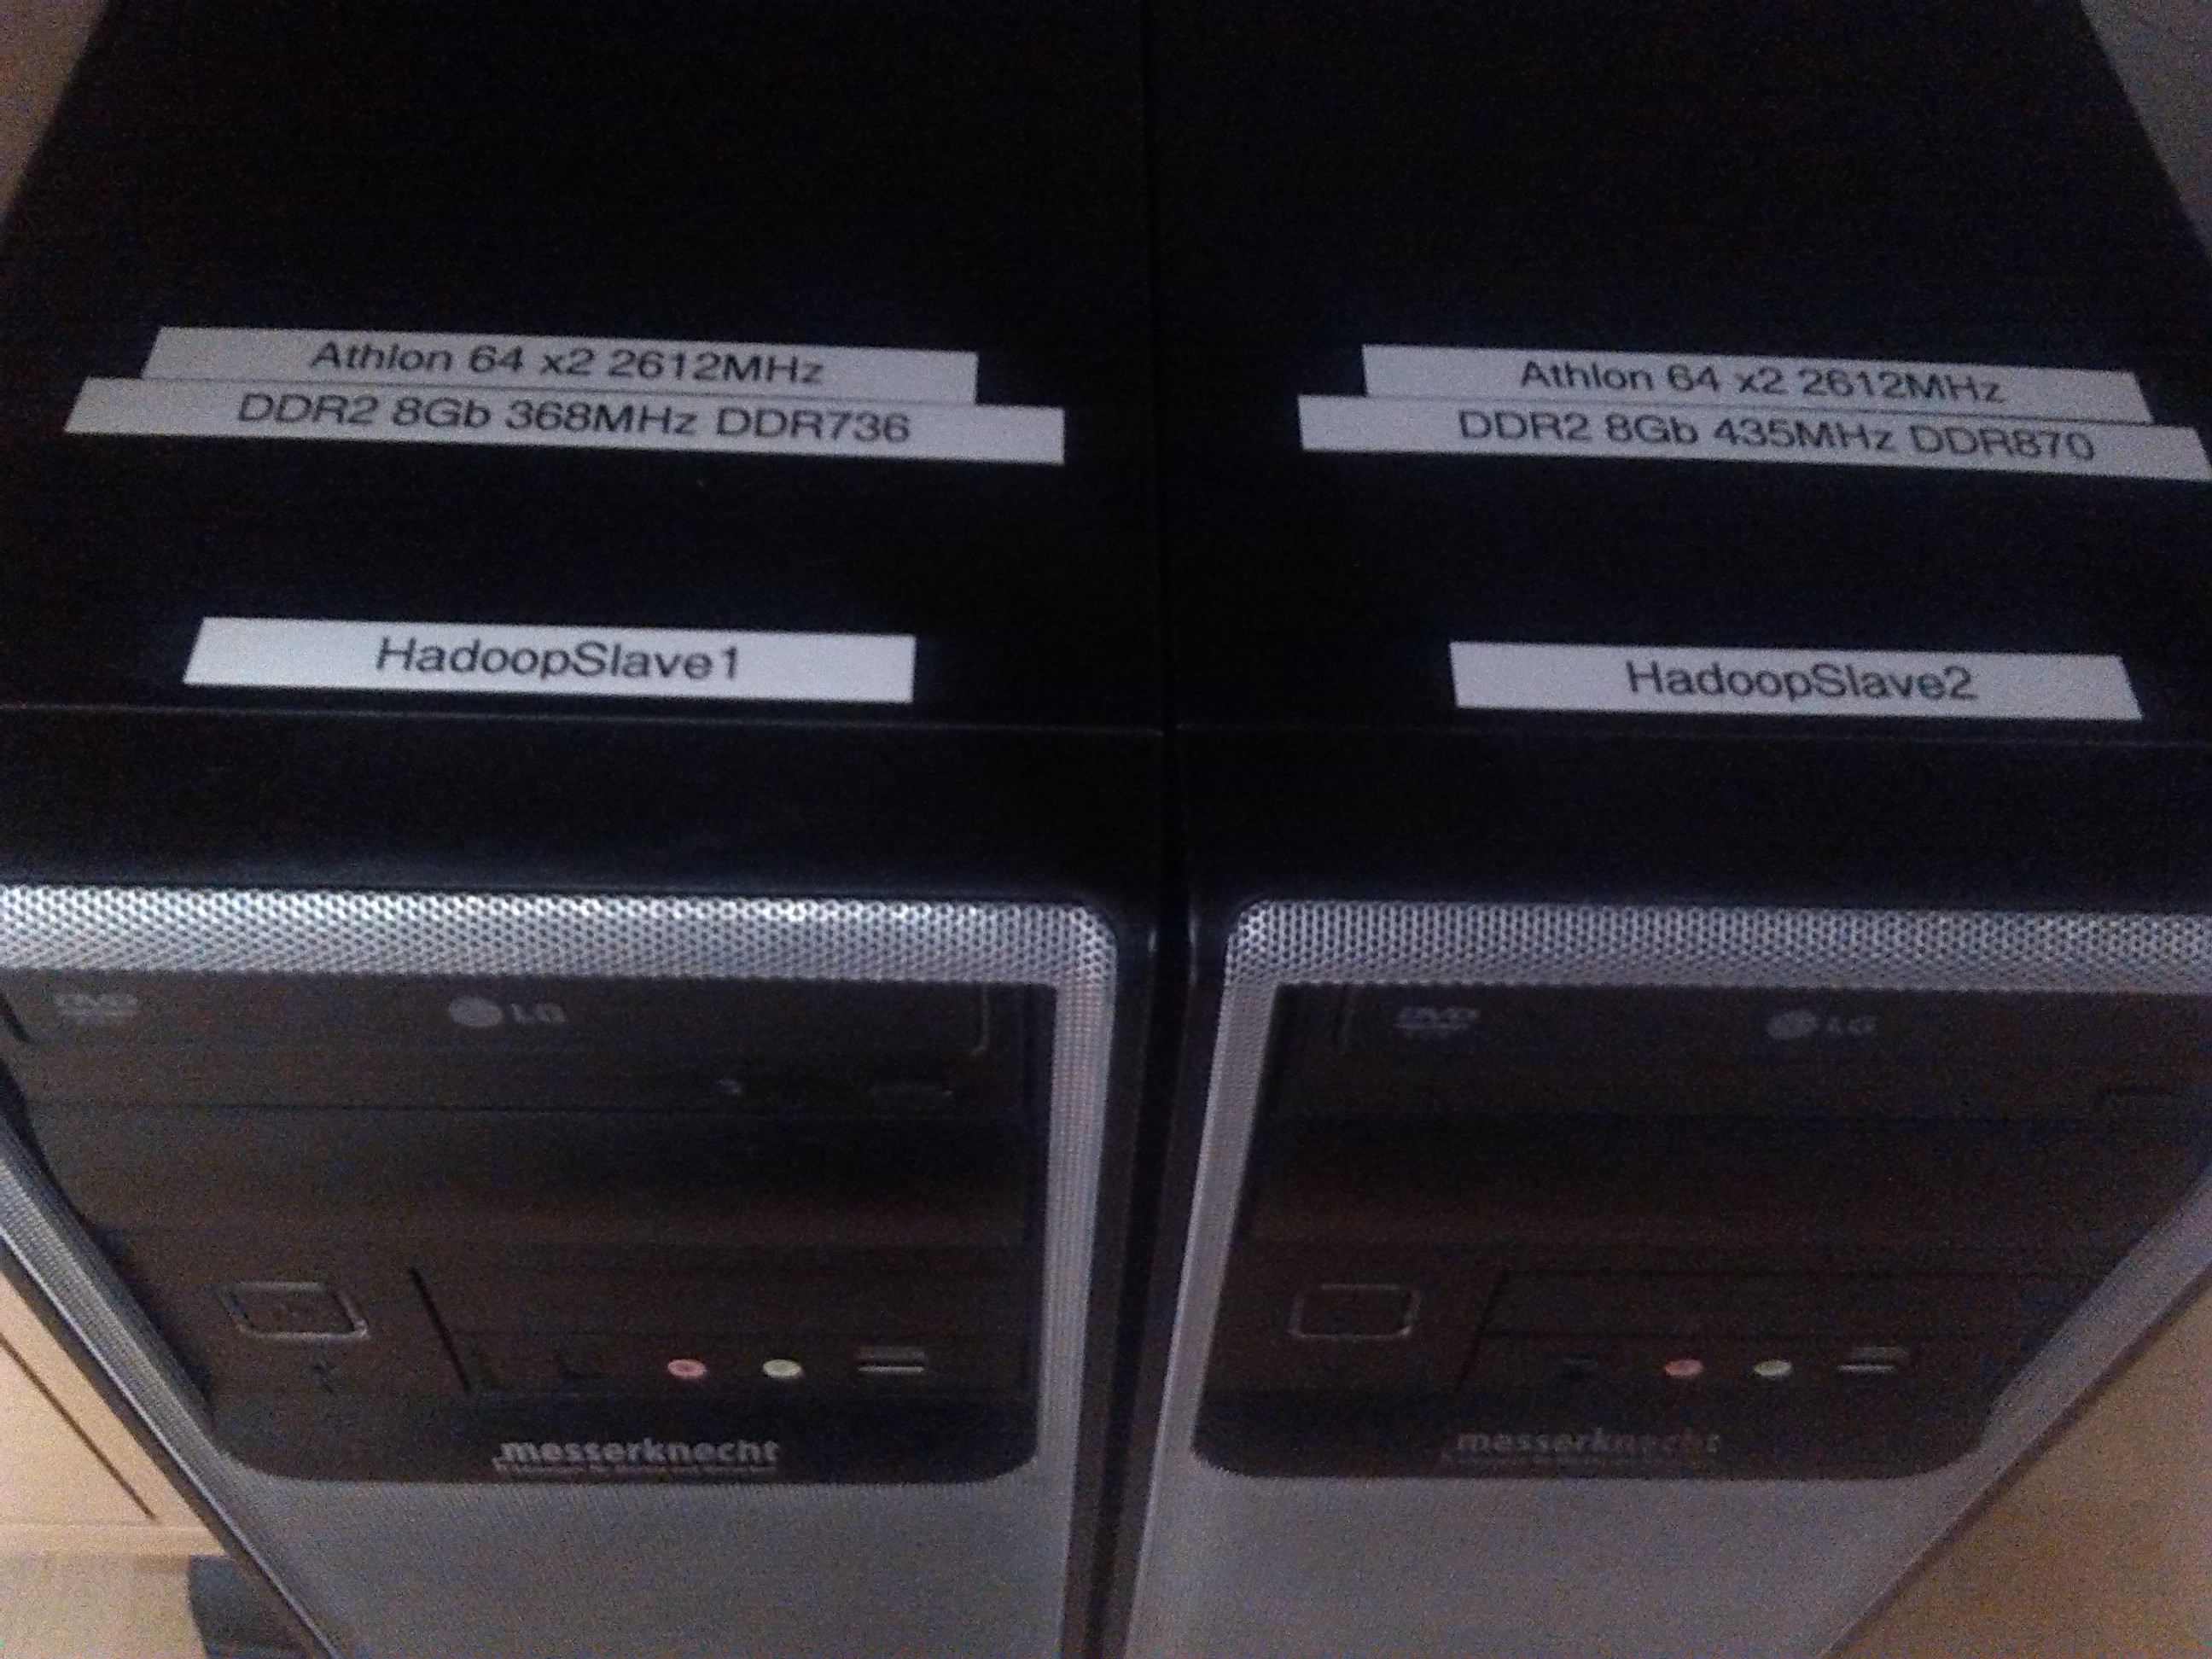
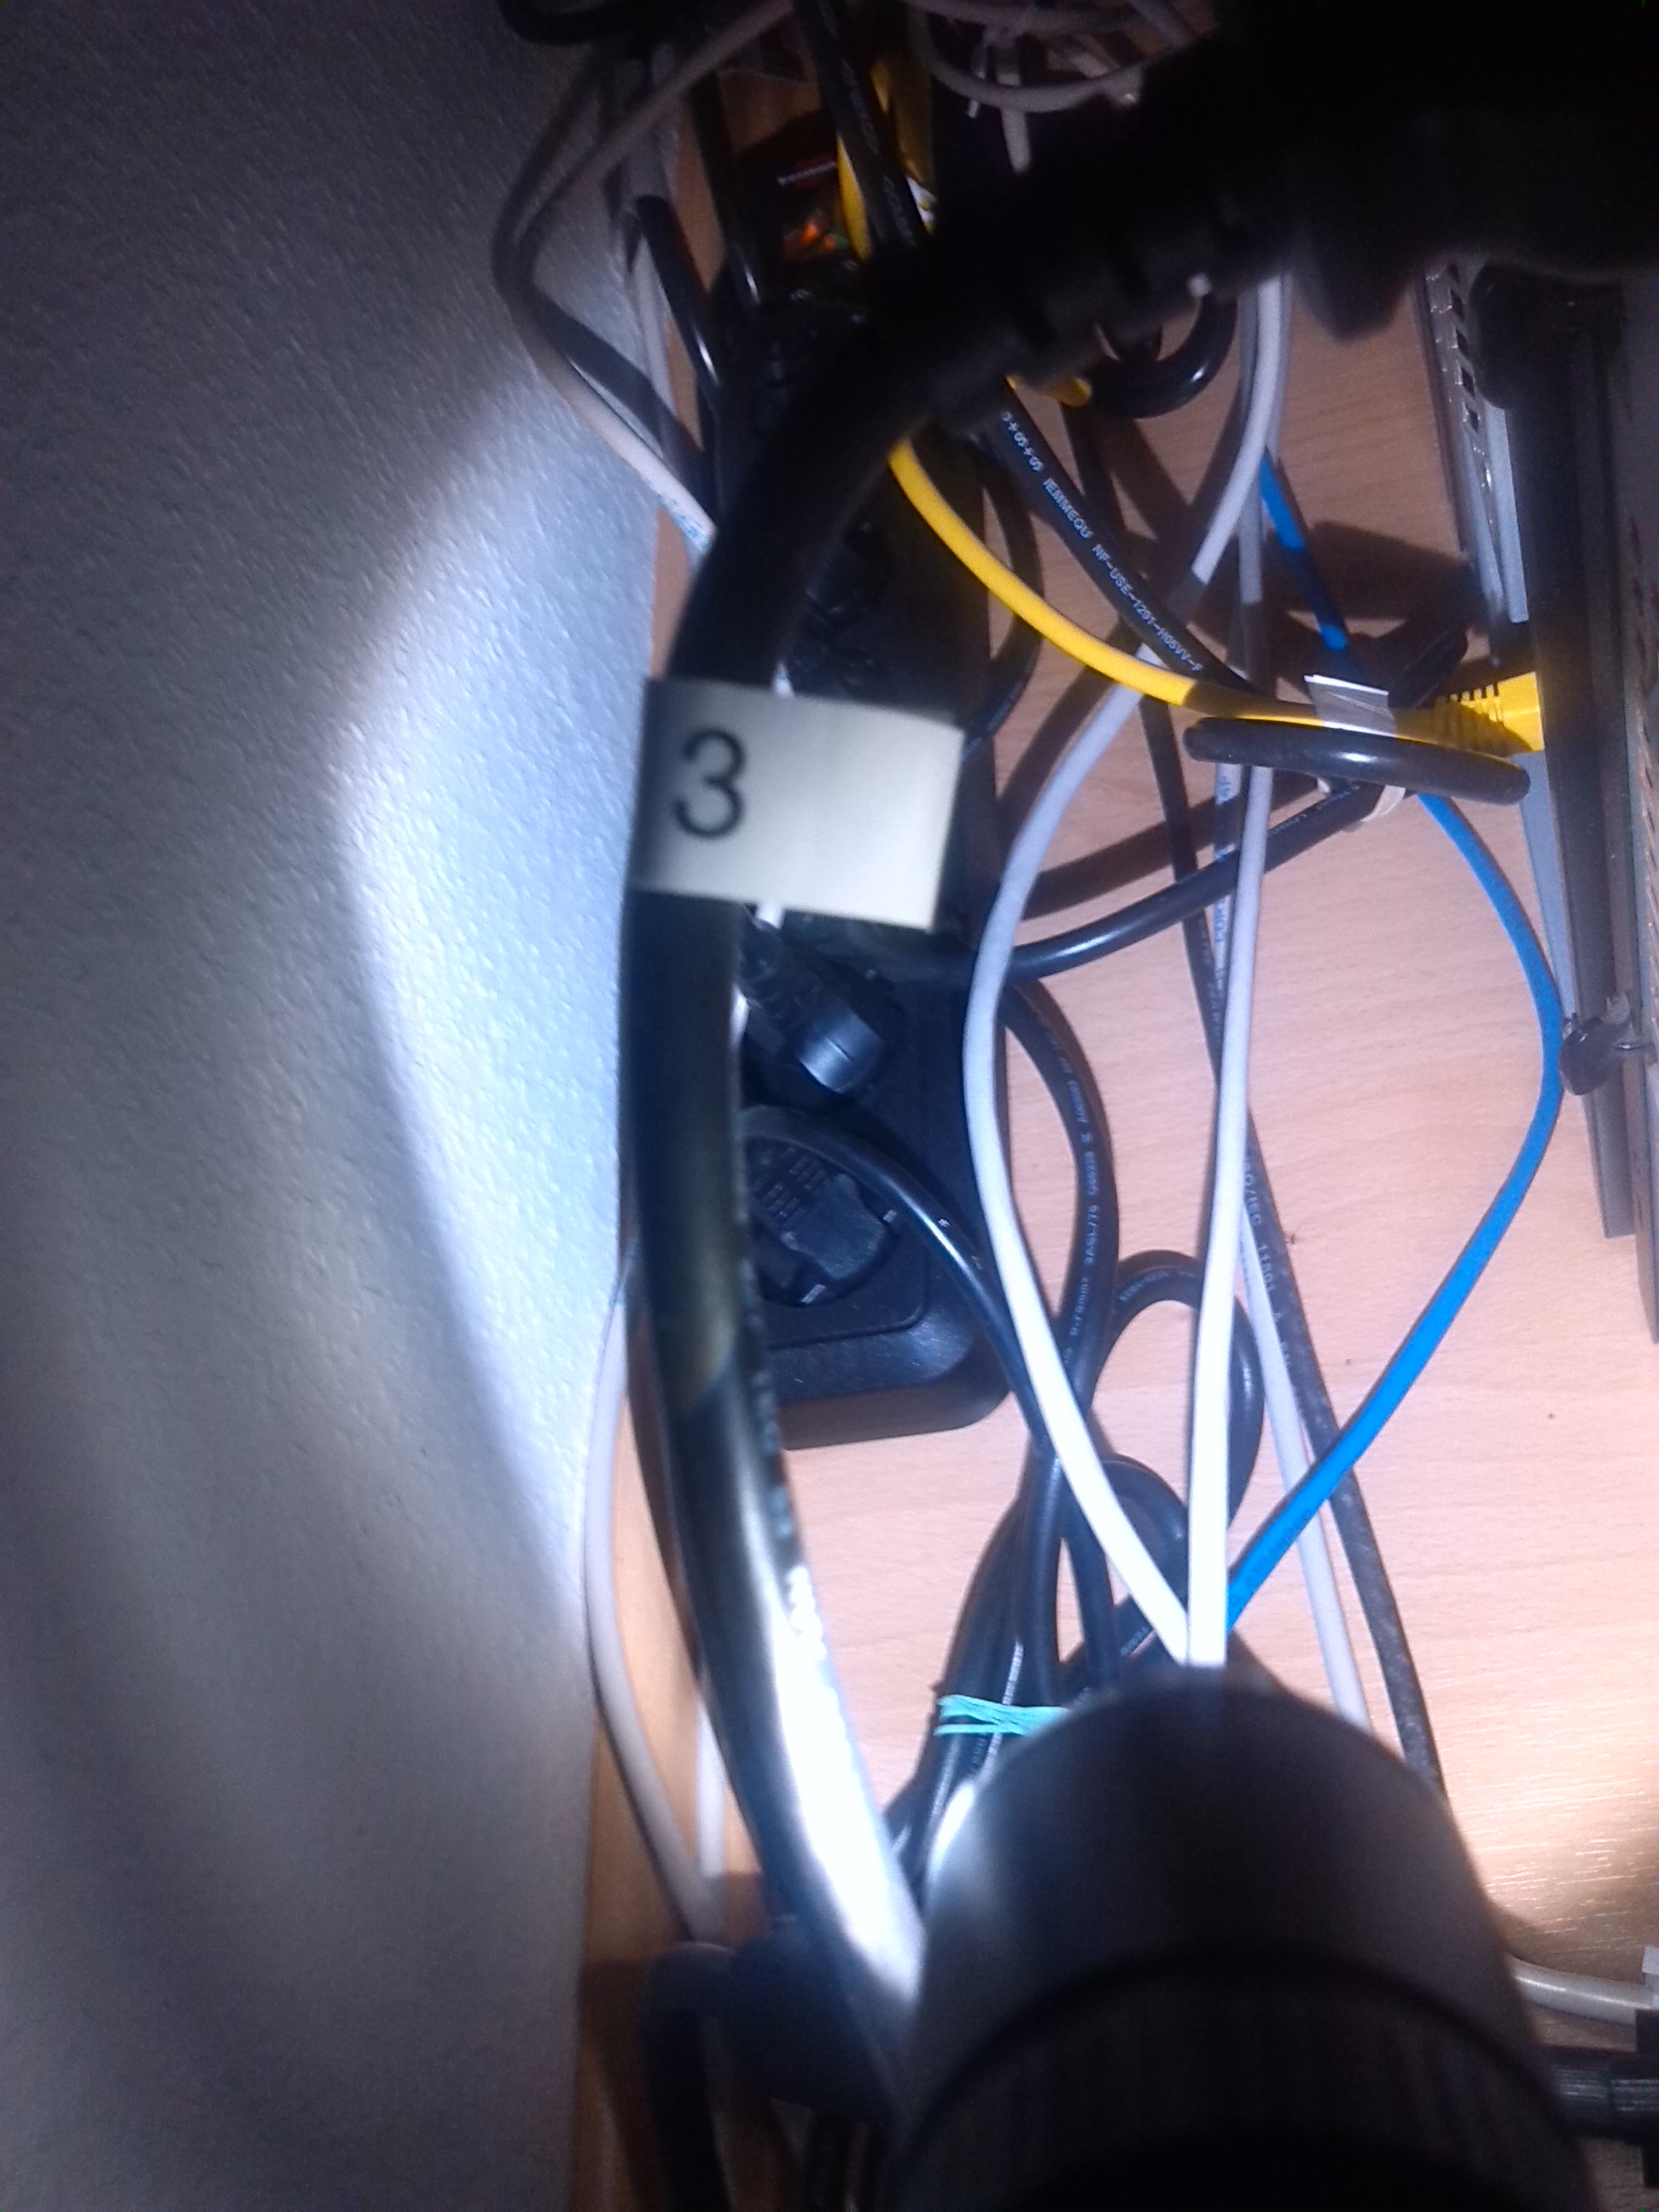
Finally, it does make sense to label all servers and
all cables.
Finally, it is pretty important how to place the serves in the room. I rationally put them under the table, so that I still have
some place for my legs. I bougth a long VGA-Cable, so that all computers can be switched to the monitor without moving them.
Note that I engaged only 6 servers in cluster, I keep the 7th (marked with black cross) in reserve.
As to the network configuration, I decided for the following: Hadoop nodes (Ubuntu Server) are assigned static IPs and connected to the Internet
indirectly, via a gateway on the MASTER server (Ubuntu Desktop), which has two network cards. My workstation (Windows 7) also has two network cards, so I can
directly enter my "Hadoop Intranet" and manage the nodes via SSH.
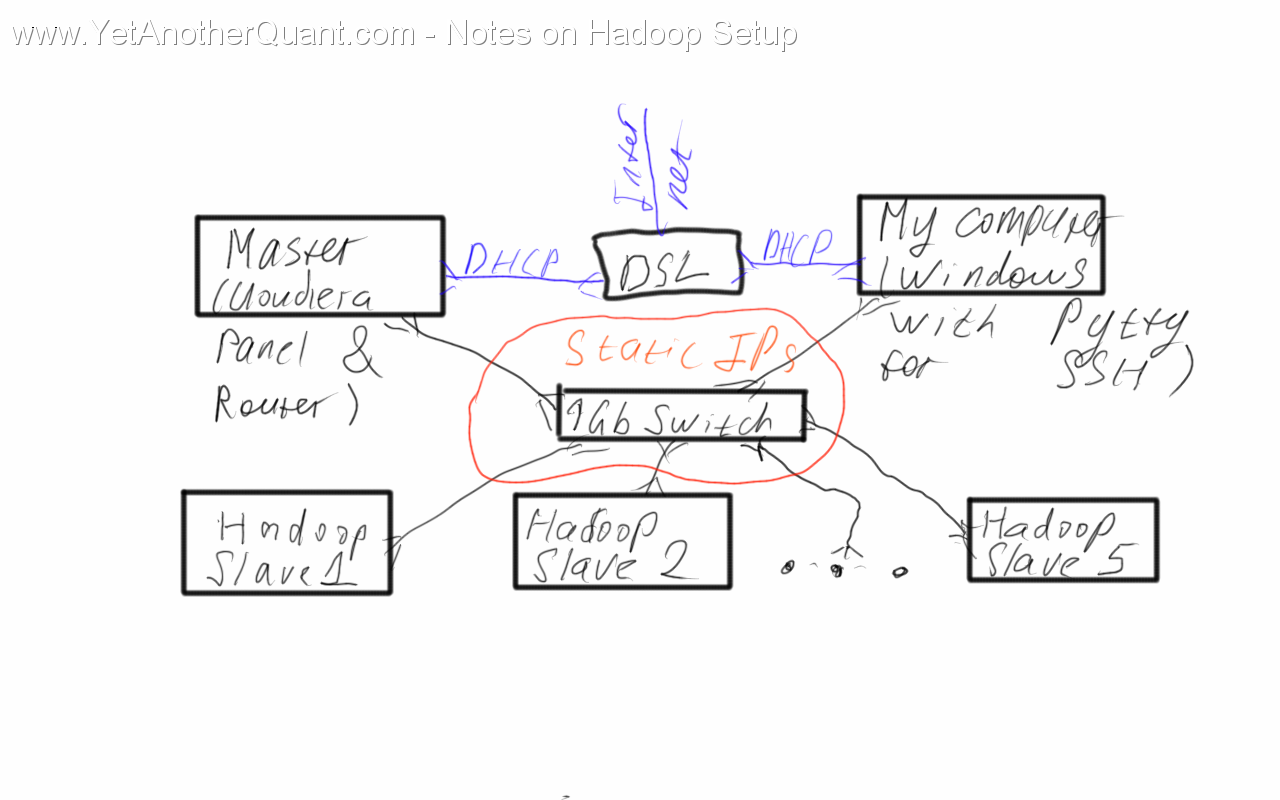
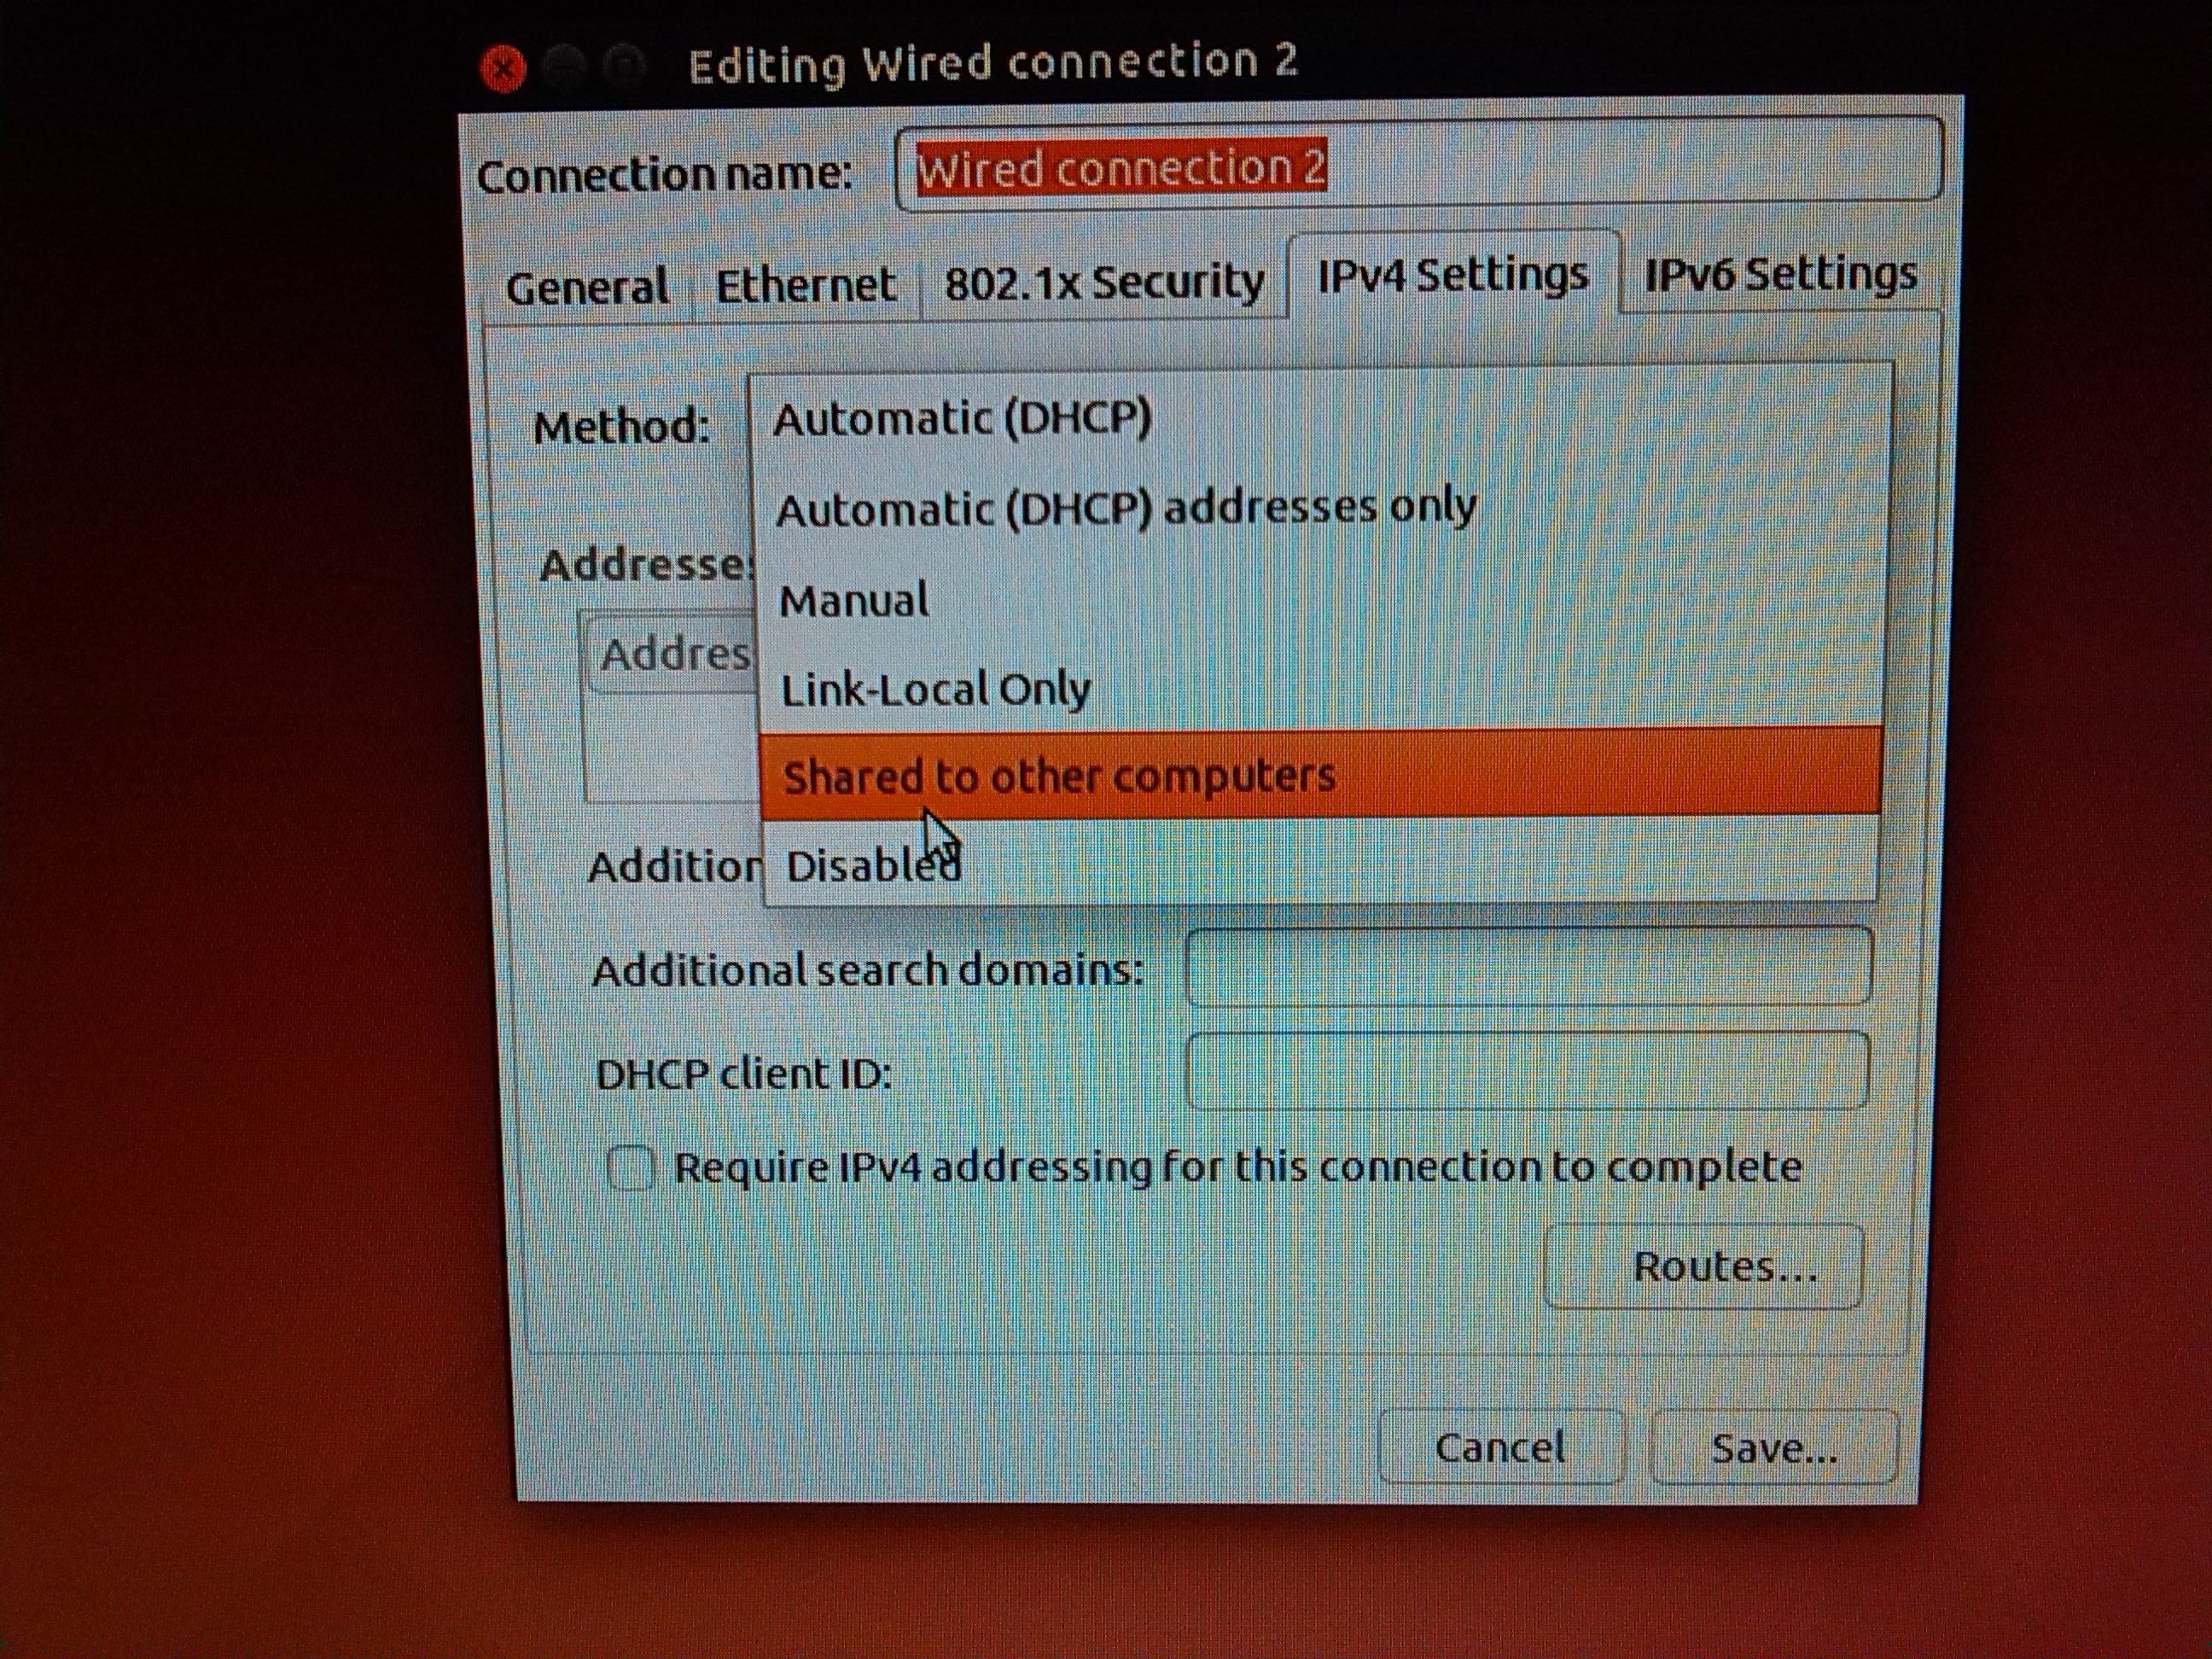
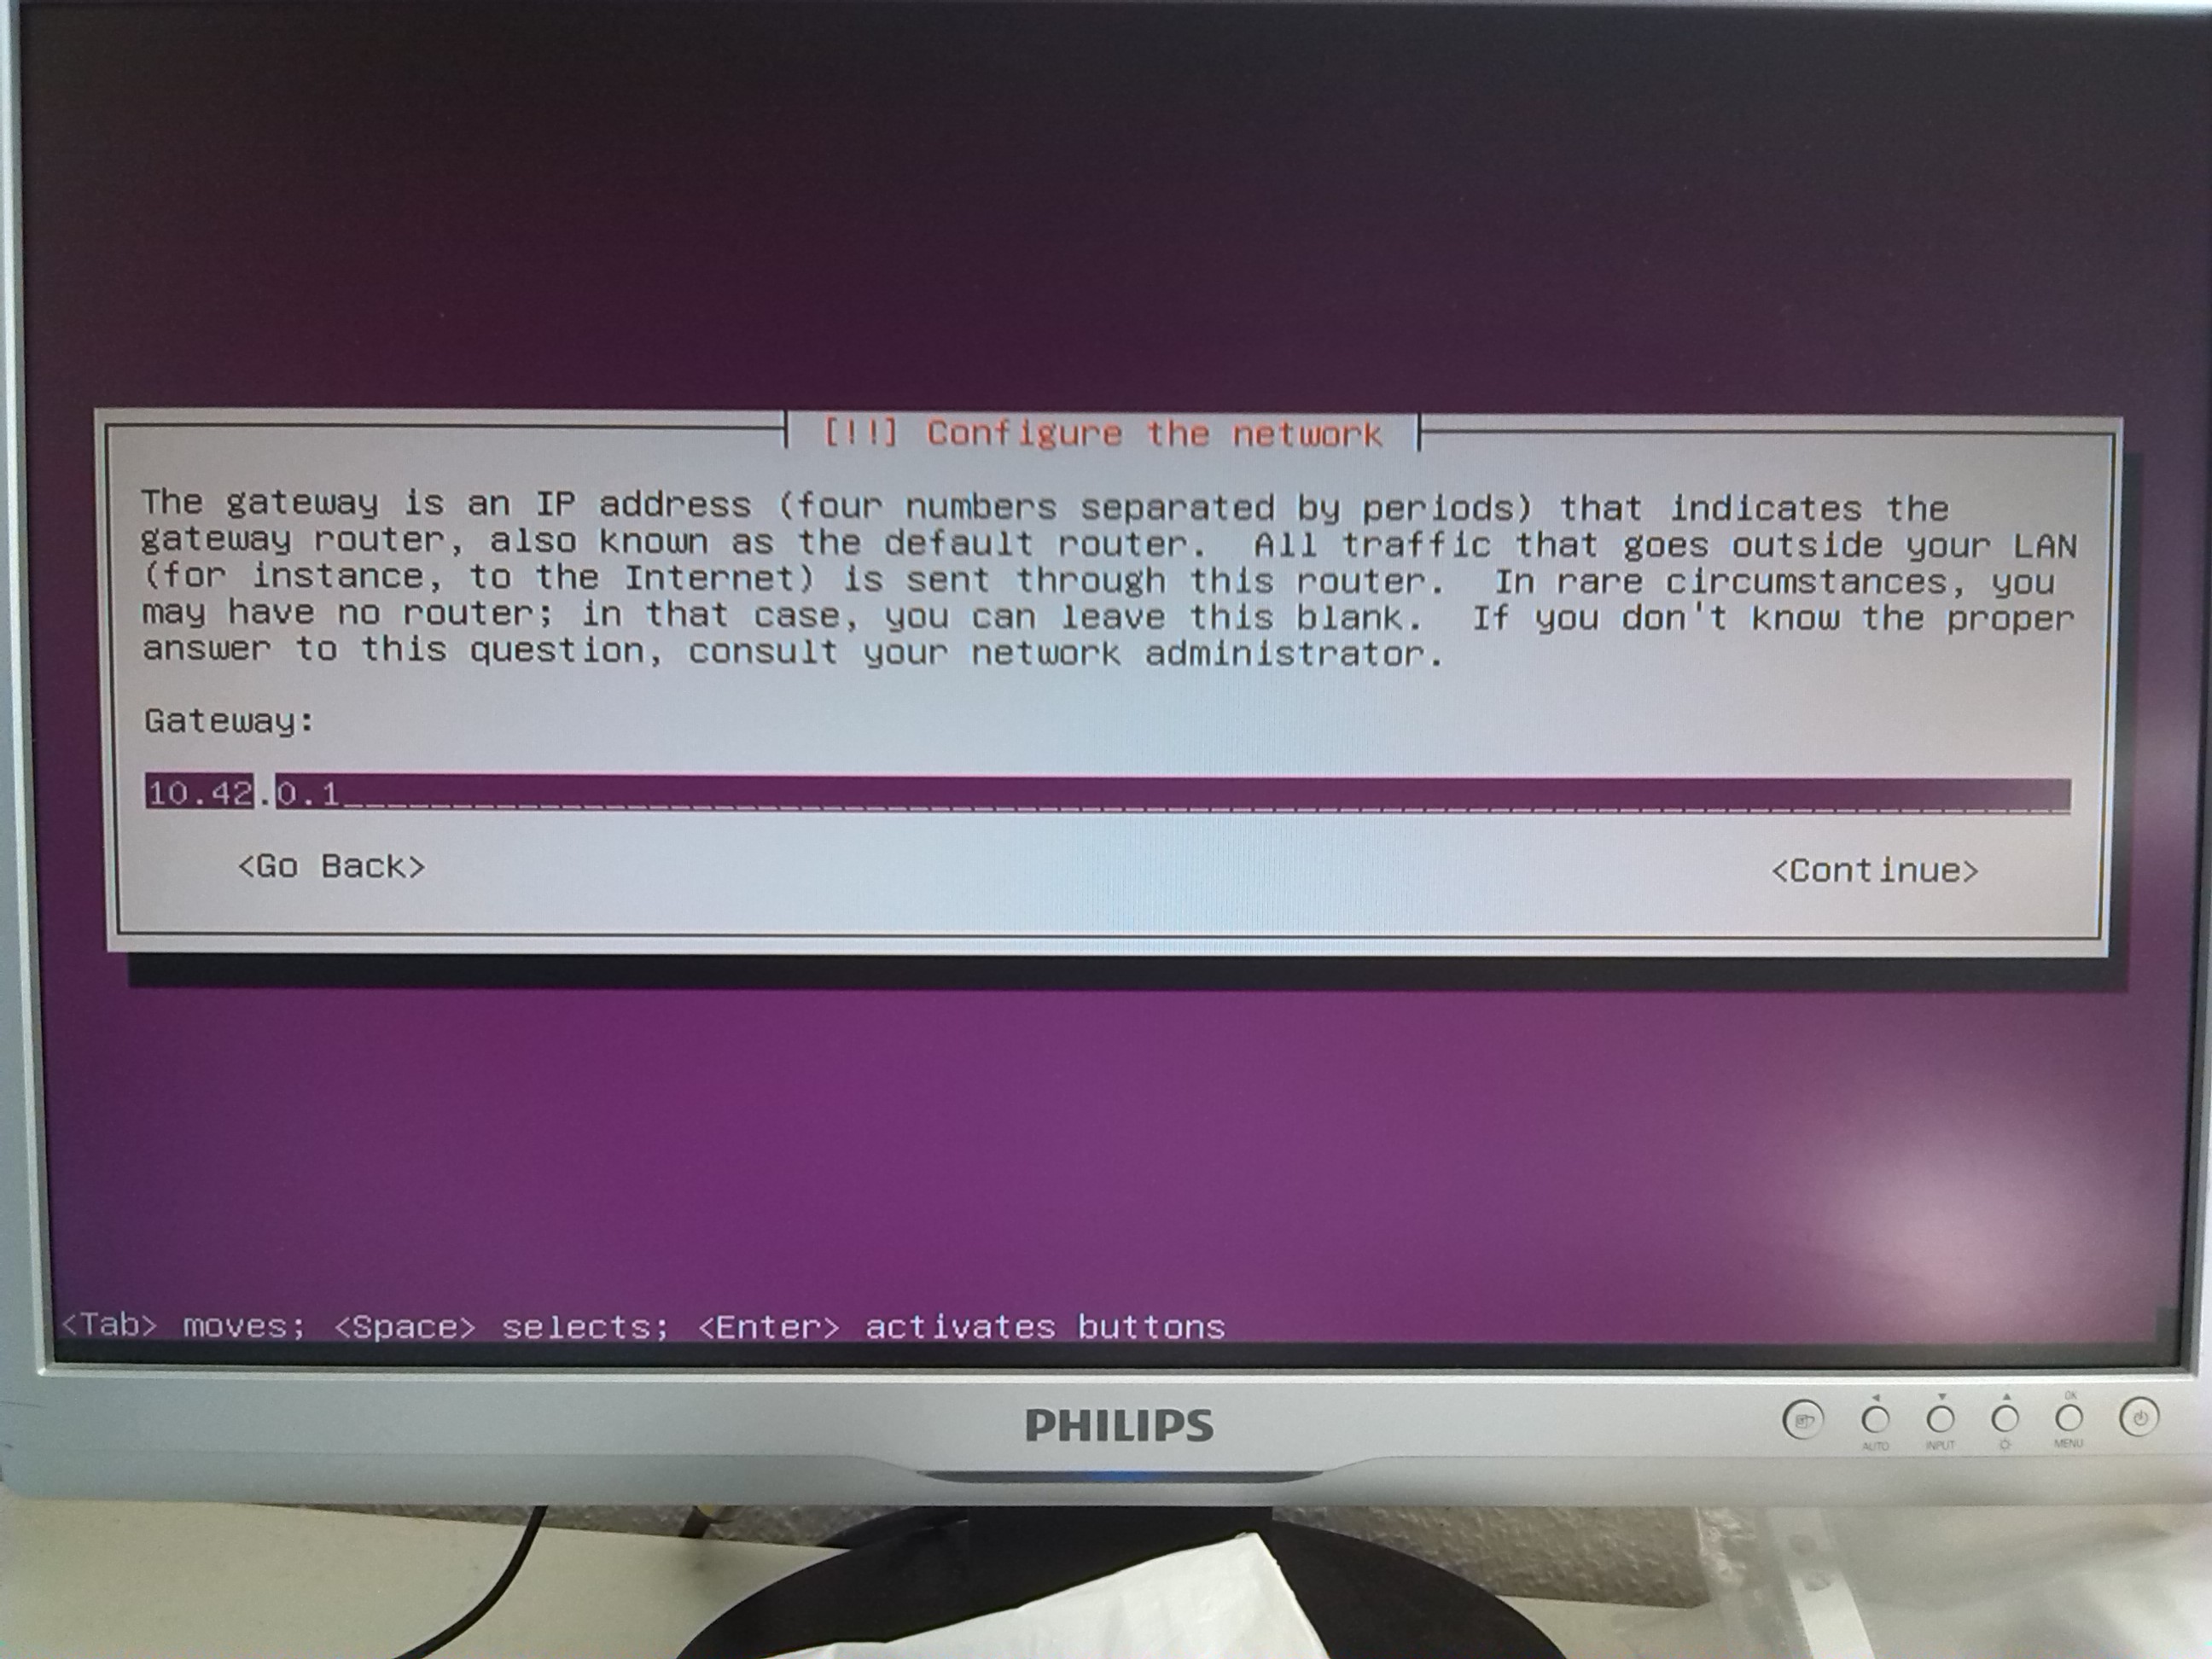
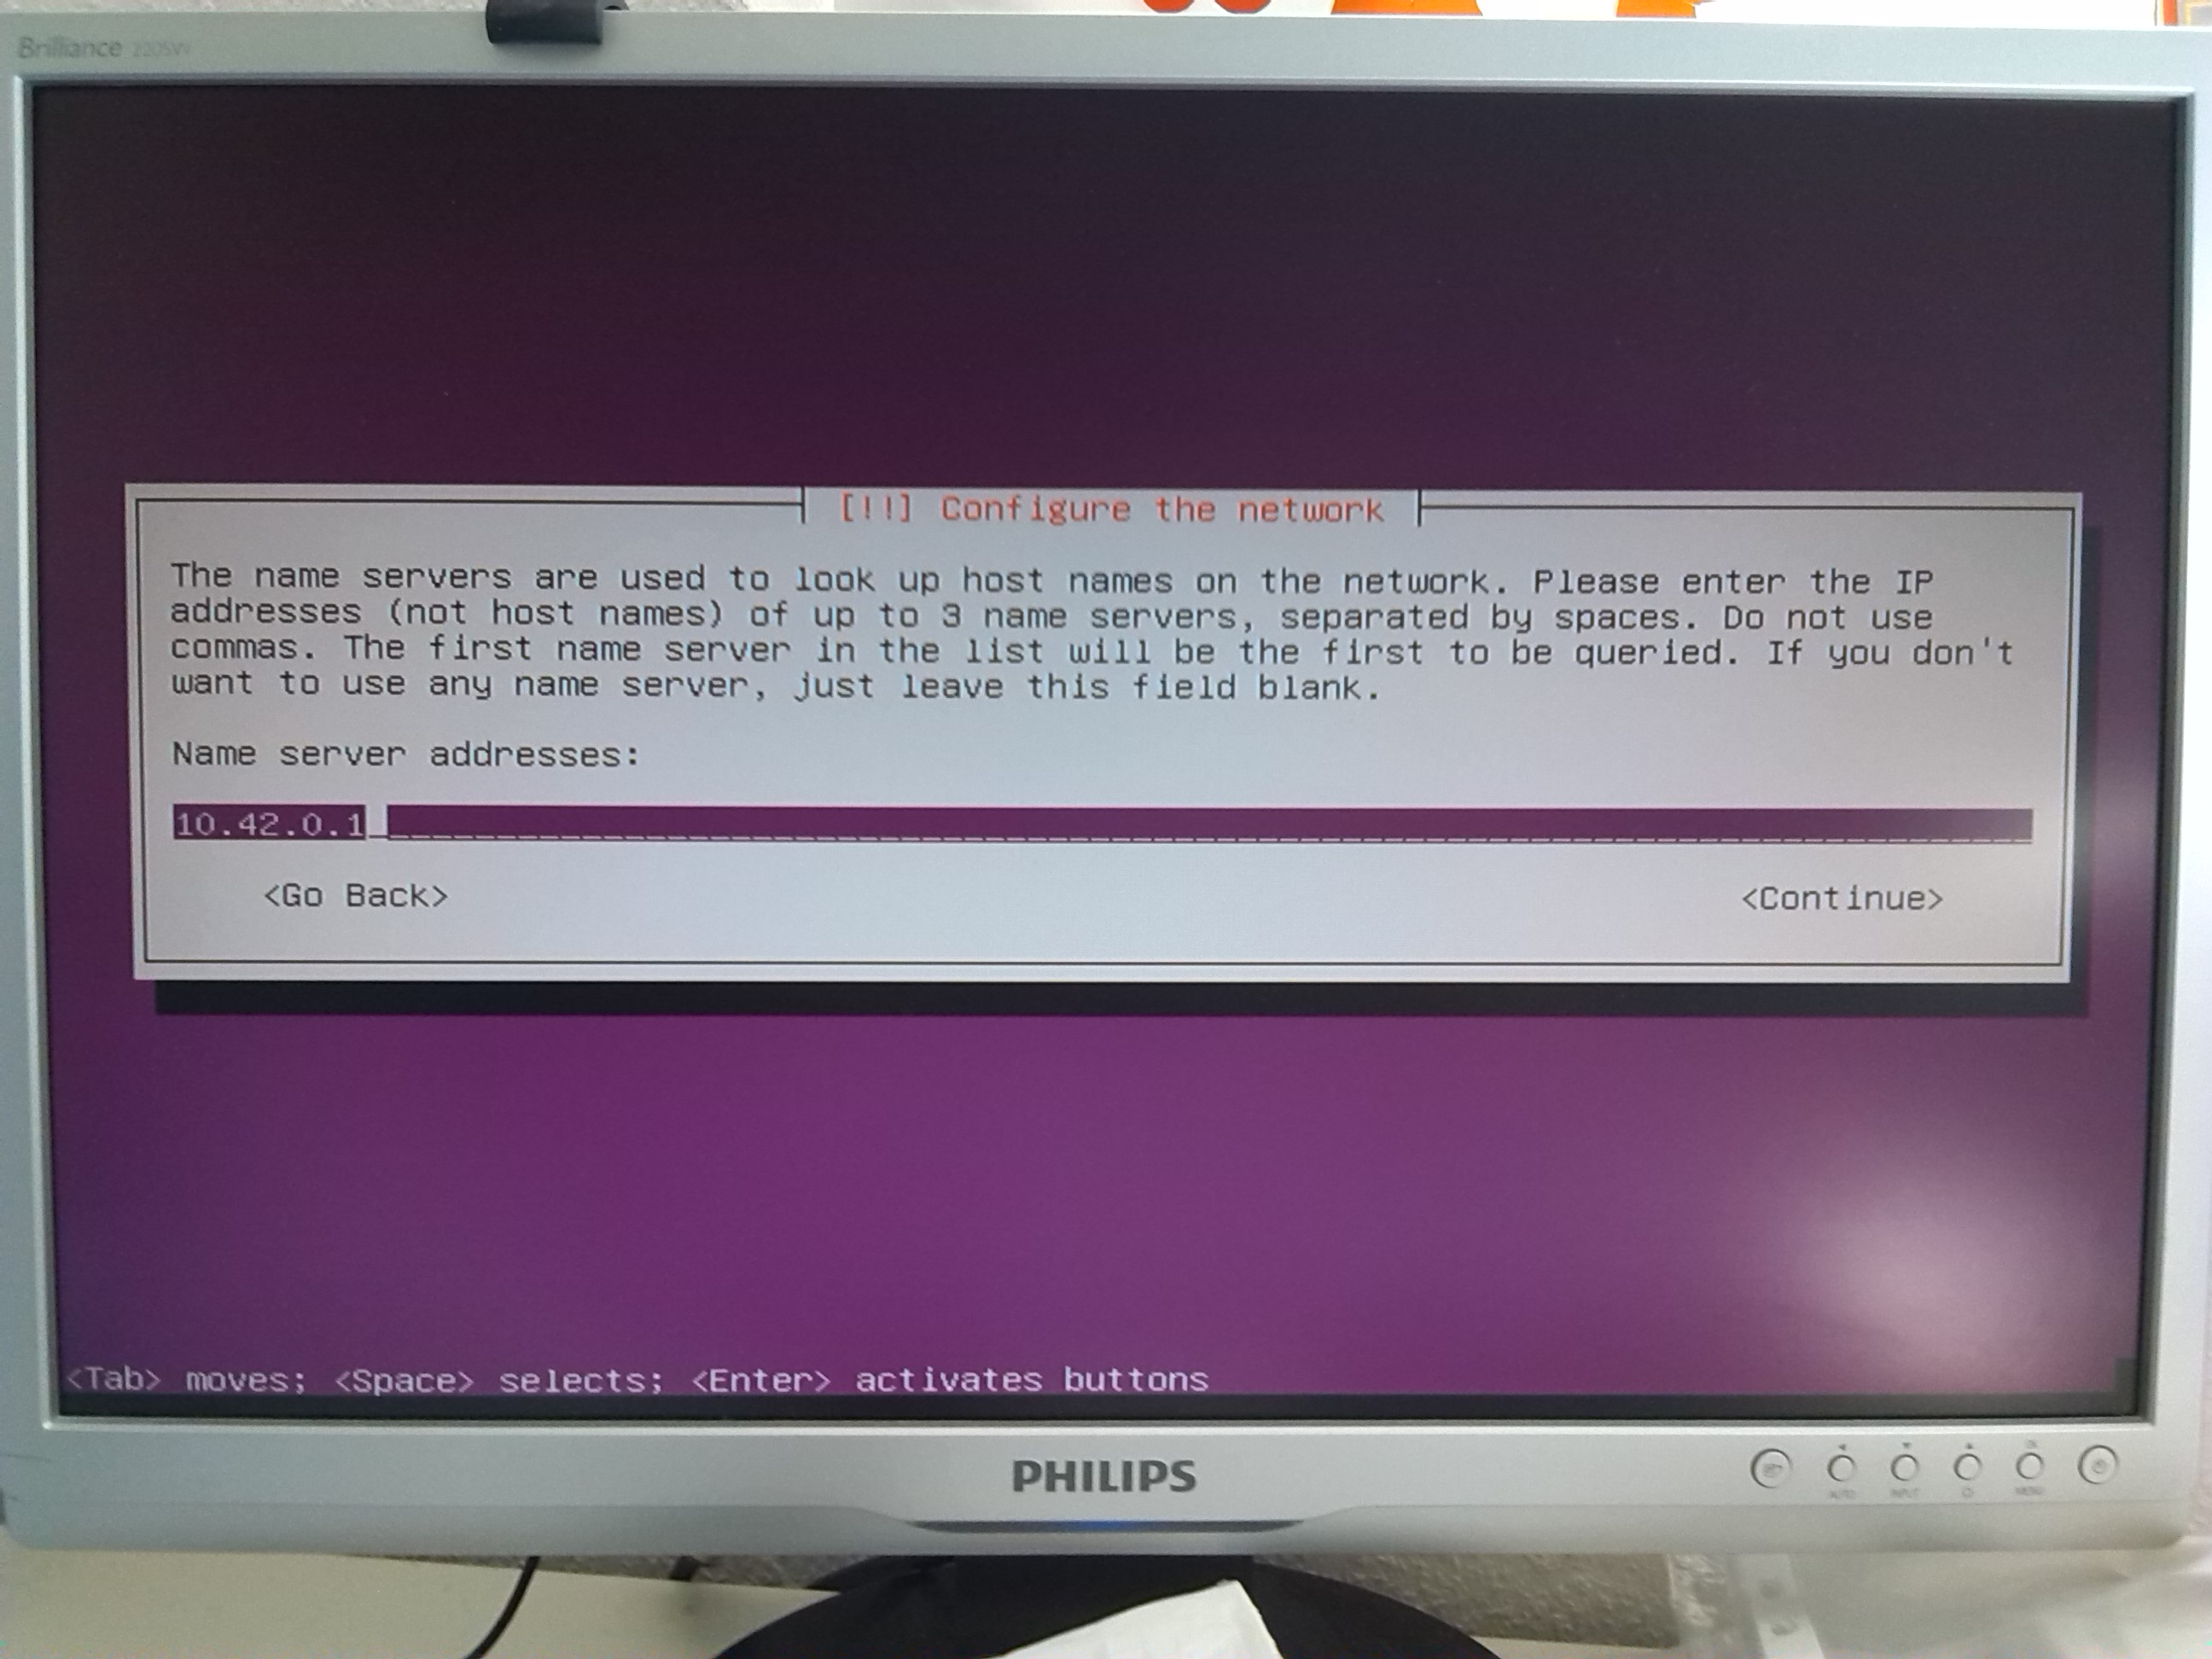
In order to configure a gateway on the MASTER node, set the network interface, which is connected to 1 Gb Switch to "shared
to other computers". (1). By default it gets the ip-address
10.42.0.1 (2)
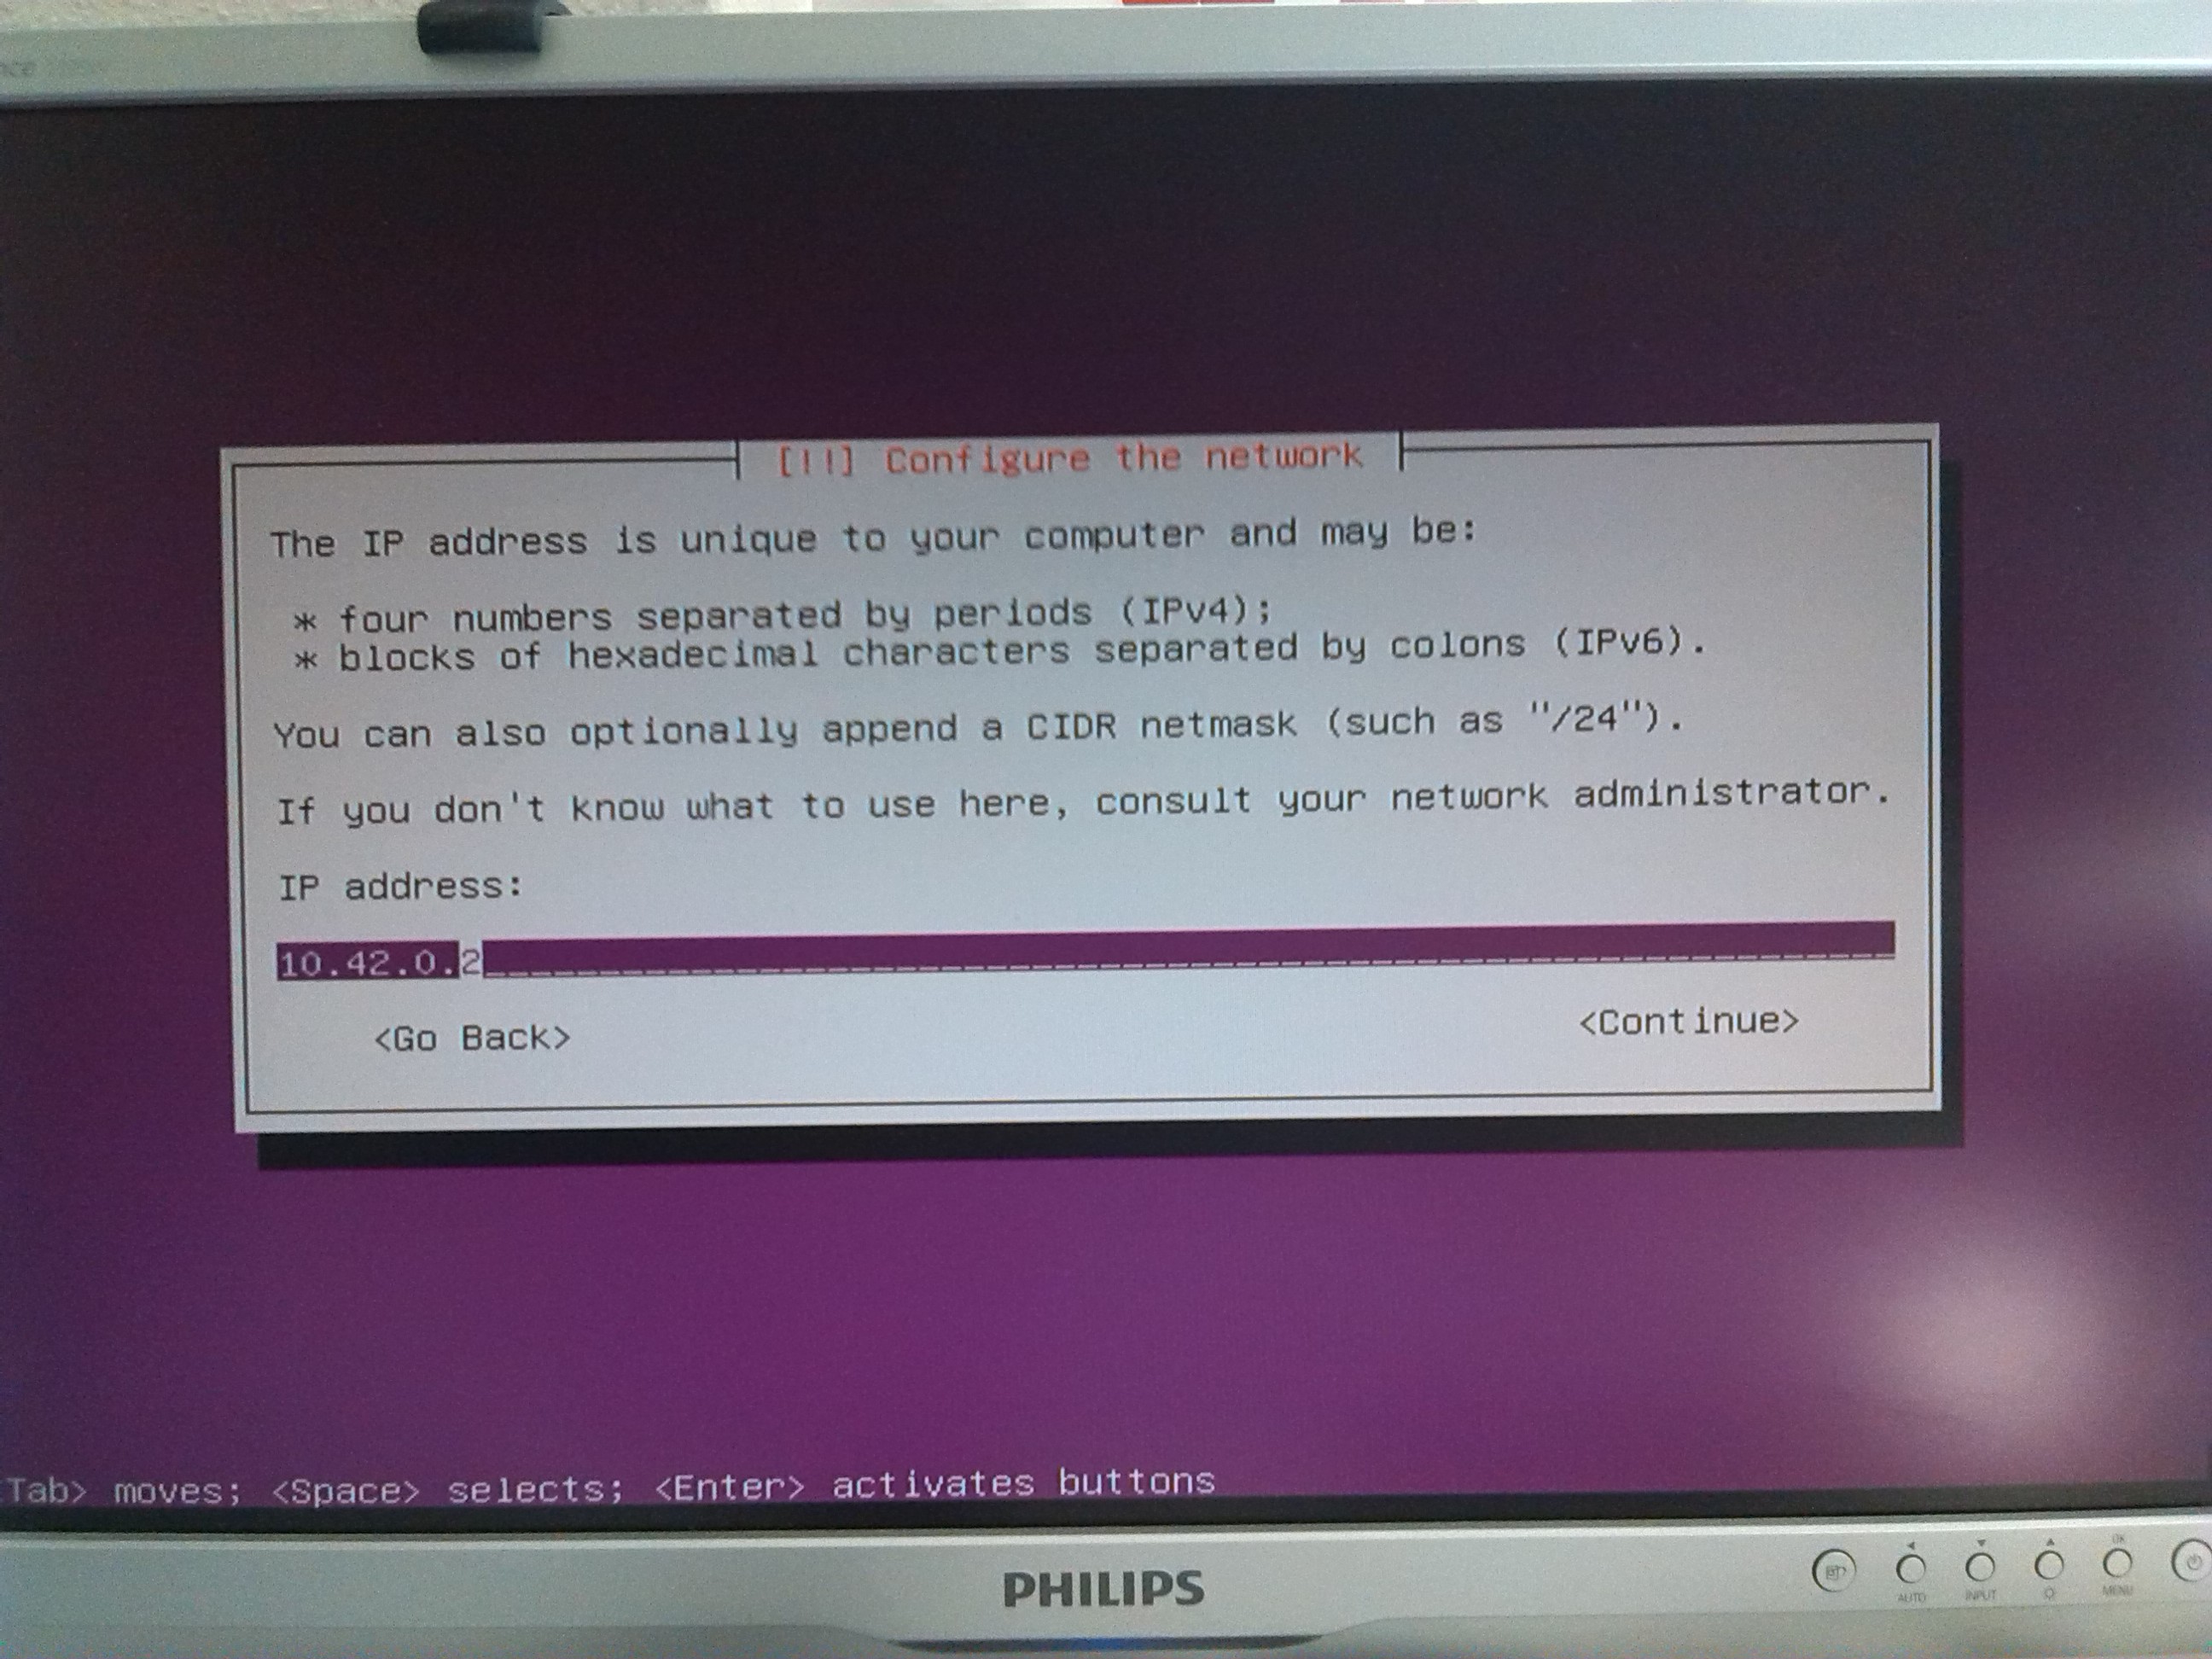
so its not implausible to assign the ip-addresses 10.42.0.2 ... 10.42.0.6 to the Hadoop nodes (see below).
As to the network card, connected to DSL/Internet, just choose "Automatic(DHCP)" (I assume that your DSL provides DHCP, otherwise
you can of course configure it with static IP).
Installing Ubuntu 14.04.2
A quick Internet research shows that Hadoop is most frequently deployed on CentOS and Ubuntu.
I chose Ubuntu because it seemed to be a little bit more popular and I have some experience with Debian, upon which Ubuntu is built.
All Hadoop nodes are run on Ubuntu Server but the control panel/gateway computer is run on Ubuntu Desktop. There is no big difference
but to put it briefly: Ubuntu Server lets you install just necessary minimum of software.
Installing Ubuntu Desktop is straightforward and we will not discuss it here. Just one nuance: a Desktop version has no SSH server by
default, so you need to install it: sudo apt-get install ssh-server
Installing Ubuntu server is just a bit more tricky but still not complicated. As to software components, select
"No automatic updates"
and install only OpenSSH server.
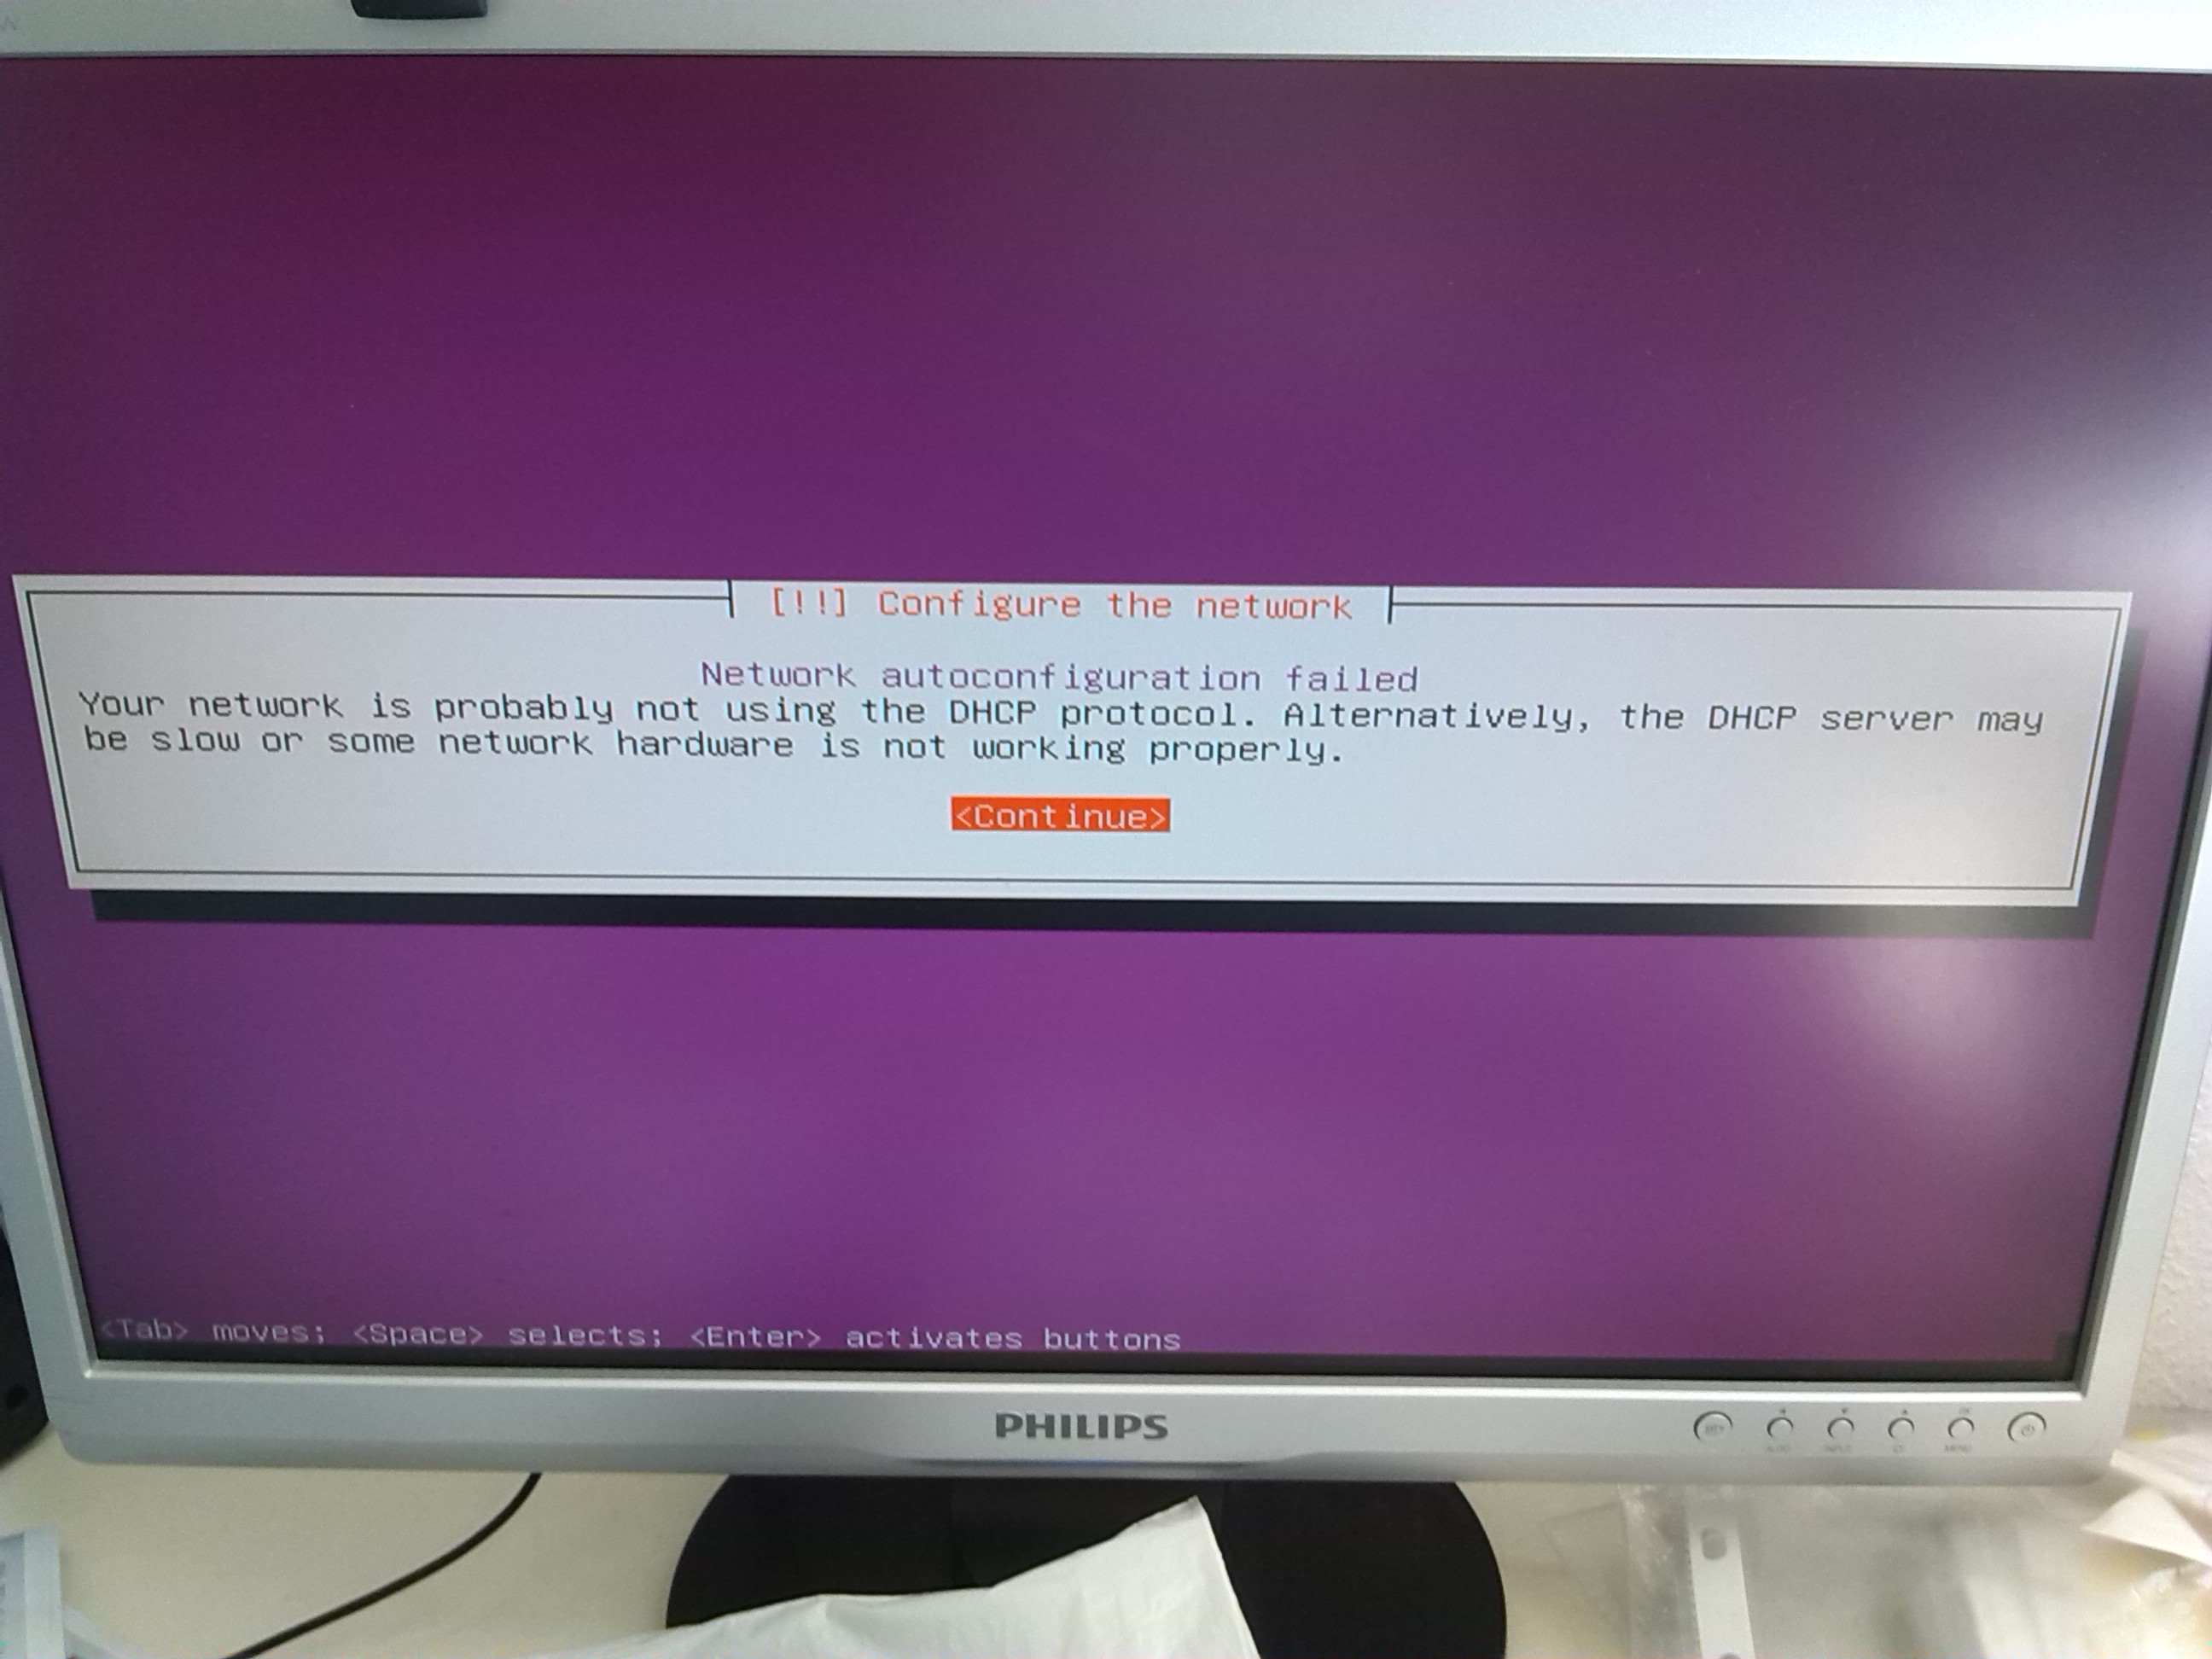
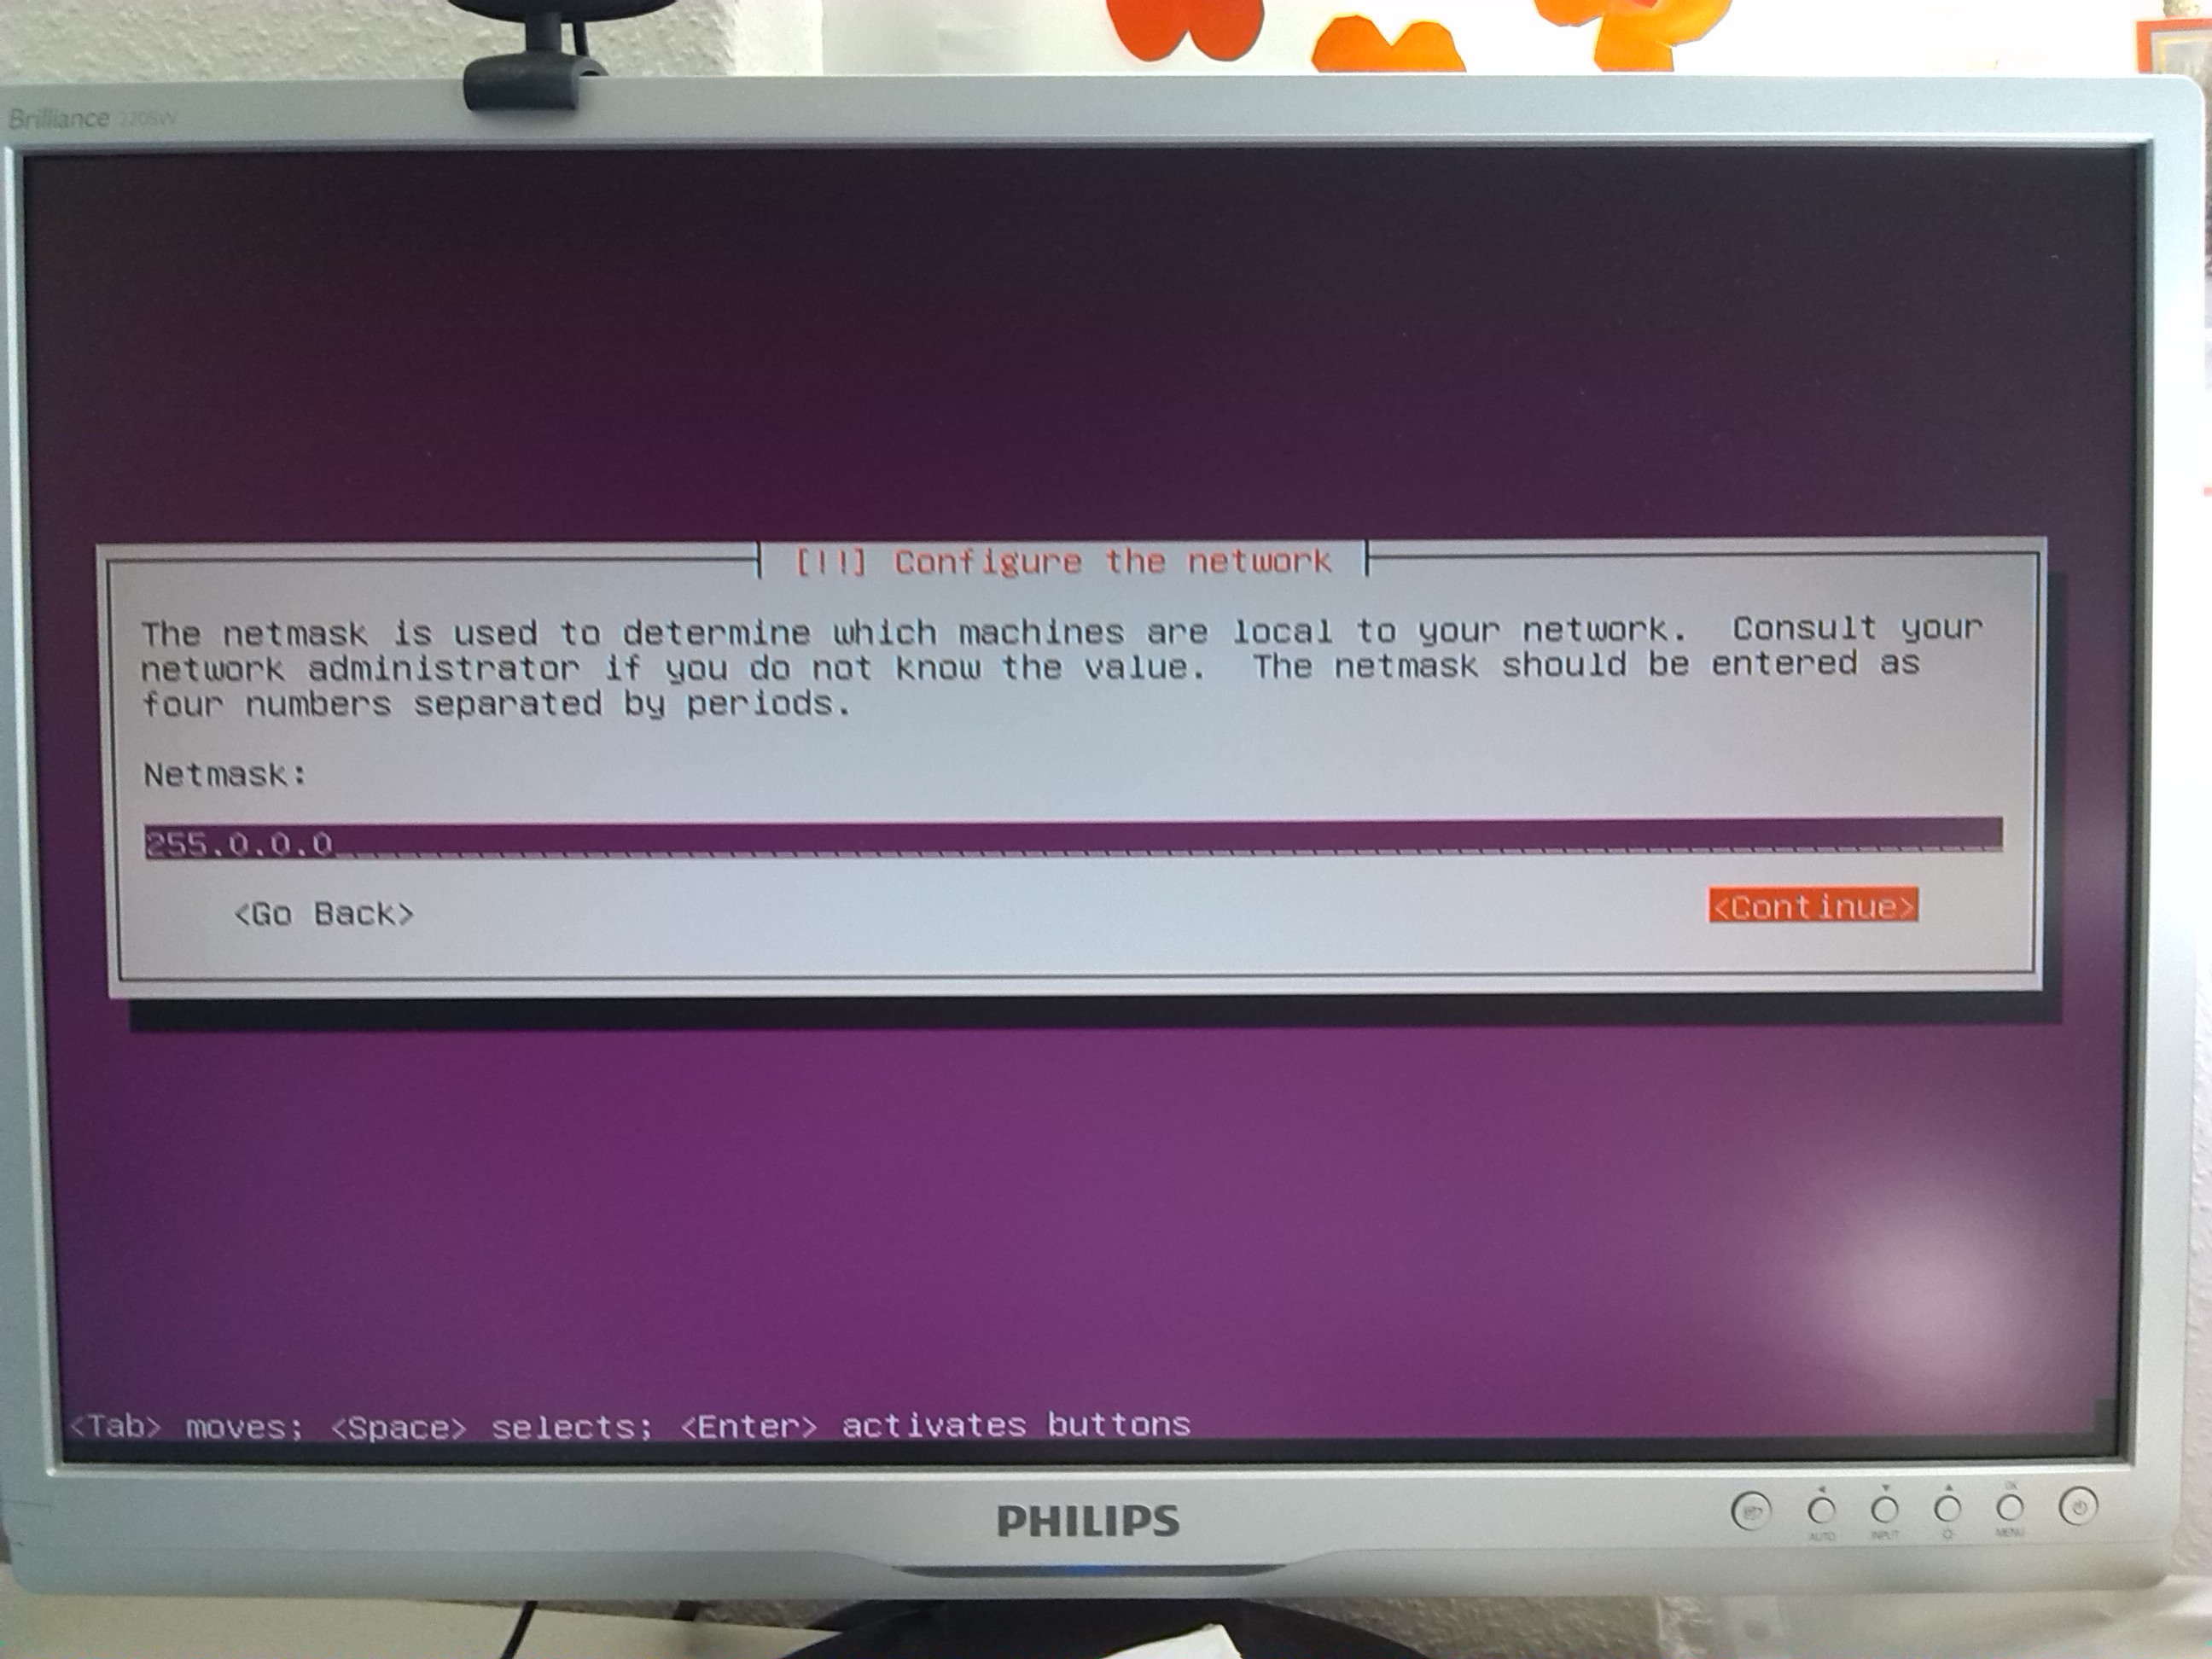
Configure your network according to screenshots in gallery. It will not heart to keep a server physically unconnected to the router
before you have configured the network (otherwise Ubuntu attempts an automatic network configuration which may result in wrong settings).
After you installed Ubuntu on all your nodes, you should do the following:
1) Check BIOS Setup and disable POST errors.
In your case the BIOS settings can be of course different but I mean you should prevent a computer from halting on power-on if
no keyboard is connected.
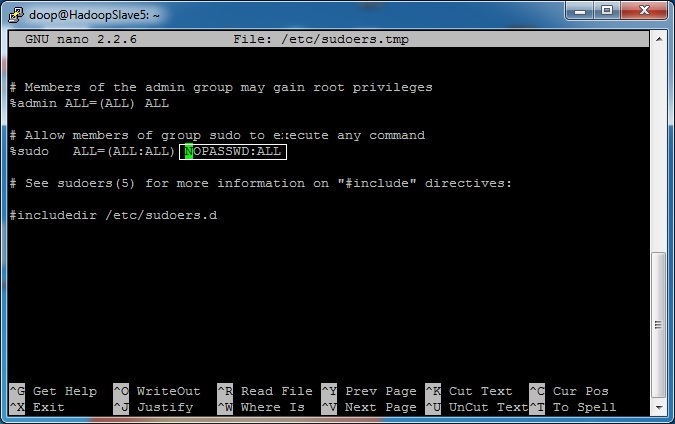
2) Deactivate sudo password. For this run on each host sudo visudo and
change the line %sudo ALL=(ALL:ALL) ALL to
%sudo ALL=(ALL:ALL) NOPASSWD:ALL. If you don't, Cloudera setup manager will not be able to proceed!
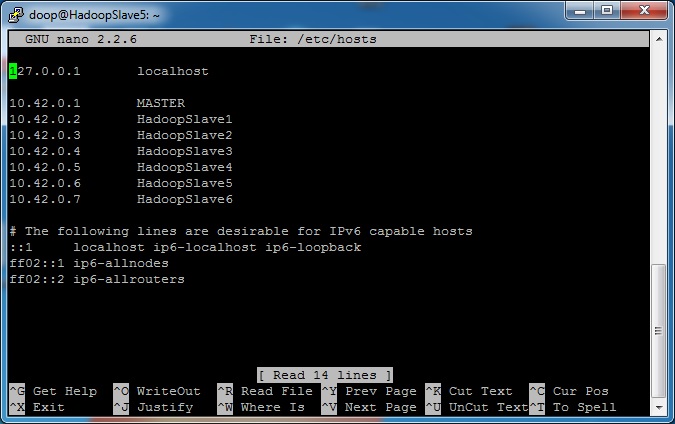
3) To change /etc/host type sudo nano /etc/hosts on each node and modify the file according to the
screenshot, press "Ctrl + O"
to save changes (do it on MASTER server as well).
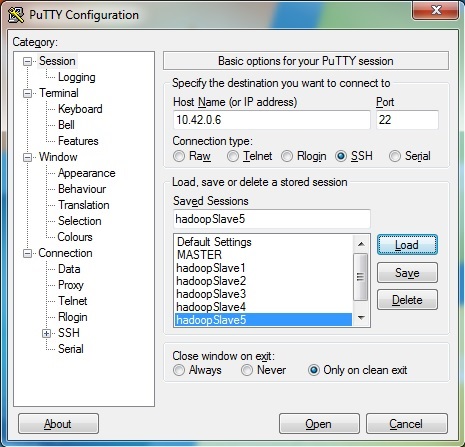
4) Setup PuTTY on your Windows desktop.
Congrats! You have successfully prepared your infrastructure.
Note: In order to accelerate the process I installed and preconfigured Ubuntu Server only on one node, then used
Clonezilla to make a disk image, then deployed this image on all other hosts and
accordingly changed hostname (sudo nano /etc/hostname)
and ip-address (sudo nano /etc/network/interfaces).
From hardware point of view there is no problem, since the hardware is identical on all nodes. However, this approach is though quick
but still dirty. First there are traces of the host name not only in /etc/hostname but also somewhere else (don't ask me where, but
I saw them :)). More important that after such cloning you need to
synchronize clock on all nodes
(sudo ntpdate pool.ntp.org). Otherwise the Clodera manager will
fail to setup HBase.
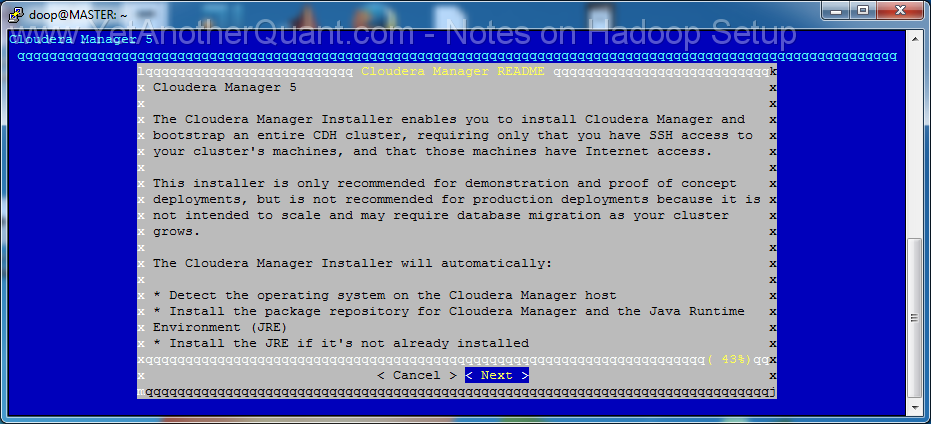
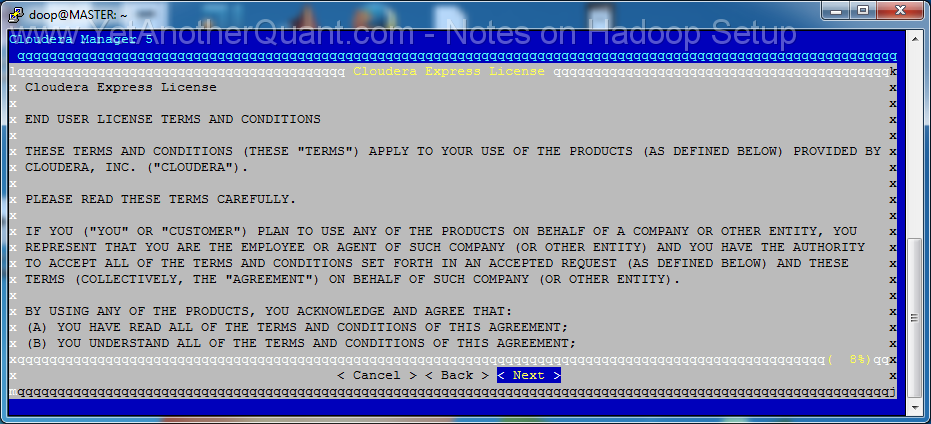
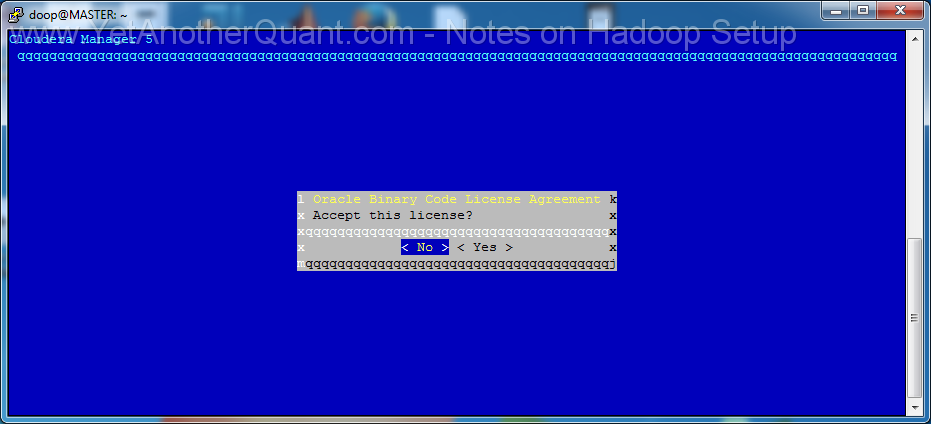
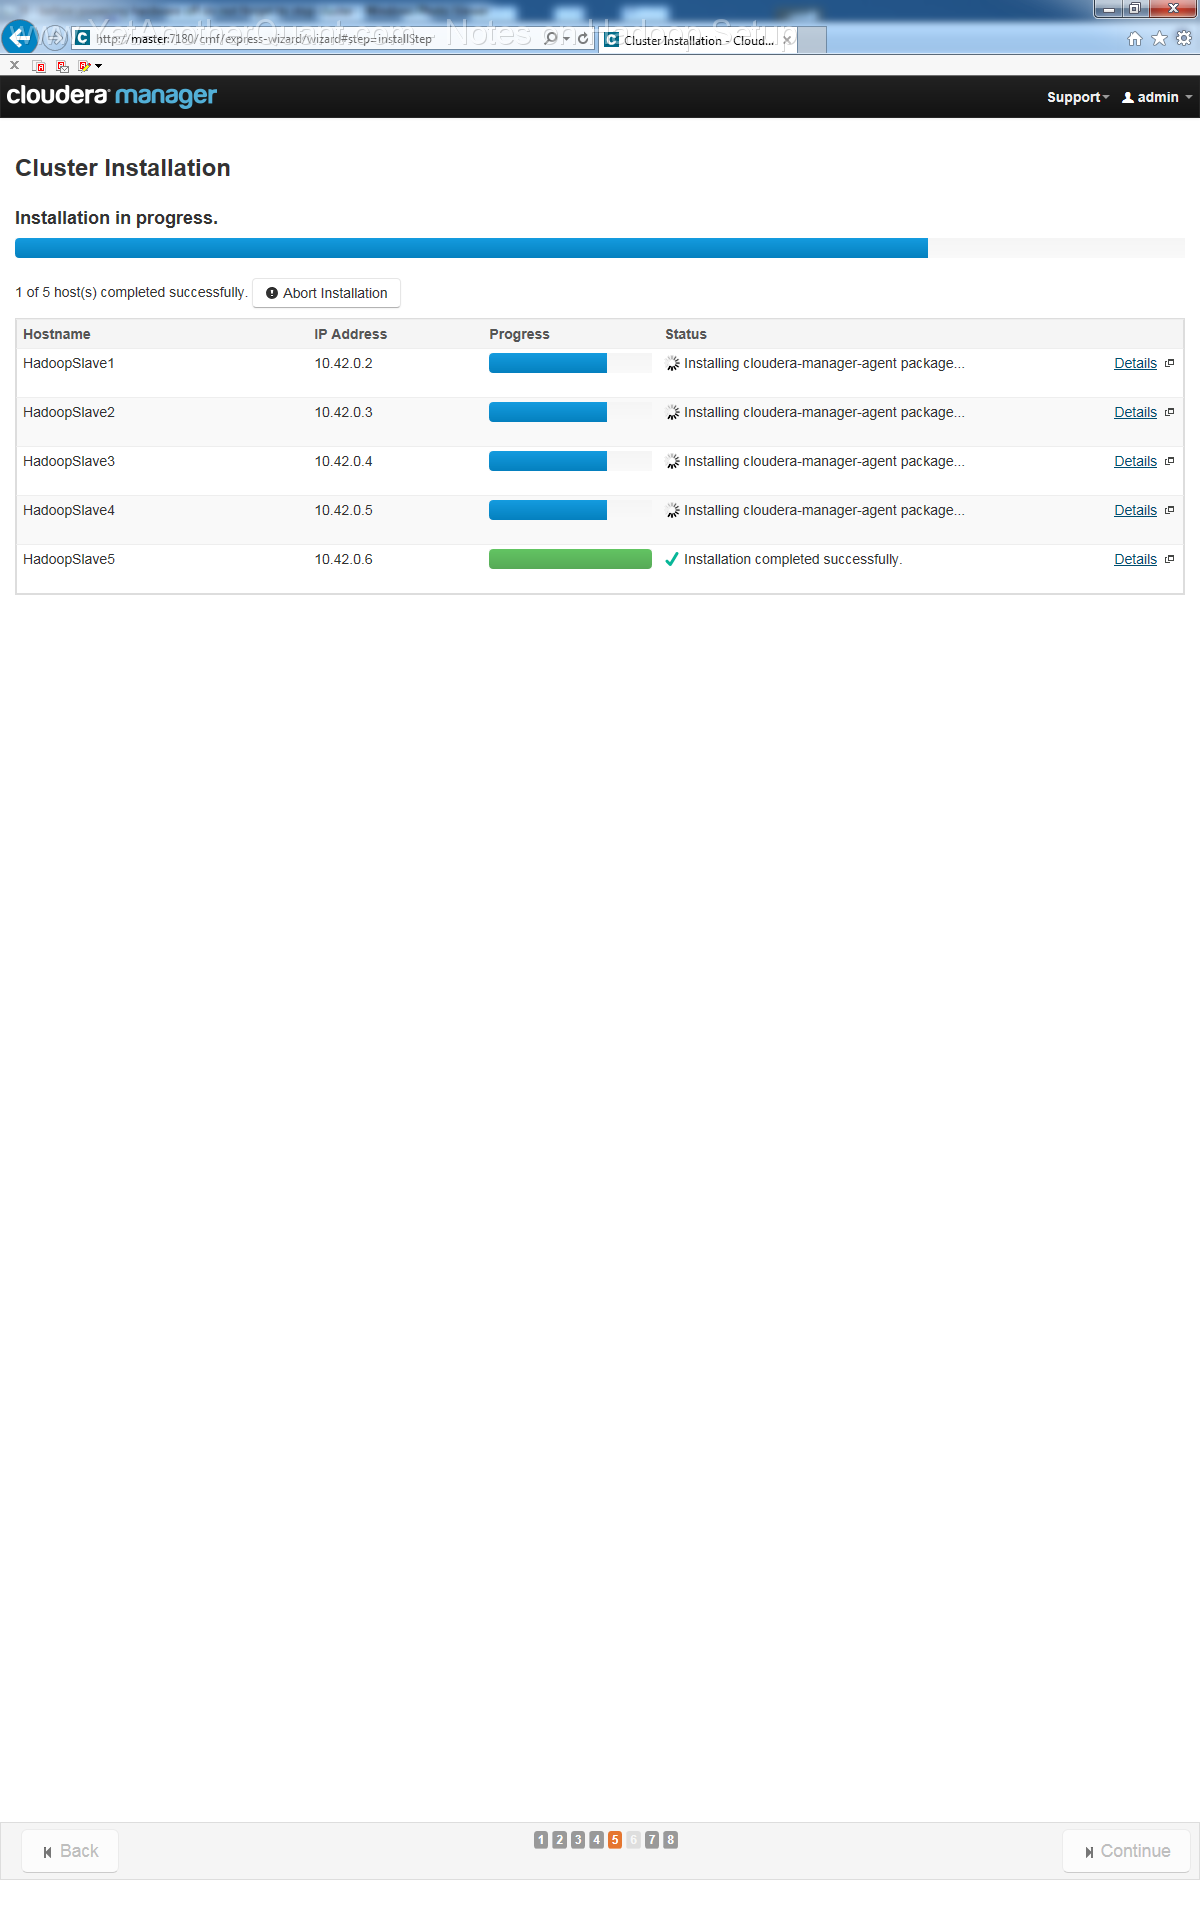
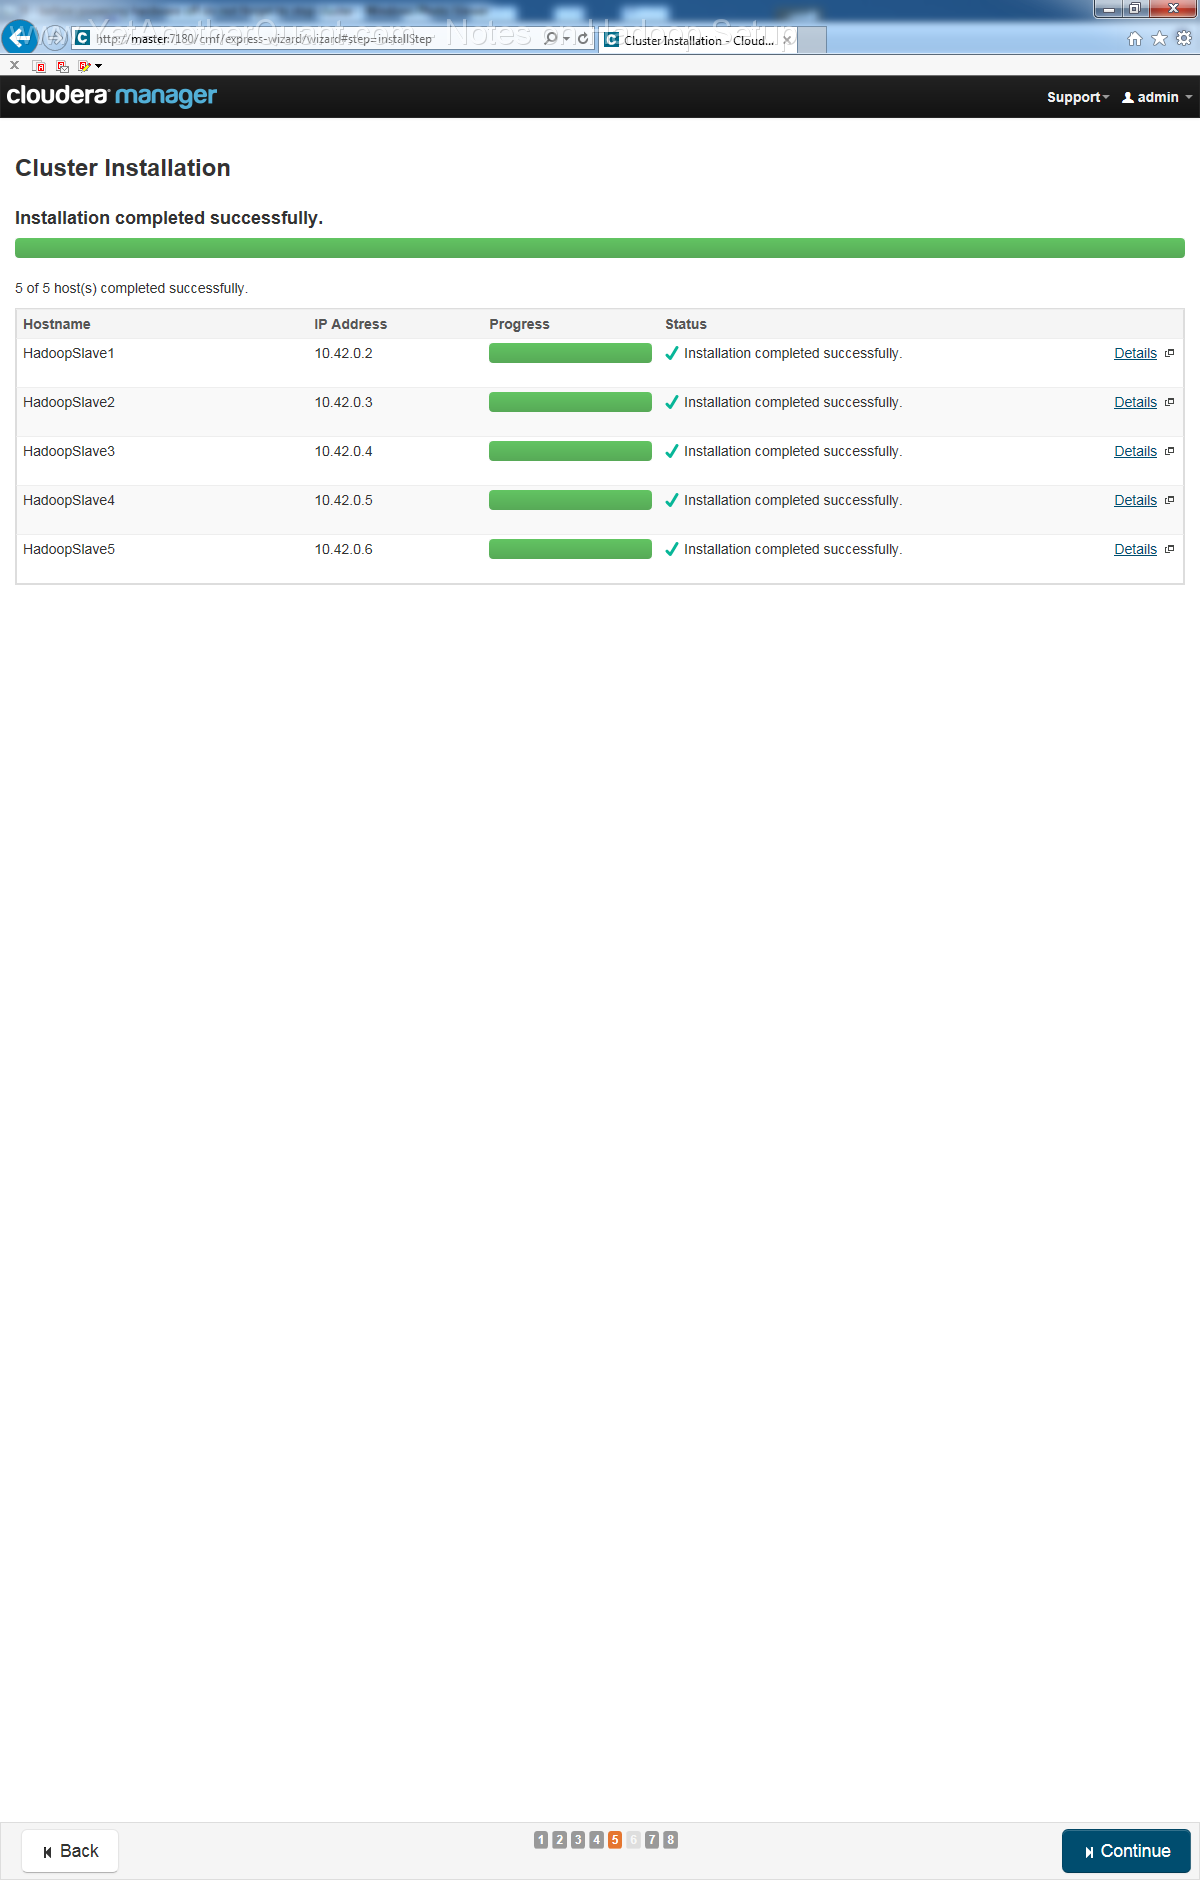
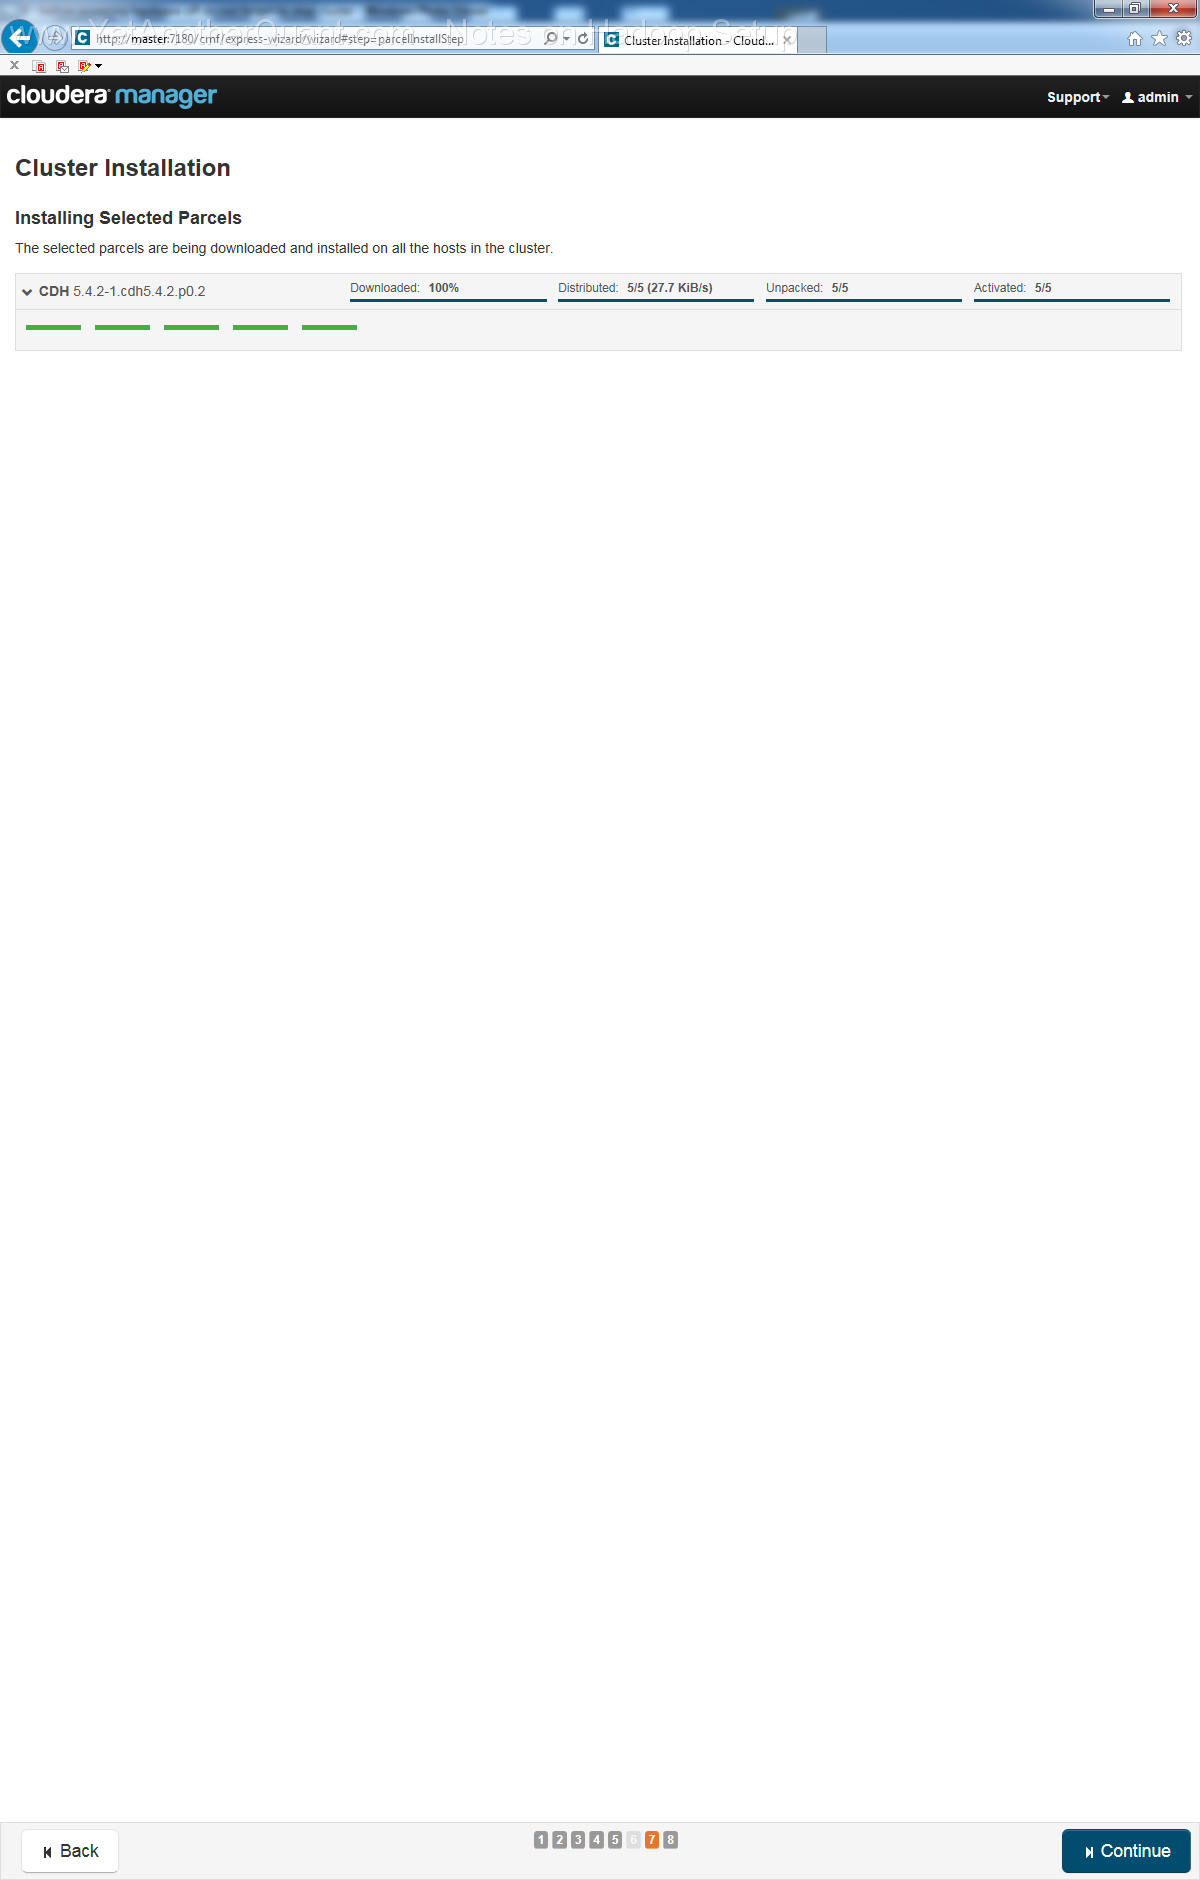
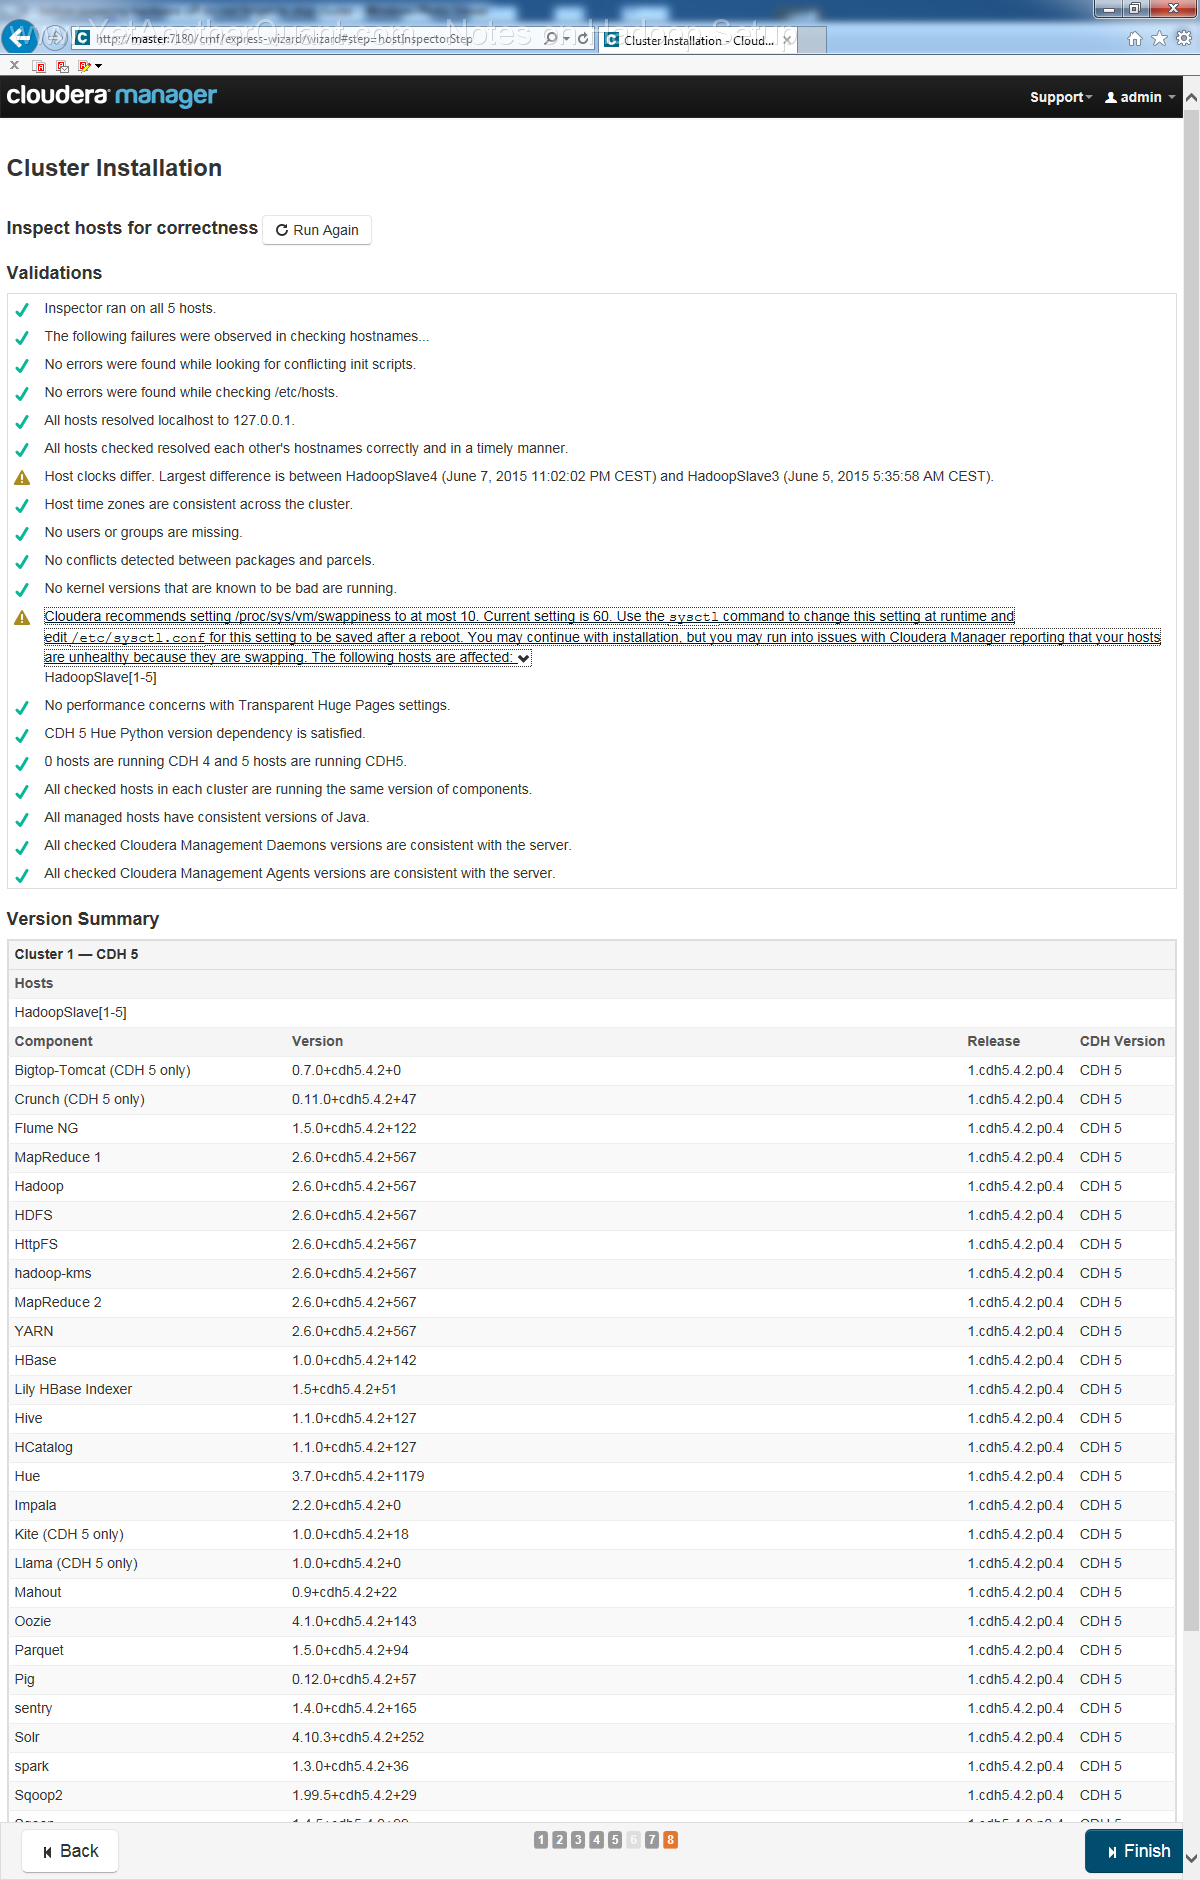
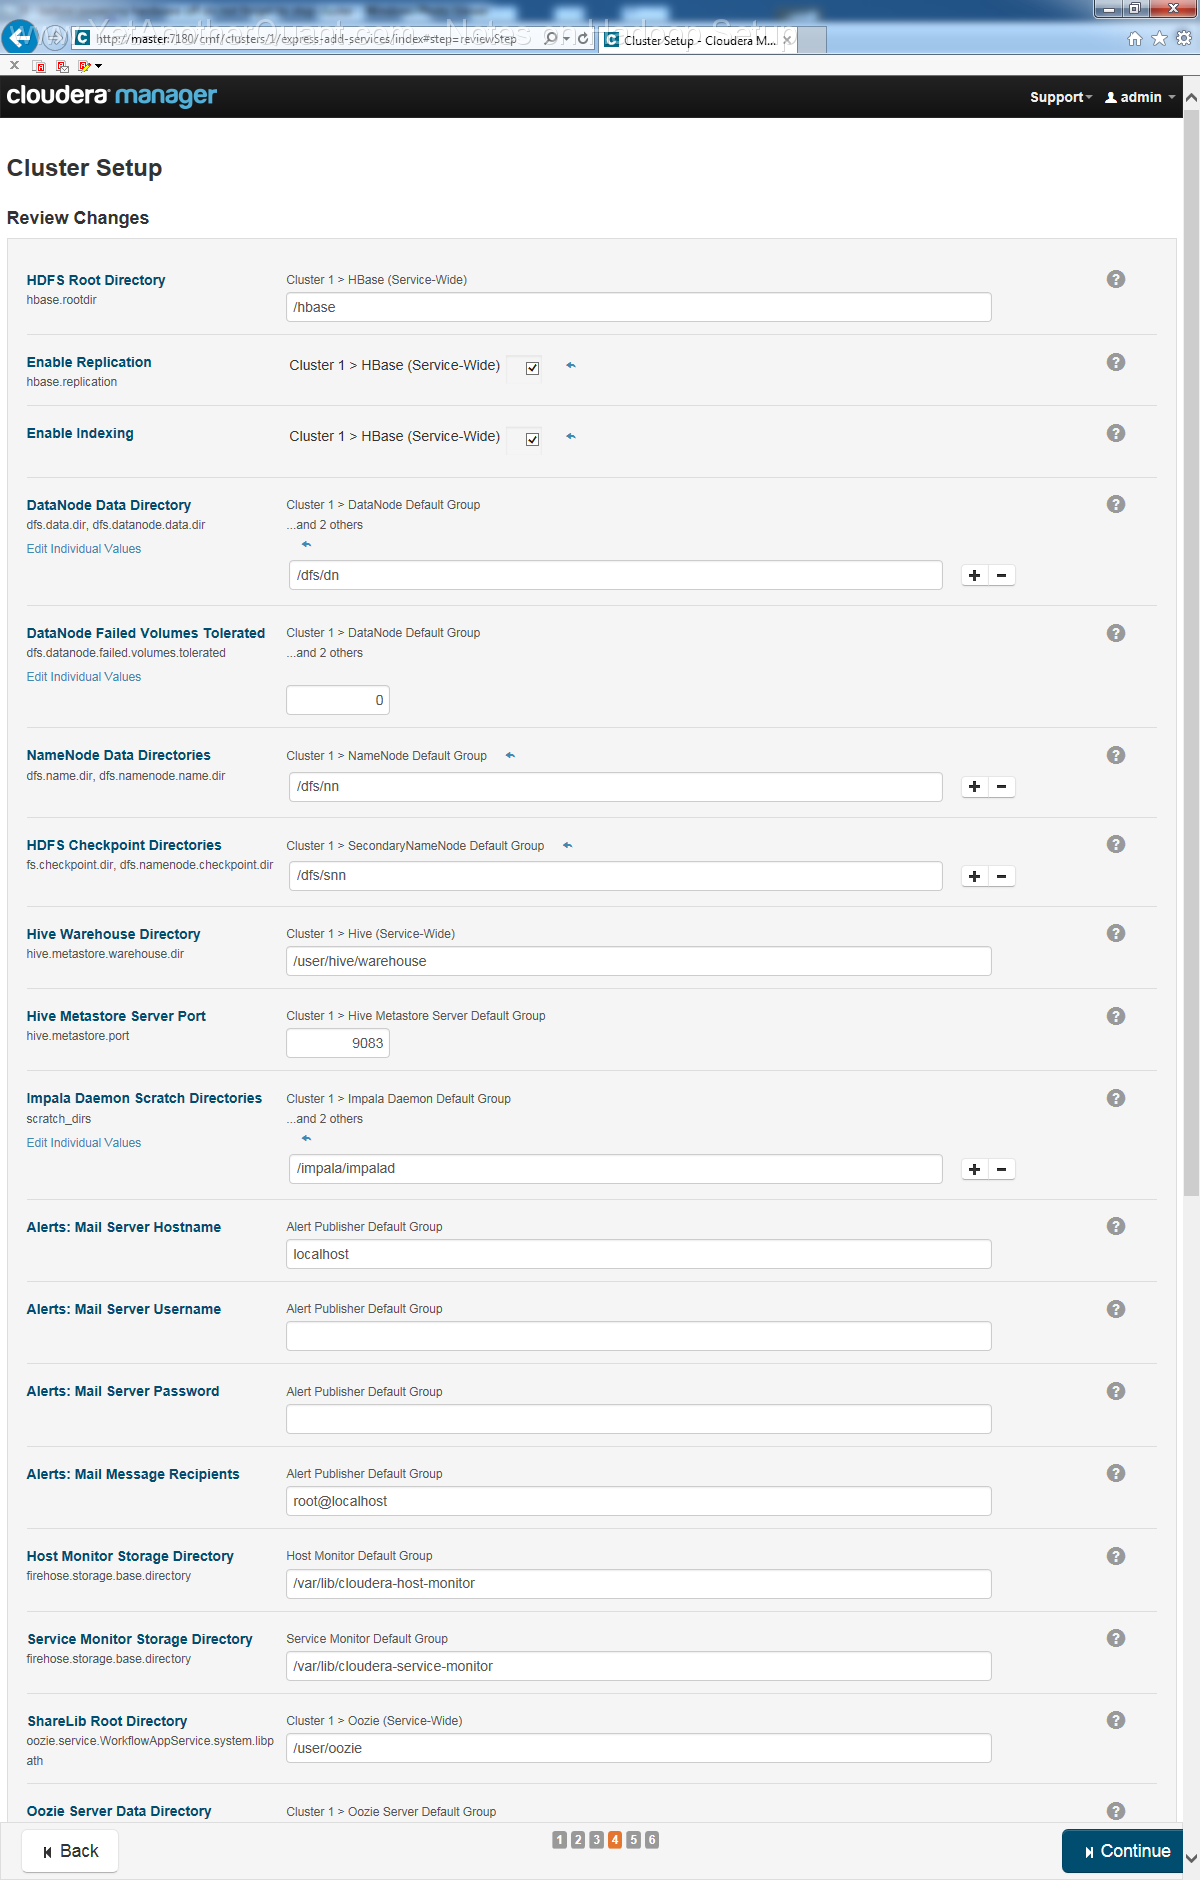
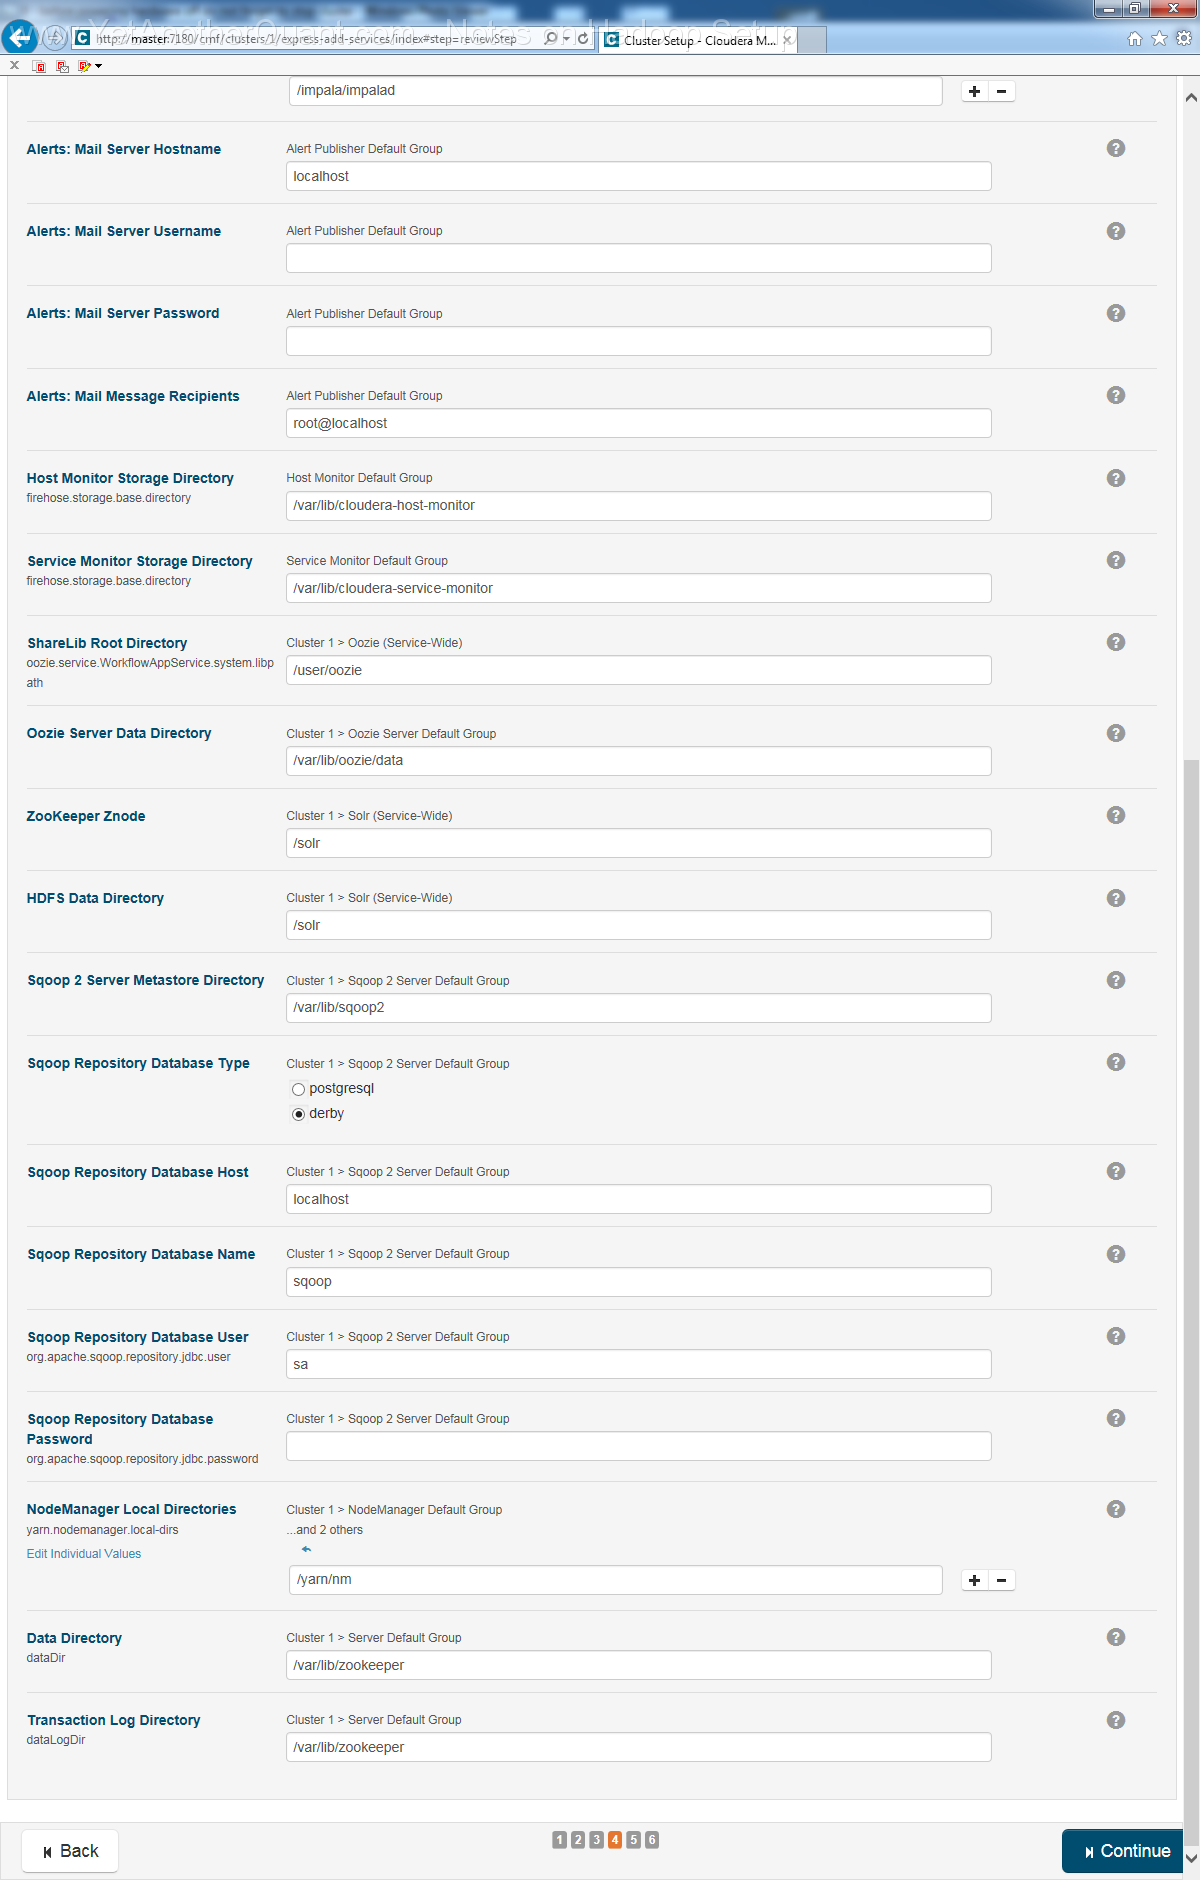
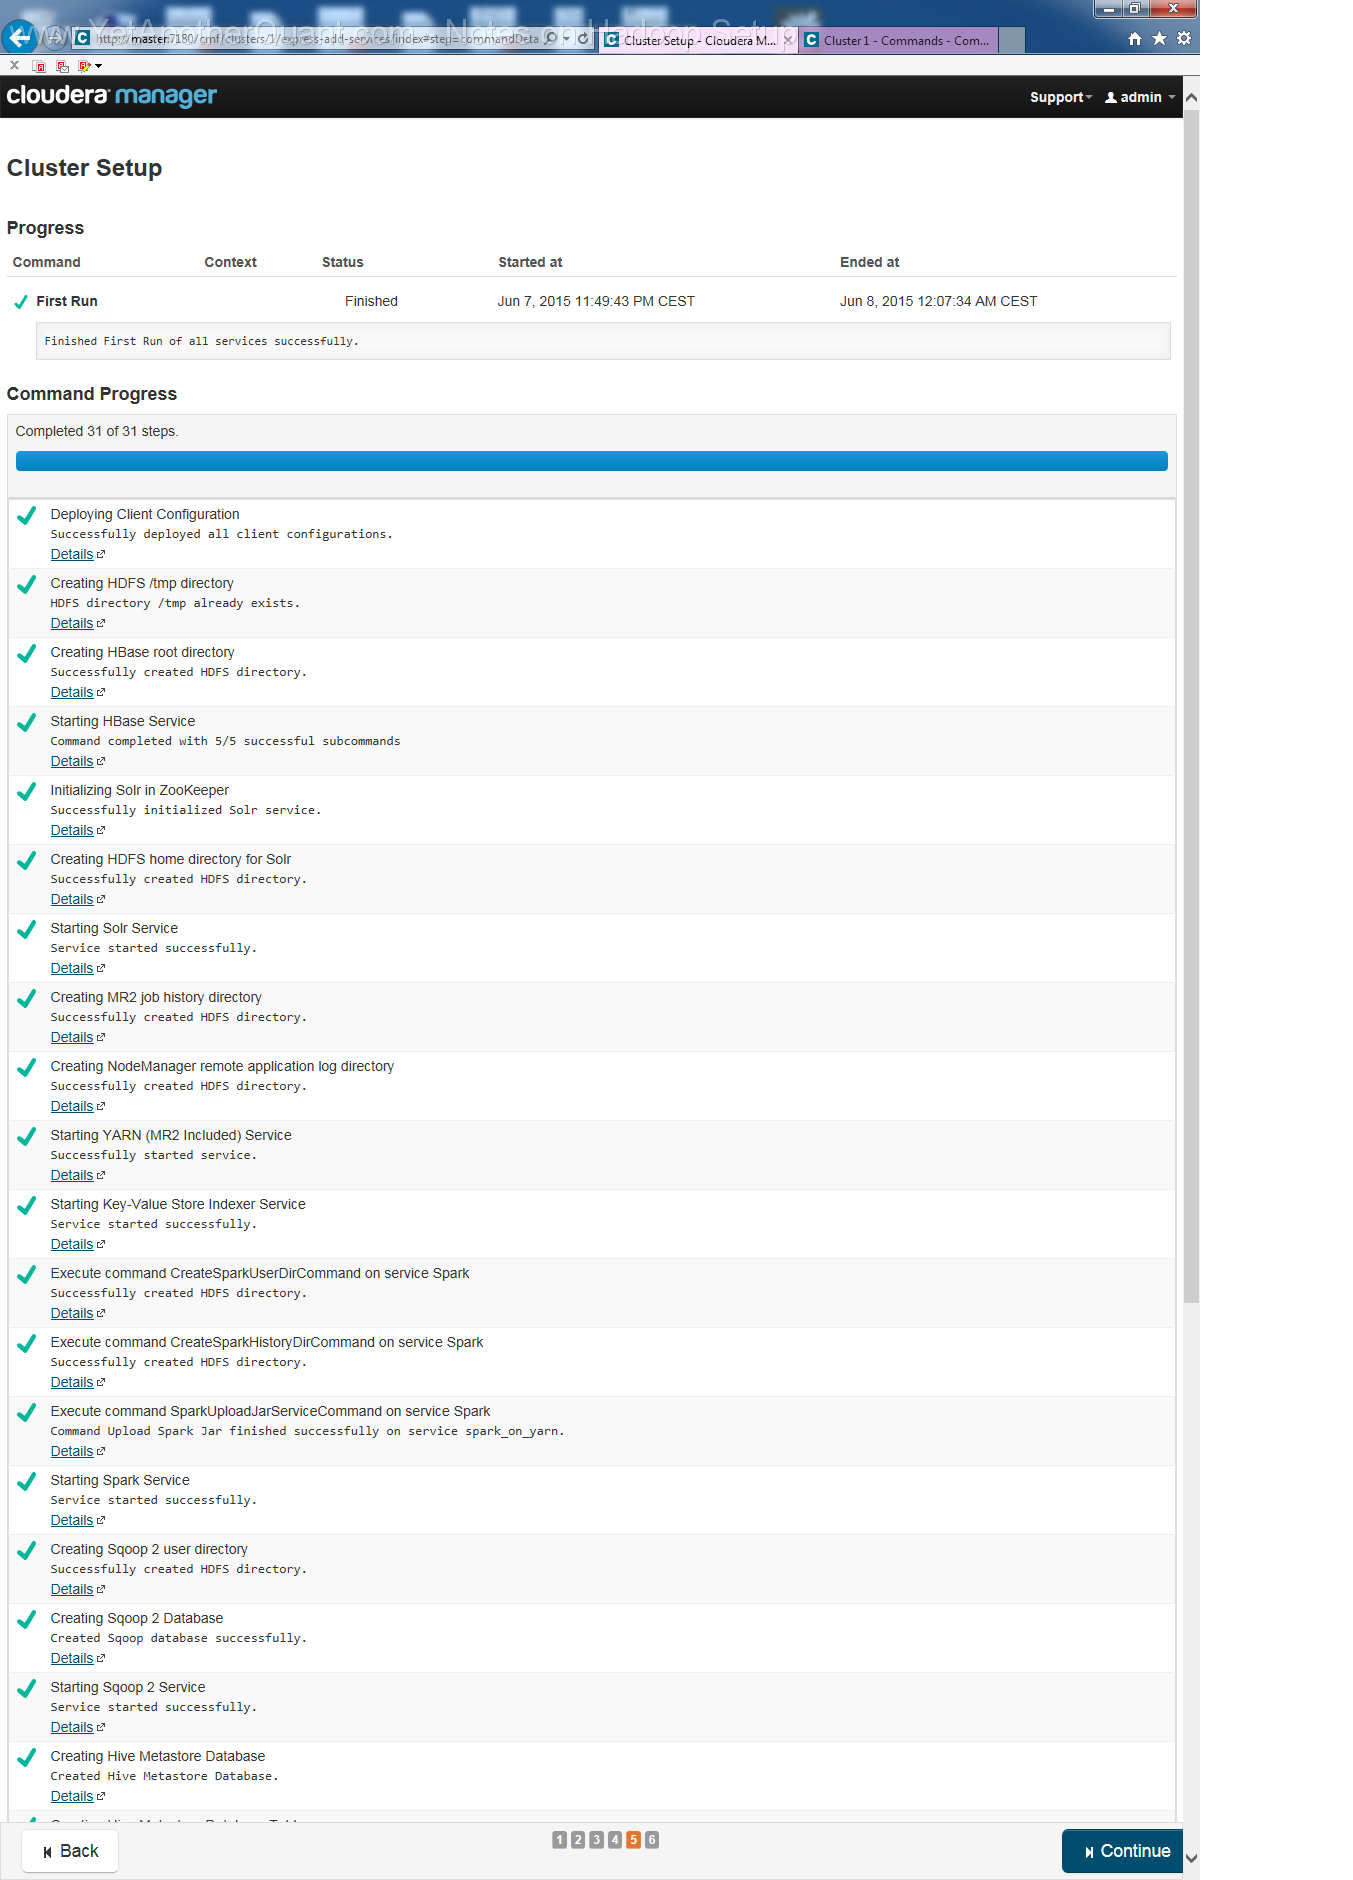
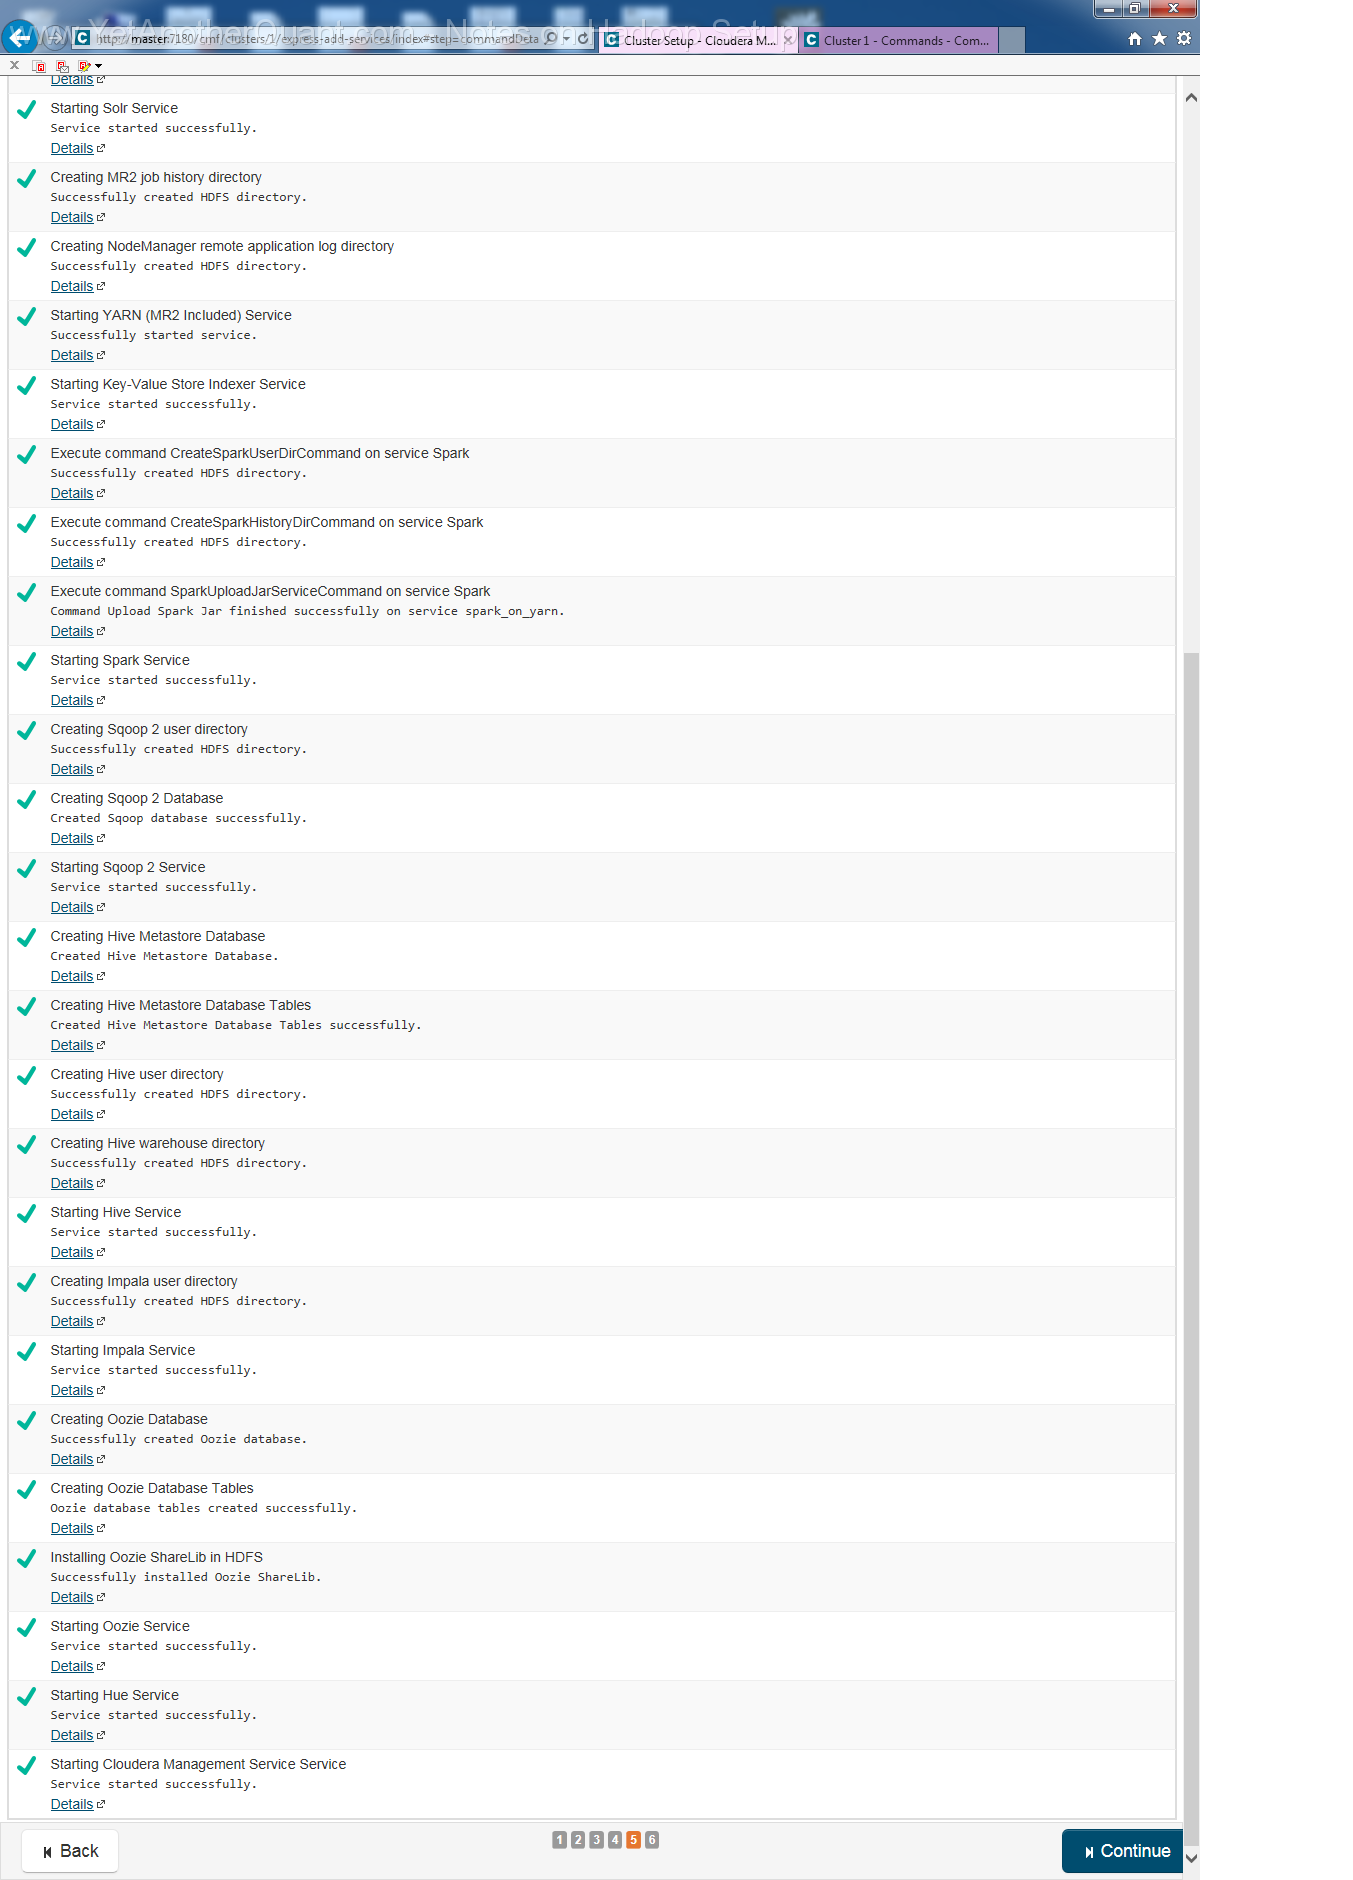
Installing Hadoop from Cloudera
This installation is surprisingly straighforward (as soon as you have properly done hardware and Ubuntu setup, you shall not
encounter any problems). Just follow the instructions:
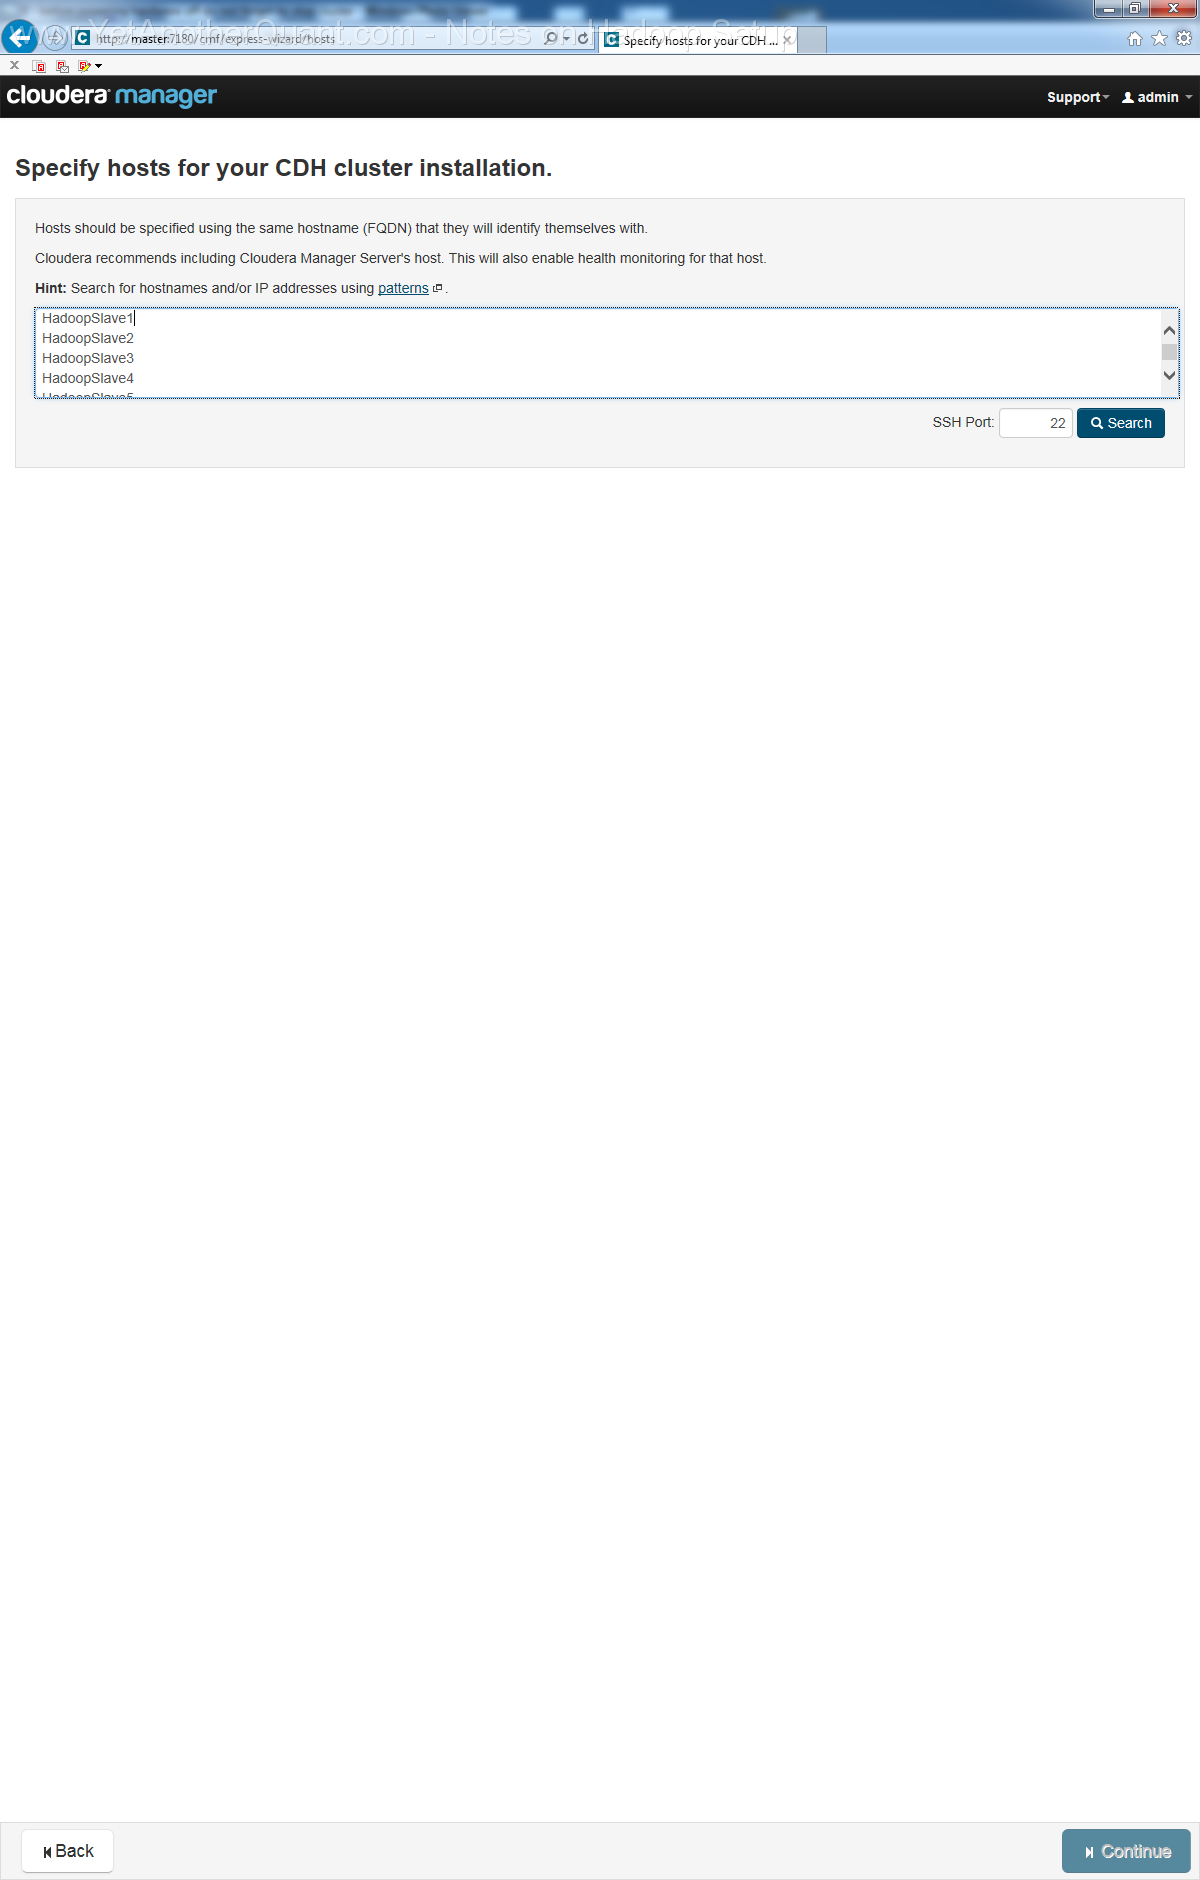
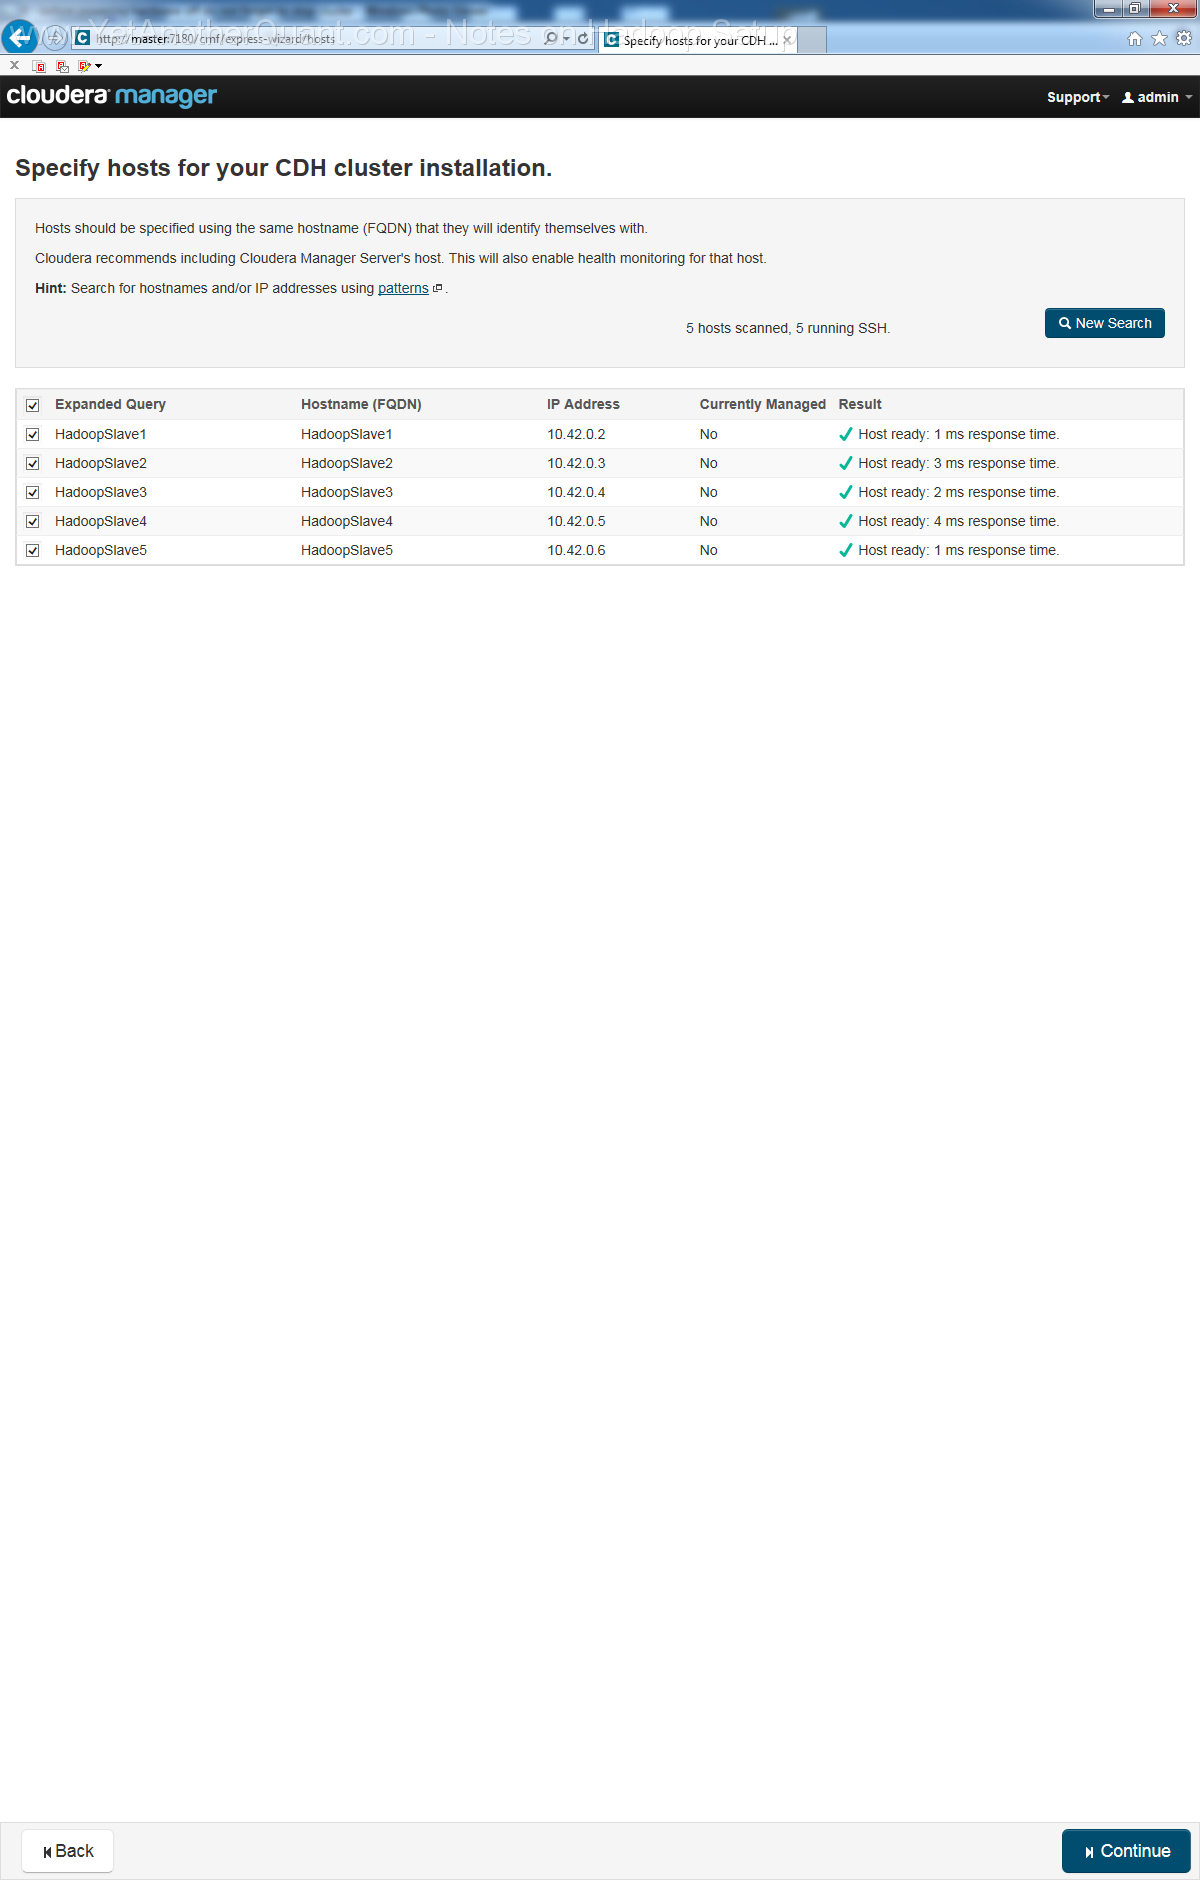
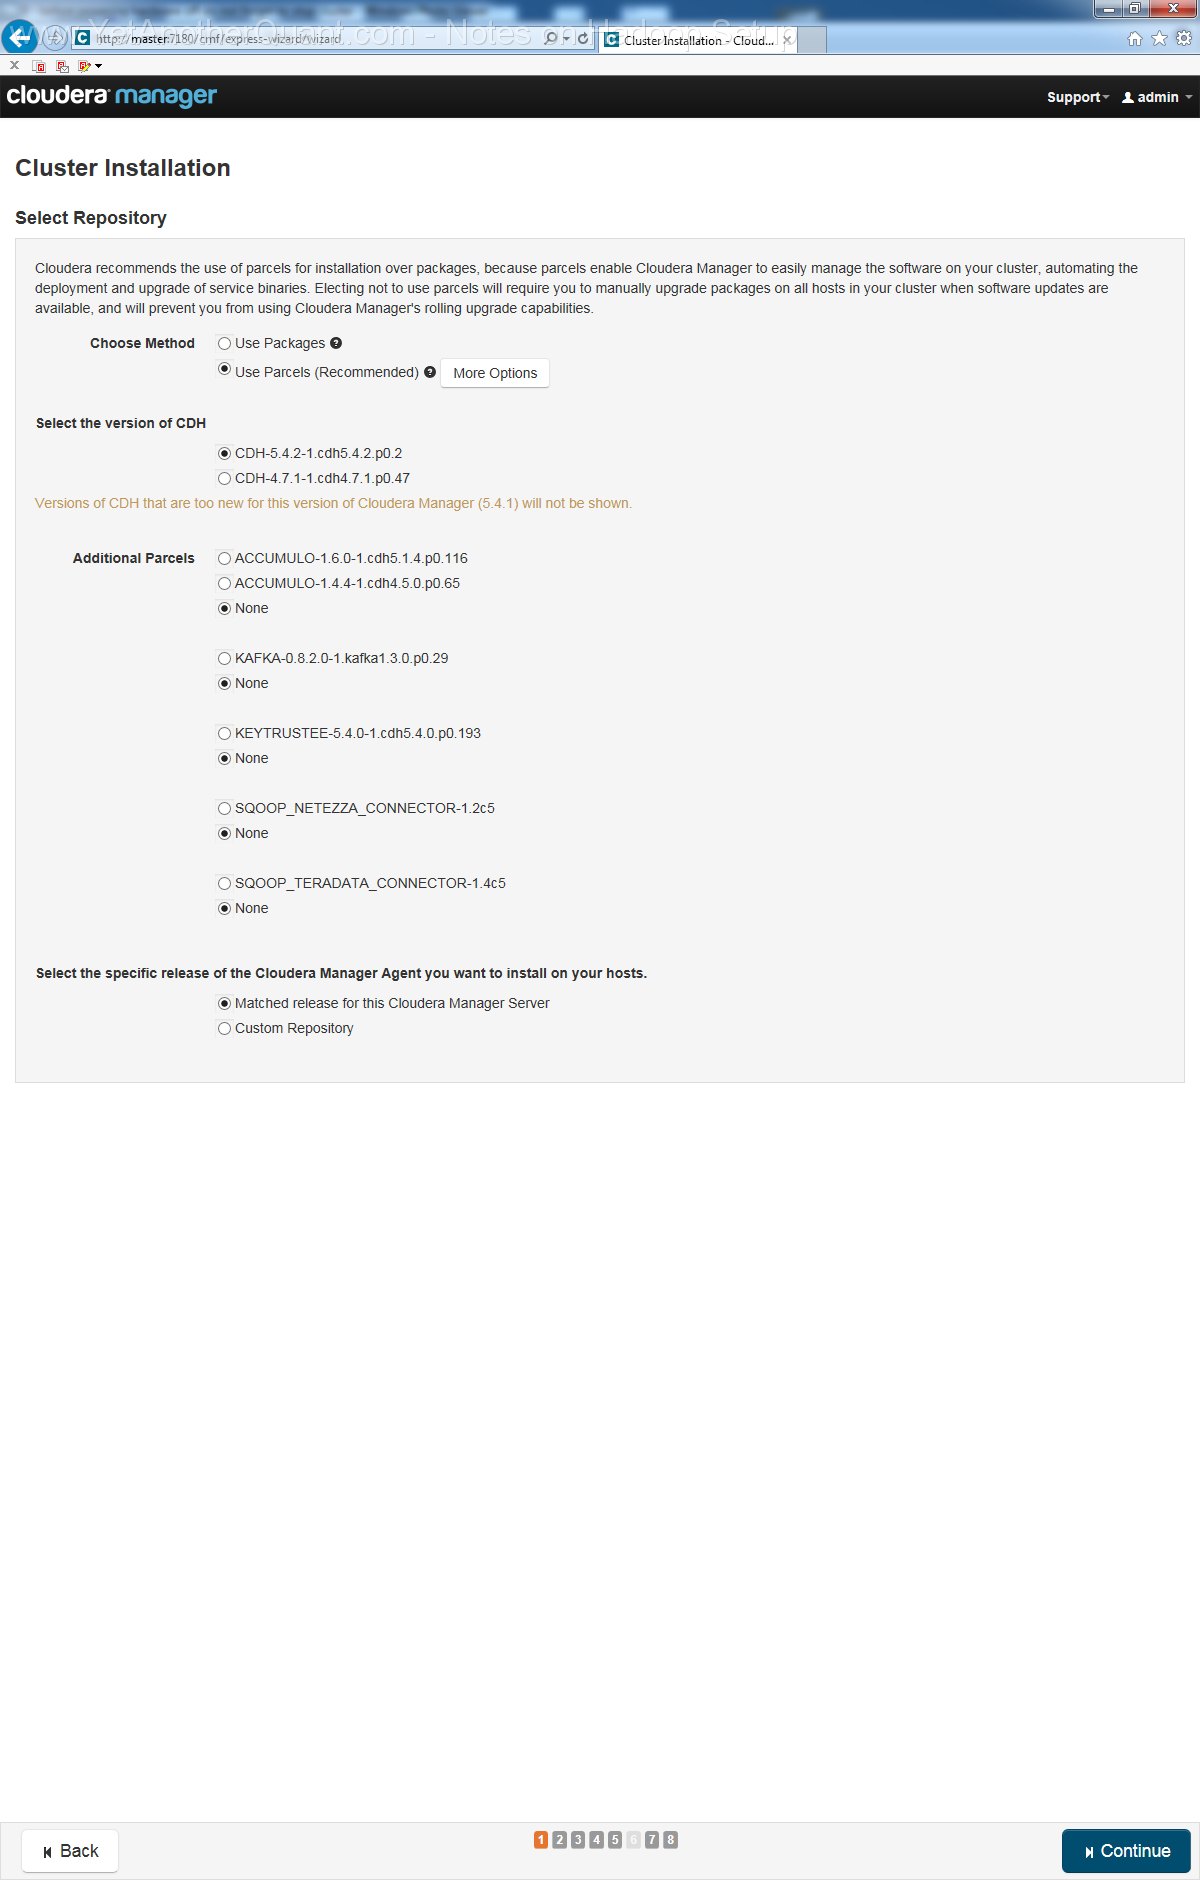
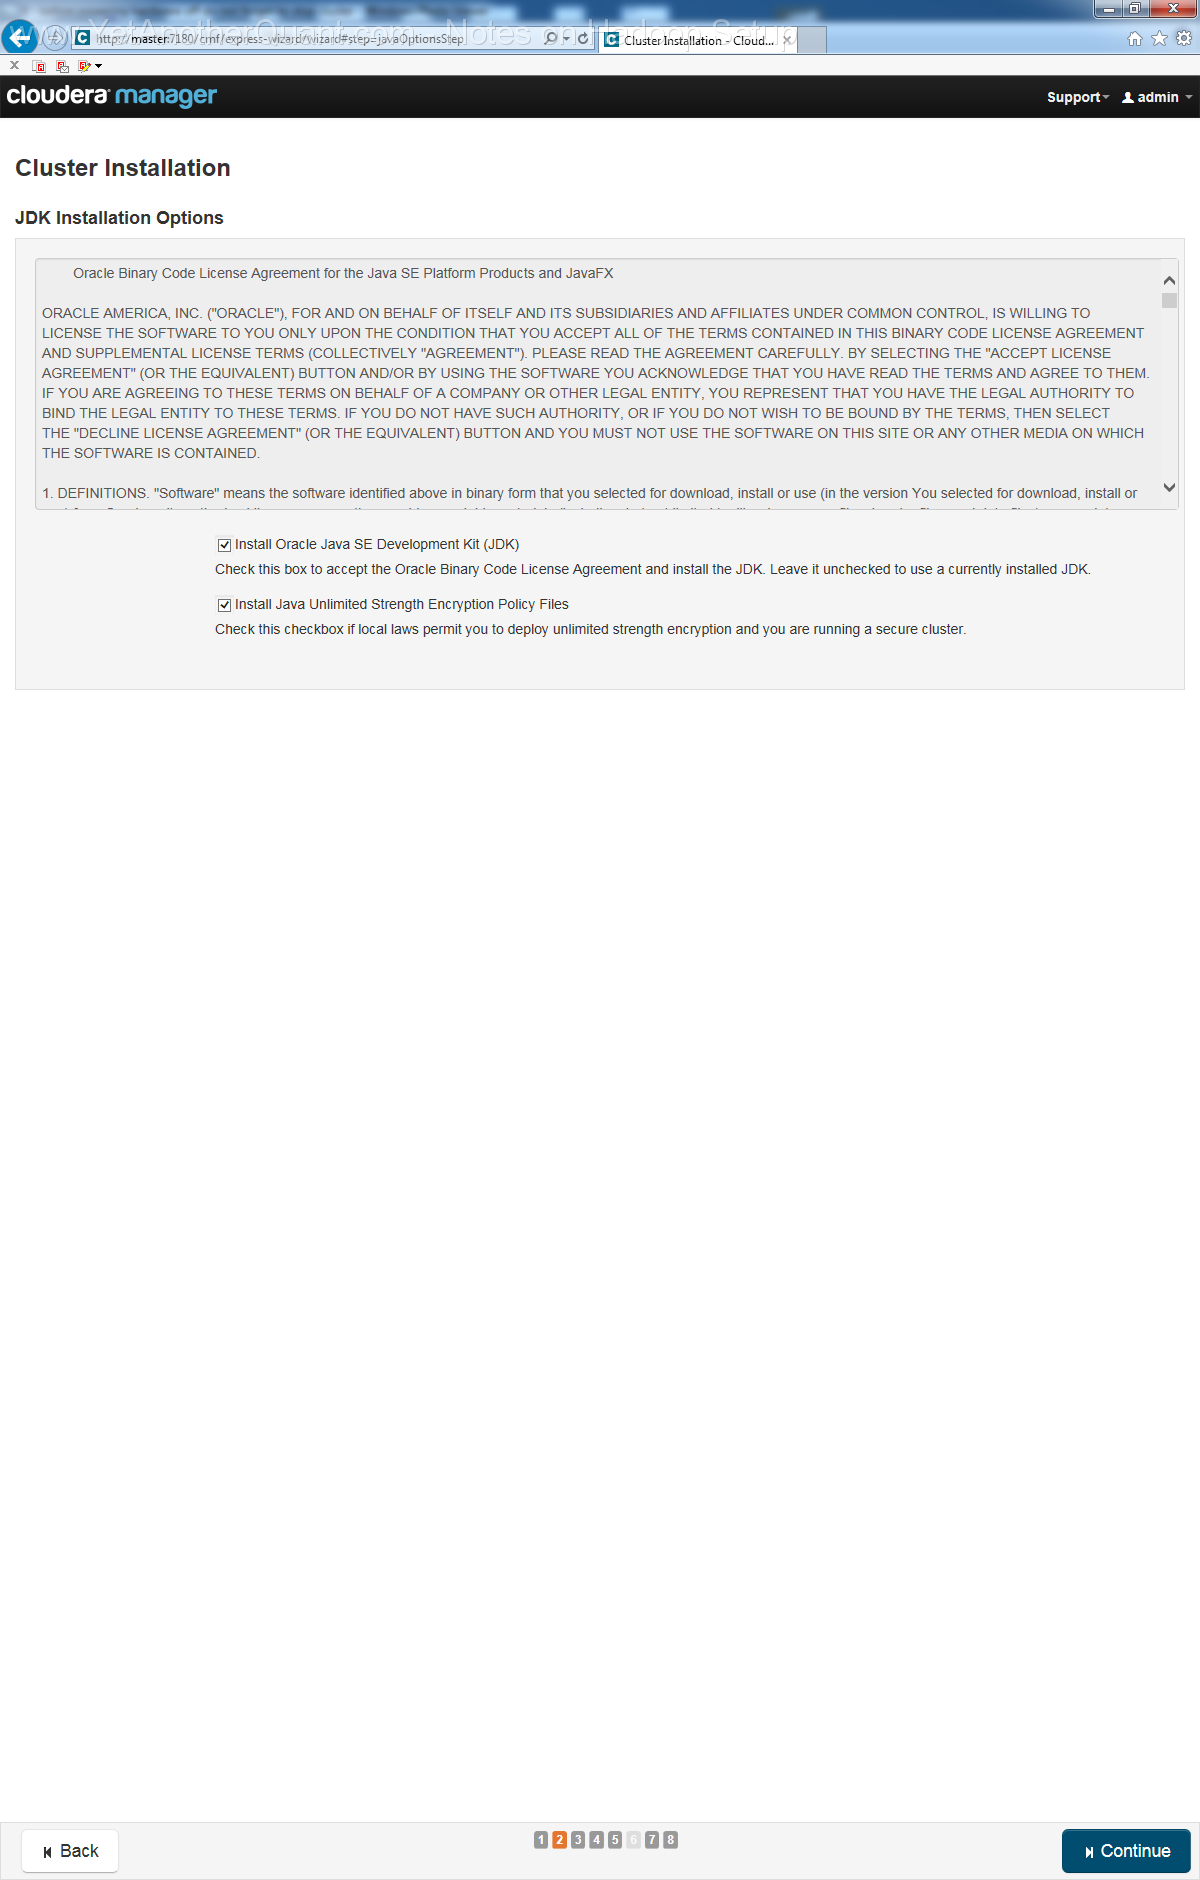
To summarize: on MASTER run
1) wget http://archive.cloudera.com/cm5/installer/latest/cloudera-manager-installer.bin (the URL can of course be changed in future :))
2) cd /home/doop
3) chmod u+x cloudera-manager-installer.bin
4) sudo ./cloudera-manager-installer.bin
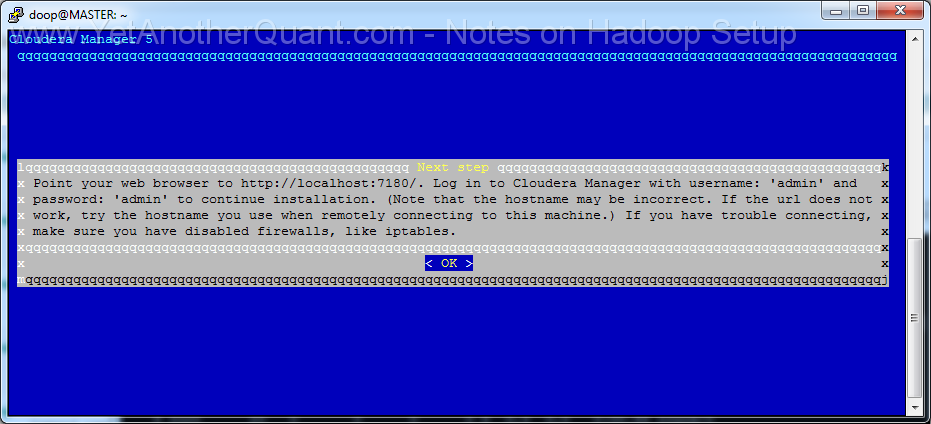
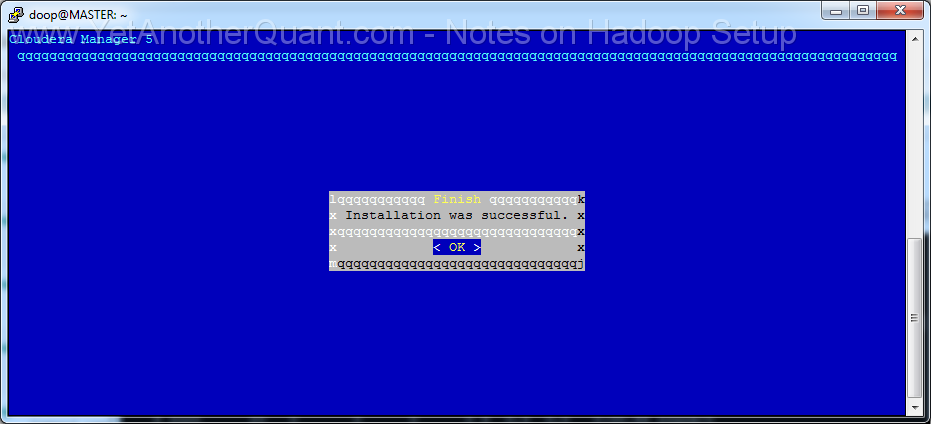
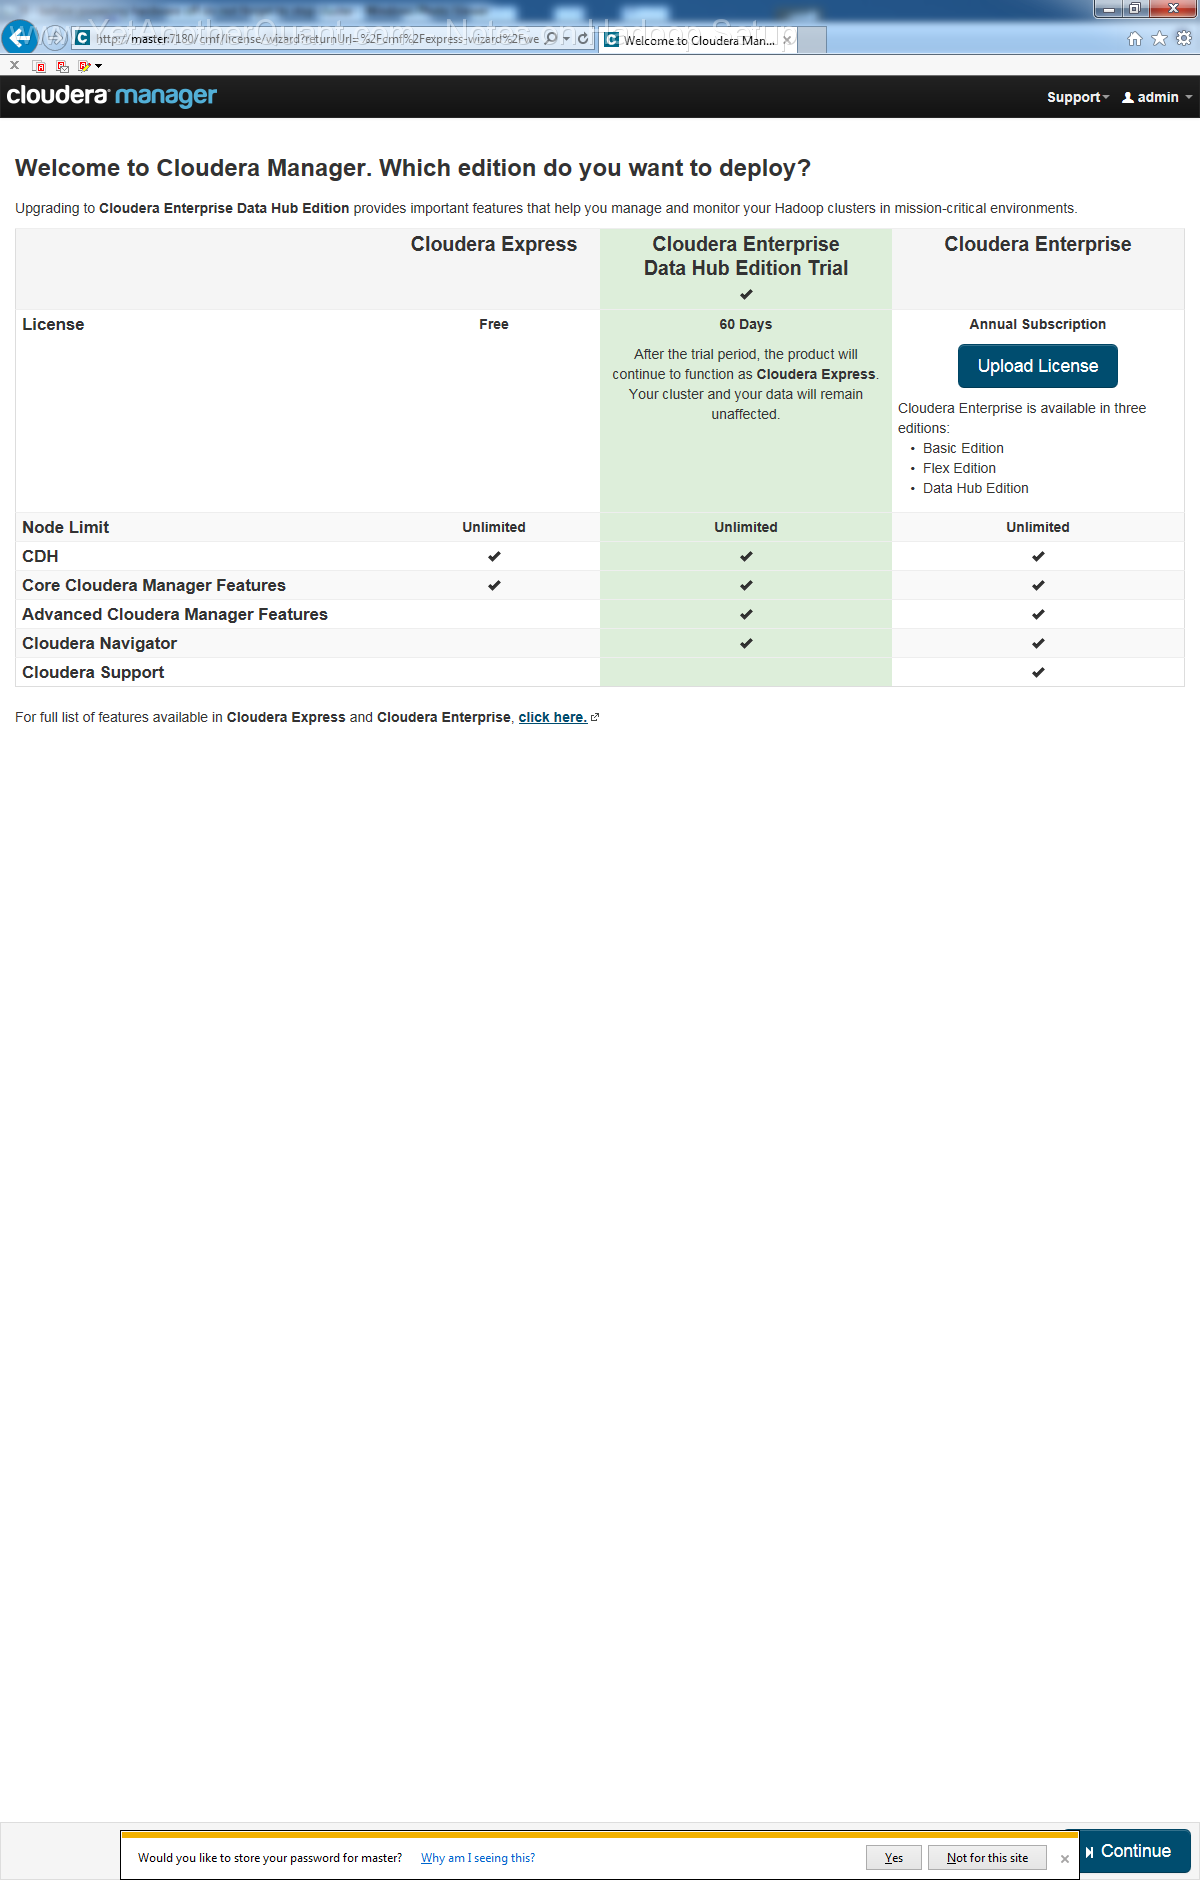
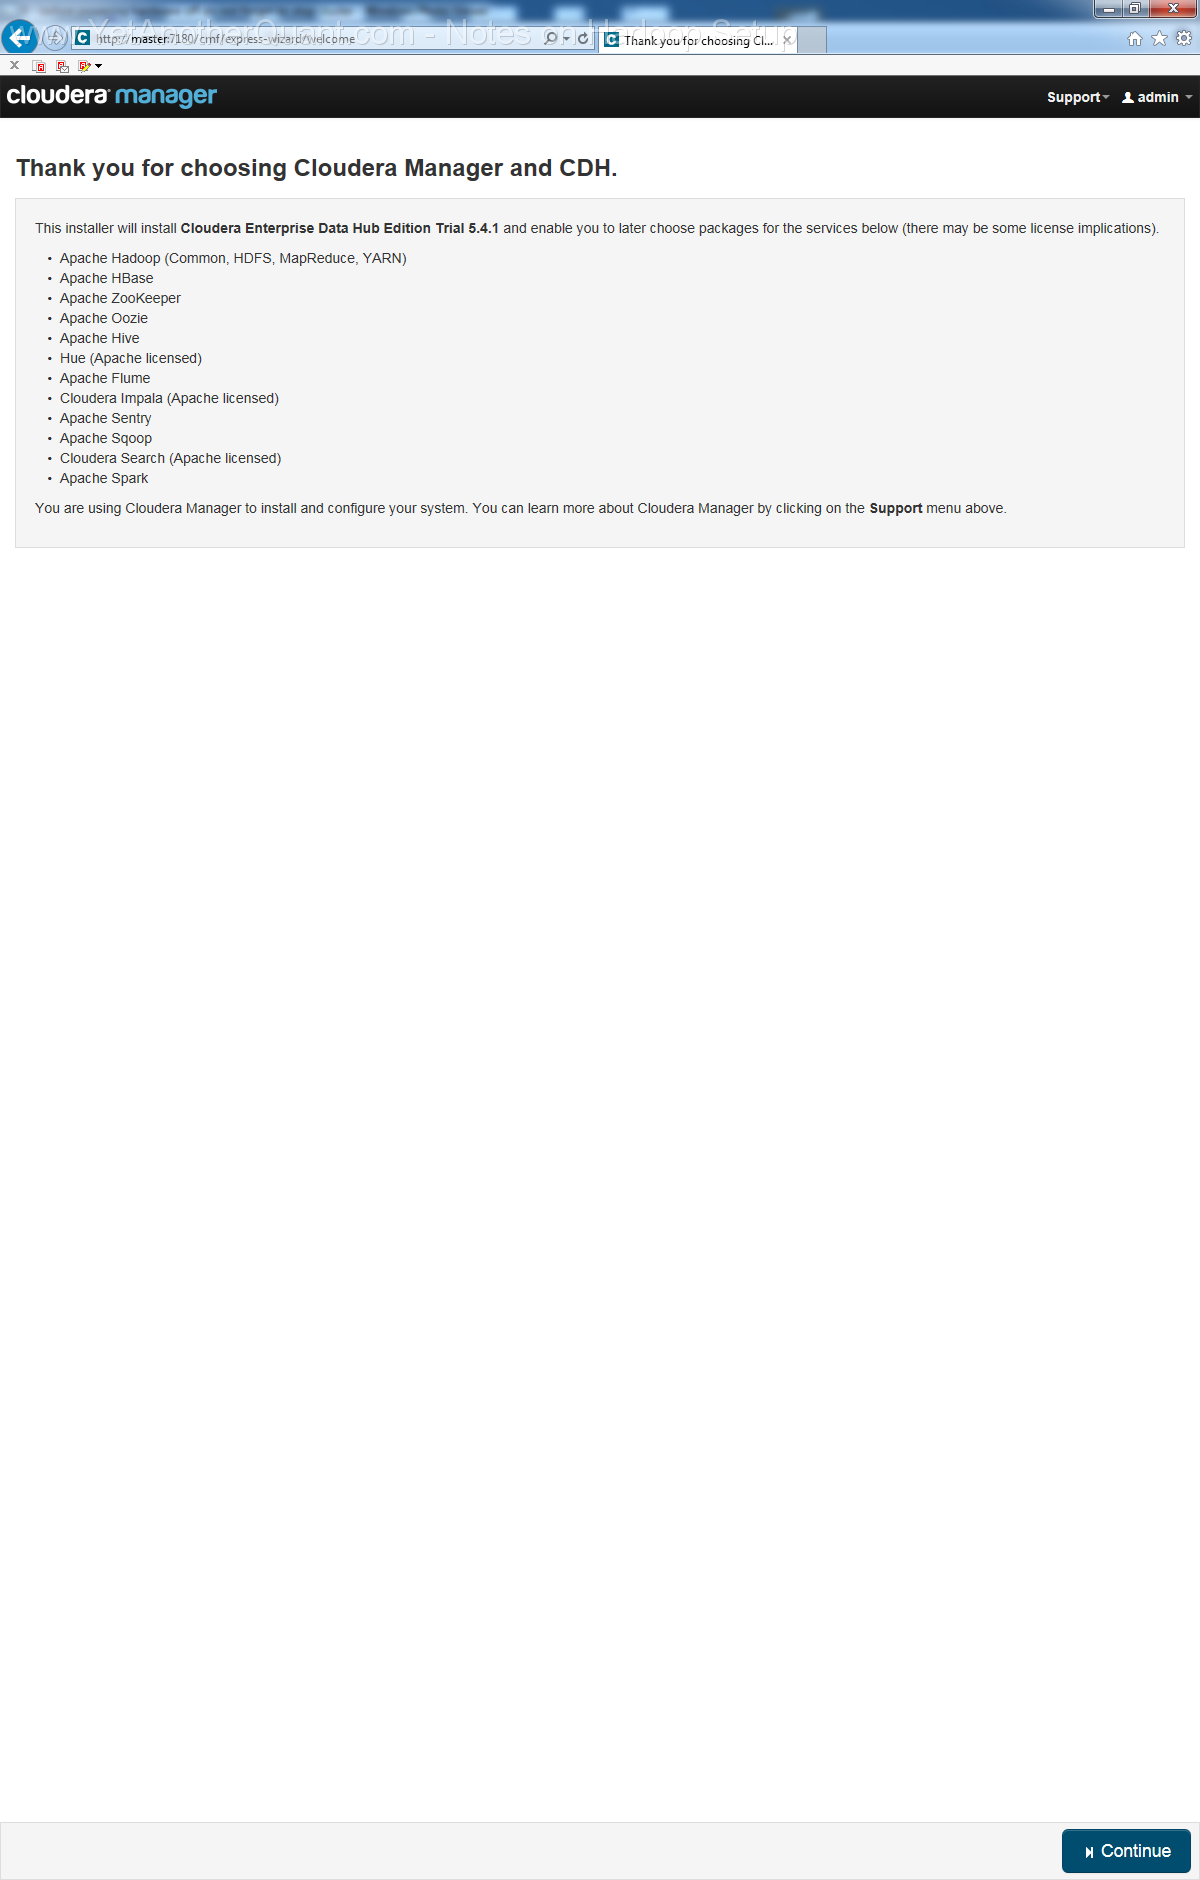
5) follow the propmts (look at gallery below) ... and be patient: setup will take some time, so do not abort it if there is seemingly no progress.
Also the Cloudera web control panel will not be accessible immediately, a webserver needs some time to start (at least on old hardware).
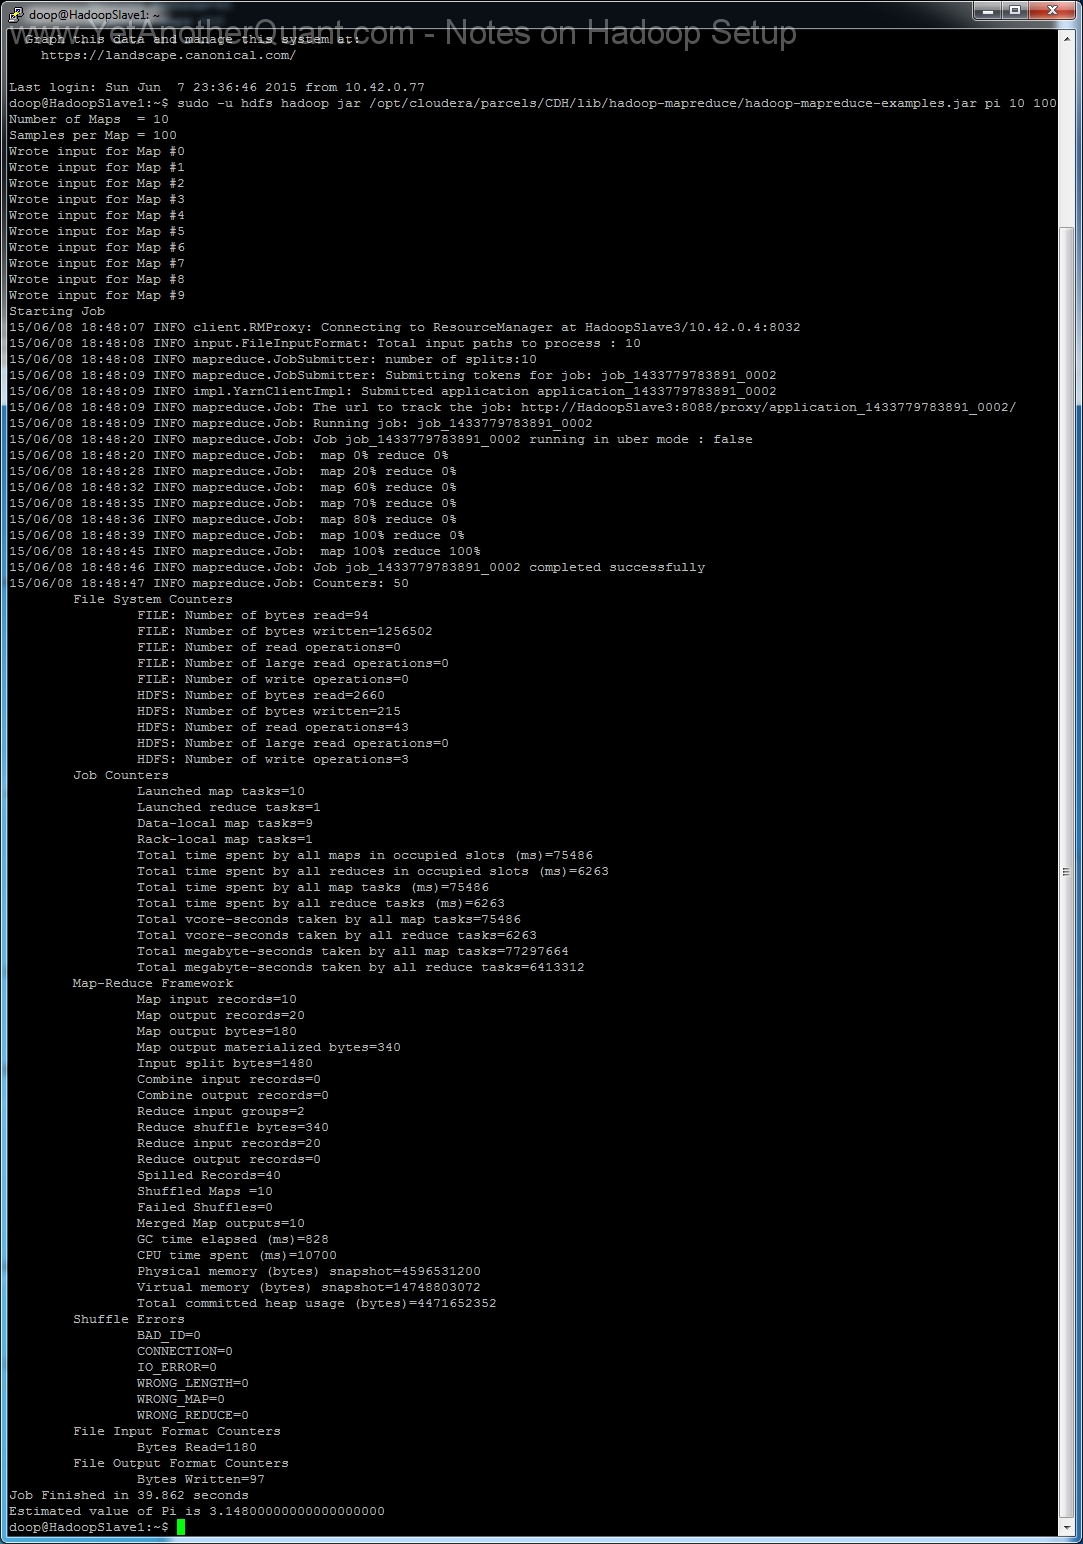
6) To test your installation run sudo -u hdfs hadoop jar /opt/cloudera/parcels/CDH/lib/hadoop-mapreduce/hadoop-mapreduce-examples.jar pi 10 100
on any hadoop node.
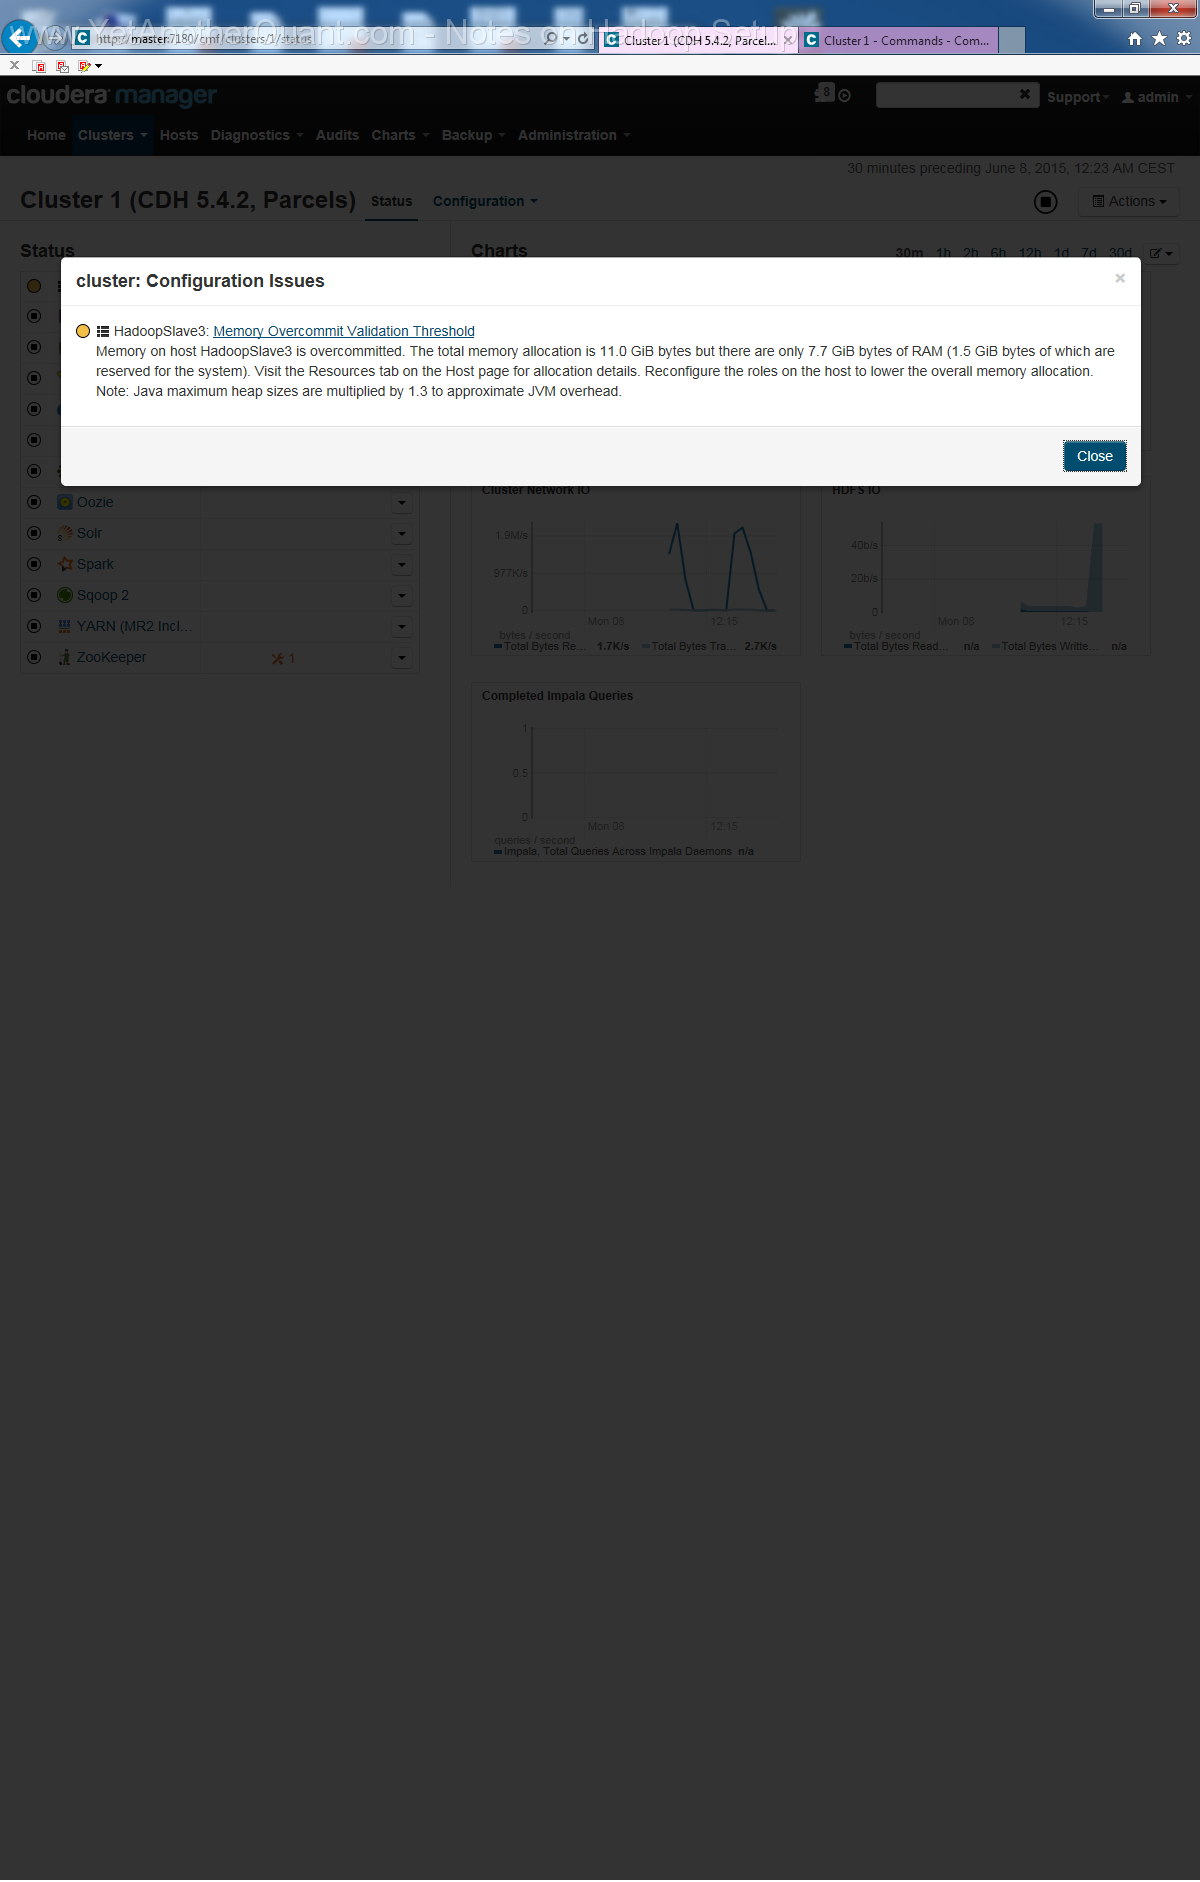
Note that strictly speaking I should have named HadoopMaster (or something like this) one host
(in our case HadoopSlave3 should actually be HadoopMaster).
To resolve the ambiguity of MASTER in the sense of cluster control via webpanel vs. HadoopMaster in the sense of Namenode and HBase we could have
installed Hadoop on MASTER (for this we should have included MASTER in the host list).
But I did not because I did not want to overload this server (from hardware point of view it is not sufficiently powerful).
Back to yetanotherquant.com